Replacing an old bathroom faucet can breathe new life into your bathroom with a relatively simple and inexpensive upgrade. Faucets are one of the most frequently used fixtures in the bathroom, and over time, they can wear out or become outdated. Whether you’re experiencing leaks or corrosion, or simply want to modernize the look of your sink, changing your faucet is a rewarding DIY project. Not only will it improve the functionality of your sink, but it can also enhance the overall aesthetic of the bathroom. Plus, with the wide variety of faucet styles available today, you can find a design that complements your existing décor or inspires a whole new look for the space.
Before you begin, it’s essential to consider the type of faucet you currently have and what kind of replacement you’ll need. Bathroom faucets typically come in three main configurations: single-hole, center-set, and widespread. Single-hole faucets combine the spout and handle into one unit, which is great for smaller sinks. Center-set faucets also feature a single base but with separate hot and cold handles. Widespread faucets, on the other hand, have individual spouts and handles that can be spaced further apart, providing a more elegant, high-end look. Make sure to choose a faucet that matches the hole configuration of your sink to avoid unnecessary adjustments.

Once you’ve selected the perfect faucet, the next step is gathering the tools and materials needed for the installation. While it might seem daunting, replacing a faucet is a straightforward project that most homeowners can tackle with basic tools like an adjustable wrench, a plumber’s tape, and a basin wrench. You may also need silicone caulk for sealing the faucet and a plumber’s putty for a watertight seal. Many modern faucets come with their installation kits, which can make the process even easier by providing all the necessary parts and instructions.
Before you start removing the old faucet, it’s crucial to turn off the water supply. Locate the shut-off valves under the sink and close them by turning them clockwise. If your shut-off valves are stuck or difficult to turn, you may need to replace them before proceeding. Once the water is turned off, open the faucet to drain any remaining water in the pipes. It’s a good idea to place a bucket or towels under the sink to catch any drips or water that may spill during the removal process.

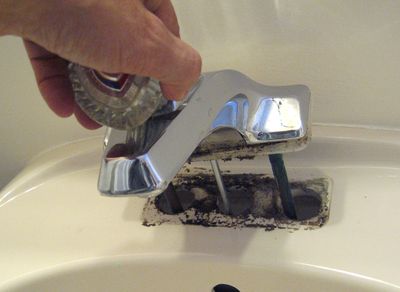
Now that the water is turned off, it’s time to disconnect the supply lines from the old faucet. Use your wrench to loosen the nuts connecting the water lines to the faucet, then carefully remove them. Depending on how old your faucet is, you may encounter rust or mineral buildup, which can make removing the nuts a bit tricky. In some cases, applying a penetrating oil can help loosen stuck connections. Once the supply lines are disconnected, you can use a basin wrench to unscrew the mounting nuts that hold the faucet to the sink.
With the old faucet removed, take a moment to clean the area around the sink holes. Over time, dirt, grime, and mineral deposits can accumulate around the base of the faucet, so it’s important to start with a clean surface before installing the new faucet. Use a mild cleaner or a mixture of vinegar and water to remove any buildup, and make sure the surface is dry before proceeding. This ensures a smooth, watertight installation and helps your new faucet sit flush against the sink.

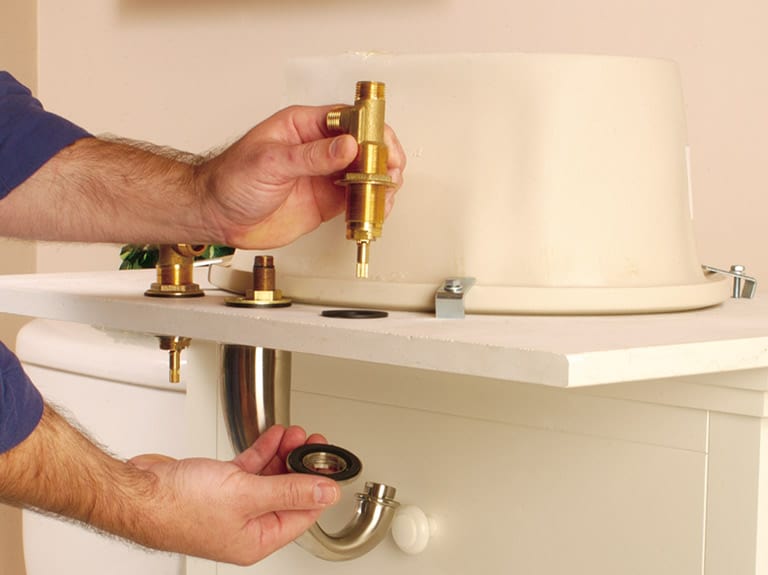
Now it’s time to install your new faucet. If you’re using a single-hole or center-set faucet, installation is generally straightforward. For widespread faucets, make sure to properly align the spout and handles before tightening the connections. Follow the manufacturer’s instructions for mounting the faucet, and be sure to apply plumber’s putty or silicone caulk around the base to prevent leaks. Once the faucet is securely in place, you can reconnect the water supply lines.
After reconnecting the water supply lines, it’s time to test your new faucet. Slowly turn on the water supply and check for any leaks around the connections. If you notice any drips, tighten the nuts slightly until the leak stops. Be careful not to overtighten, as this can damage the connections or strip the threads. Once everything is secure and there are no leaks, you can turn on the faucet and check the water flow. Adjust the water pressure as needed, and make sure both hot and cold water are working properly.
In some cases, replacing the faucet may reveal other issues with your sink’s plumbing, such as corroded pipes or worn-out shut-off valves. If you encounter these problems, it’s a good opportunity to address them while you’re already working under the sink. Replacing old or damaged pipes can improve water flow and prevent future leaks, ensuring that your new faucet functions optimally for years to come.
One of the benefits of replacing an old faucet is the opportunity to upgrade to more modern, water-efficient fixtures. Many new faucets are designed to reduce water consumption without sacrificing performance, which can help lower your utility bills and conserve water. If you’re environmentally conscious, look for faucets with a WaterSense label, which certifies that the faucet meets EPA standards for water efficiency. These faucets often include features like aerators that maintain strong water pressure while using less water.
While the installation process is fairly simple, there are a few potential challenges that can arise. One common issue is dealing with corroded or rusted nuts and bolts, especially if the faucet has been in place for many years. In these cases, it may require more effort or the use of specialized tools to remove the old faucet. Another potential challenge is ensuring that the new faucet fits perfectly with your existing sink and plumbing. Measuring the distance between the holes in your sink before purchasing a new faucet can prevent any compatibility issues.
It’s also important to consider the finish of your new faucet. With so many options available, including chrome, brushed nickel, oil-rubbed bronze, and matte black, it’s important to choose a finish that complements the rest of your bathroom fixtures and décor. A cohesive look can elevate the overall design of your bathroom, making the faucet replacement feel like a bigger upgrade. Some finishes, like chrome, are easy to clean and resist water spots, while others, like brushed nickel, offer a more subtle, modern look.
One often overlooked aspect of faucet replacement is maintenance. Once your new faucet is installed, regular cleaning and maintenance will ensure that it continues to look and function its best. Wipe down the faucet with a soft cloth after use to prevent water spots and mineral buildup, and avoid harsh chemicals that could damage the finish. If your faucet has an aerator, it’s a good idea to clean it periodically to maintain strong water pressure.
In the end, replacing an old bathroom faucet is a project that can be completed in just a few hours, but the impact on your bathroom’s appearance and functionality is significant. It’s an affordable way to refresh your space, and with the right tools and preparation, it’s a task that even novice DIYers can handle. Whether you’re looking to update your faucet for aesthetic reasons or because of performance issues, taking the time to choose the right faucet and install it properly will ensure that you enjoy the benefits for years to come.
Common Mistakes to Avoid
Not turning off the water supply: Forgetting to shut off the water can lead to a messy, water-filled disaster. Always make sure to turn off the valves before starting the removal process.
Using the wrong tools: A basin wrench is specifically designed for working in tight spaces under the sink. Trying to use a standard wrench can make the job much harder and lead to frustration.
Overtightening connections: It’s easy to assume that tighter is better, but overtightening can cause damage to your faucet’s connections or strip the threads, leading to leaks down the line.
Skipping the cleaning step: Failing to clean the area around the faucet can result in poor adhesion of the plumber’s putty or silicone, leading to water leaks over time.
Choosing the wrong faucet type: Not all faucets are compatible with all sinks. Make sure the faucet you purchase matches the hole configuration of your sink to avoid unnecessary headaches during installation.
Neglecting the finish: Choosing a finish that clashes with your other bathroom fixtures can detract from the overall look of the space. Always consider how the faucet finish will coordinate with your existing décor.
How long does it take to replace a bathroom faucet?
Replacing a bathroom faucet typically takes between one to two hours, depending on your level of experience and the condition of the existing faucet. The most time-consuming parts are removing the old faucet and ensuring that all the connections are properly sealed to avoid leaks.
Do I need a plumber to replace a bathroom faucet?
In most cases, replacing a bathroom faucet is a DIY-friendly project that doesn’t require a plumber. However, if you encounter issues with your water supply lines, shut-off valves, or corroded pipes, it may be worth consulting a professional to ensure everything is installed correctly.
What tools do I need to replace my bathroom faucet?
You’ll need an adjustable wrench, a basin wrench, plumber’s tape, plumber’s putty, and possibly silicone caulk. Many modern faucets also come with their own installation kits, which include all the necessary parts and instructions.
How do I know if my sink is compatible with a new faucet?
The easiest way to check compatibility is to measure the distance between the holes in your sink. Faucets are typically designed for single-hole, center-set, or widespread configurations, so make sure the faucet you purchase matches the number of holes in your sink.
What can I do if the nuts are too rusted to remove?
If the nuts on your old faucet are rusted or stuck, applying a penetrating oil like WD-40 can help loosen them. In more severe cases, you may need to use a hacksaw or a specialized tool designed for cutting through rusted metal.
Are water-efficient faucets worth it?
Yes, water-efficient faucets can help reduce your water usage without sacrificing performance. Look for faucets with a WaterSense label, which indicates they meet EPA standards for water conservation. These faucets often include aerators that maintain strong water pressure while using less water.
How to Replace a Bathroom Faucet: 14 Steps (with Pictures)
How to replace old bathroom faucet – DoItYourself.com Community Forums
How to Install a Bathroom Faucet – HomeTips
How to Install or Replace a Bathroom Faucet RONA
Related articles:
- Bathroom Faucet Fittings
- Moen Brantford Widespread Bathroom Faucet
- How Much To Replace A Bathroom Faucet
- Bathroom Faucet Height
- Moen Wall Mount Bathroom Faucet
- Pegasus Bamboo Bathroom Faucet
- Grohe Bathroom Faucet Installation
- Bathroom Faucet Drain Assembly Horizontal Rod
- Bathroom Faucet Glacier Bay
- Delta Bathroom Faucets Polished Brass


