Installing bathroom tile around a tub is a detailed process that requires careful planning and precise execution. The first step is to ensure that the surface around the tub is clean, dry, and free of any debris. This may involve removing existing tiles or wall coverings and smoothing out the underlying surface. Once the surface is prepared, it’s essential to measure and mark the area where the tiles will be installed. This helps in creating a guide for the tile layout and ensures a symmetrical and aesthetically pleasing result.
After the preparation, the next crucial step is applying the adhesive. Choose a high-quality thin-set mortar that is suitable for both the type of tile being used and the surface it will adhere to. Spread the mortar evenly using a notched trowel, working in small sections to prevent the adhesive from drying out before the tiles are placed. Carefully press each tile into the mortar, using spacers to maintain consistent gaps between tiles for grout. Pay special attention to corners and edges, where precision is key for a polished finish.

Grouting is the final step in the installation process. Once the adhesive has set, mix the grout according to the manufacturer’s instructions and apply it using a rubber float. Work the grout into the spaces between the tiles, ensuring full coverage and a smooth finish. After allowing the grout to set for a short period, use a damp sponge to wipe away excess grout from the tile surfaces. A meticulous cleaning process is crucial to achieving a professional-looking installation. Additionally, it’s important to seal the grout once it has fully cured to protect it from moisture and stains, ensuring the longevity and durability of the newly installed bathroom tile around the tub.
Installing bathroom tile around a tub is a multi-step process that demands precision, attention to detail, and the use of quality materials. From surface preparation and adhesive application to tile placement and grouting, each step contributes to the overall success of the project. Following these steps carefully not only ensures a visually appealing result but also promotes the durability and longevity of the tile installation, making it a worthwhile investment for any bathroom renovation project.
Images Related to How To Install Bathroom Tile Around Tub
Tile Layout for Tubs and Showers (DIY) Family Handyman
Nevertheless, you can go with appropriate bathroom tiles which can really help you to reverse your bathroom outlook on life completely. These kinds of tiles offer a colour or style all the way through the tile, not merely on the area like ceramic tiles. If you managed to get past the prior step, it’s now time to use a bathroom tile.
Tile Layout for Tubs and Showers (DIY) Family Handyman
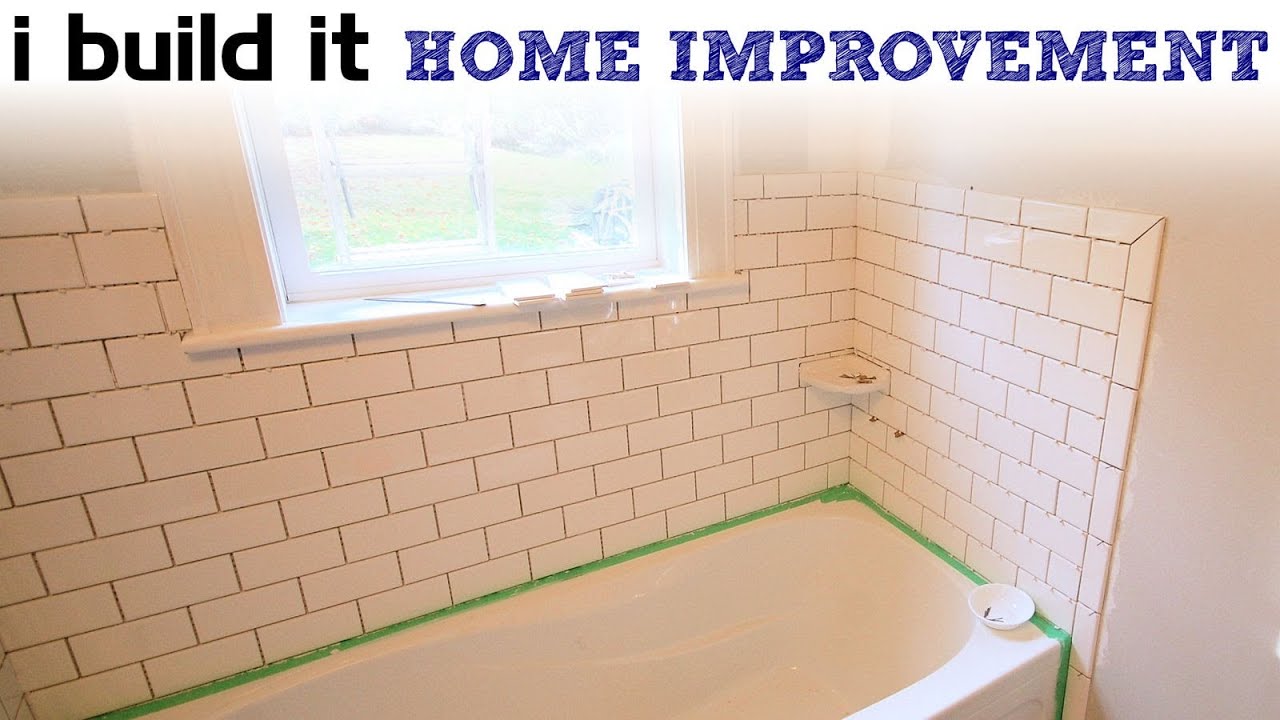
Part “1” HOW TO TILE 60″ tub surround walls – preparation, where to start tiling, tile layout

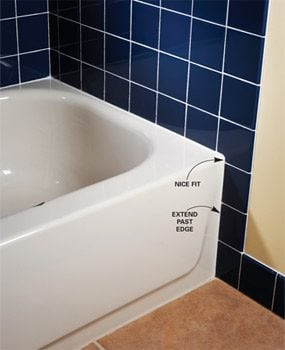
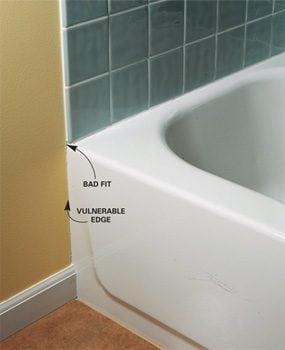
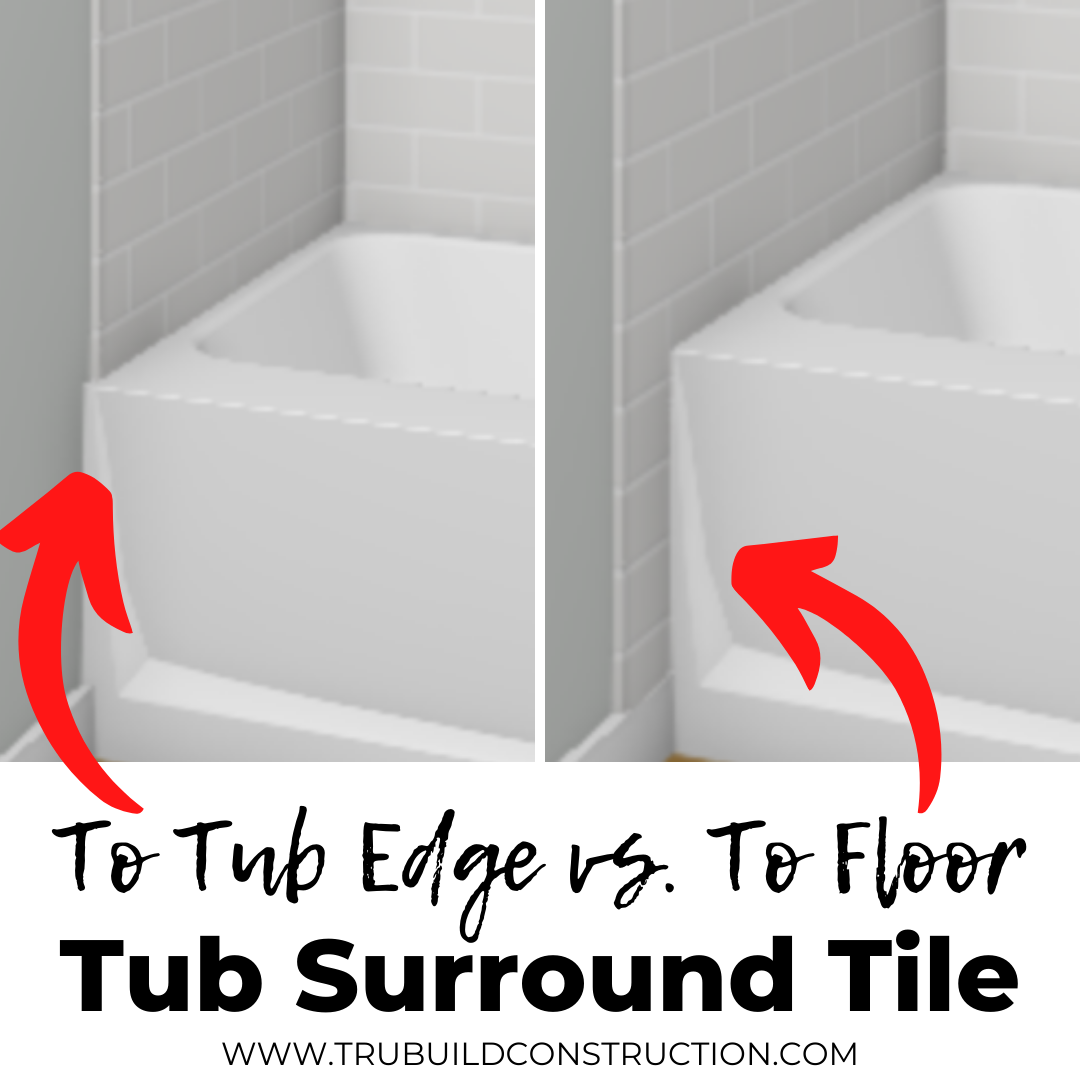
How To Tile Around A Tub With A Lip u2013 Upgraded Home
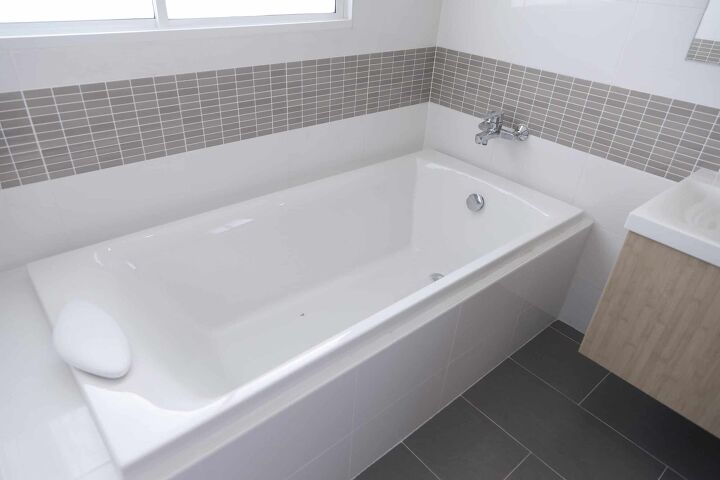
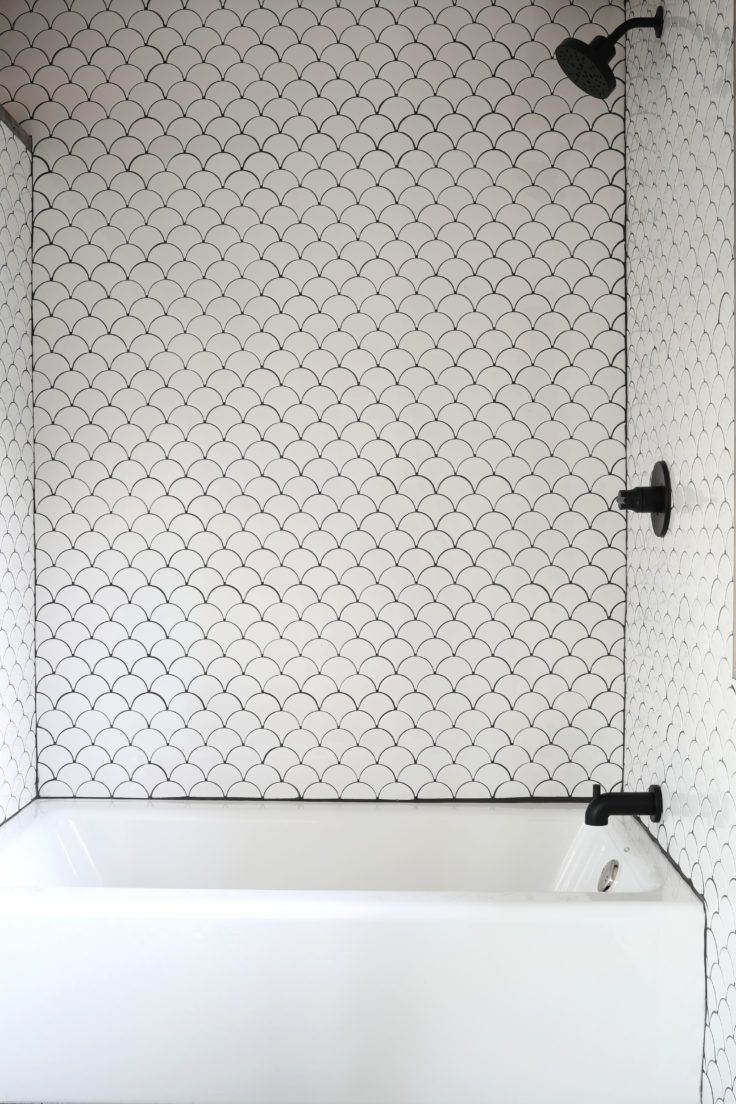
Creative Bathtub Tile Ideas And Inspiration u2014 TruBuild Construction
Small Bathroom Remodel Challenges – And a Tile Job that Went Perfectly?

DIY Tutorial // How to Install a Tiled Shower Surround u2014 The Grit
Pin on Rooms to Love

Related articles: