Creating floating bathroom shelves is a rewarding DIY project that not only adds functional storage but also contributes to the overall aesthetic of your bathroom. To start, gather the necessary materials, including wood boards (plywood or hardwood for the shelves), brackets, screws, a level, a stud finder, and a power drill. Choose wood that complements your bathroom decor and meets the desired shelf dimensions.
Begin by locating the studs in the wall where you intend to install the floating shelves. Using a stud finder ensures that the shelves are securely anchored to the wall. Once the studs are identified, mark their locations with a pencil. This step is crucial for the stability and weight-bearing capacity of the shelves, especially if you plan to place heavy items on them.
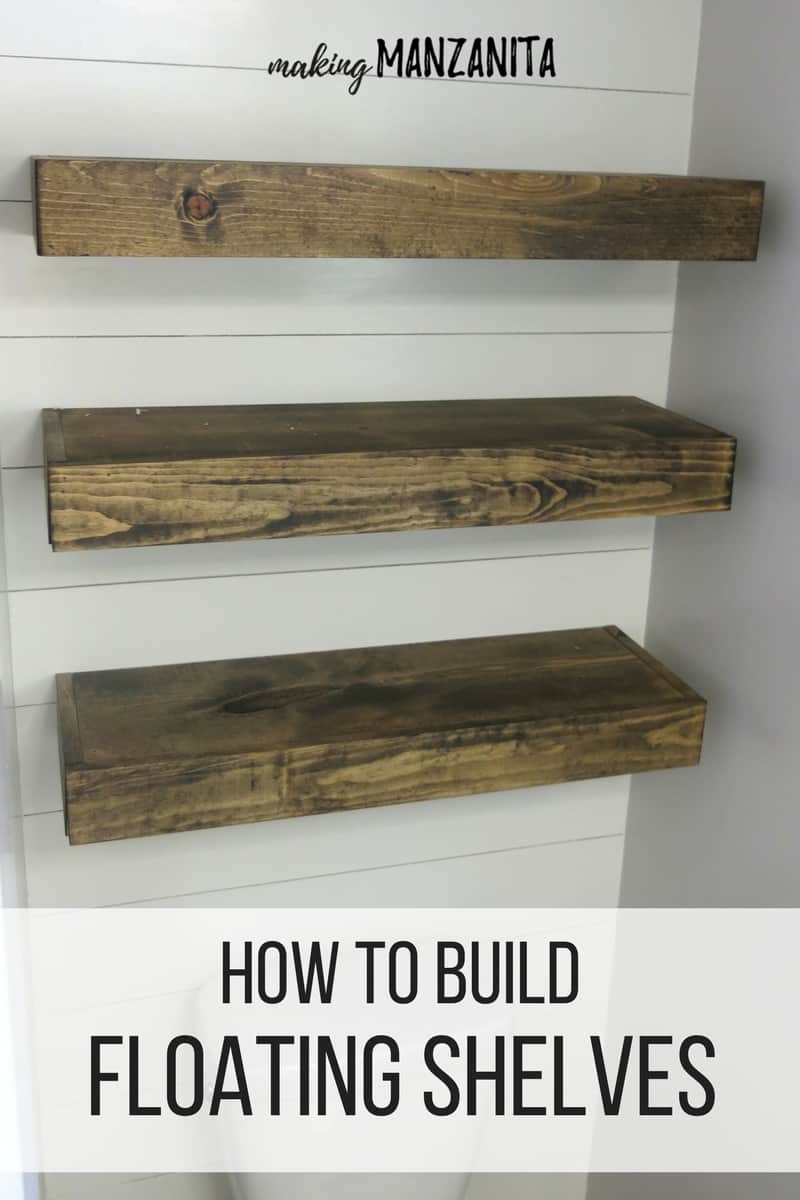
Cut the wood boards to your desired shelf dimensions using a saw. Sand the edges and surfaces to create a smooth finish. Consider staining or painting the wood to match your bathroom’s color scheme or to add a personal touch. Allow the finish to dry completely before proceeding to the next step.
Next, attach the brackets to the wall at the marked stud locations using a power drill and screws. Ensure that the brackets are level and securely fastened. The brackets serve as the support for the shelves, so their proper installation is key to the stability of the floating shelves.
Place the cut and finished wood boards onto the brackets to create the floating effect. Secure the boards to the brackets using screws from underneath or through the sides for a seamless look. The screws should be countersunk to achieve a flush finish. Double-check the level of the shelves during this step to ensure that they are straight and balanced.
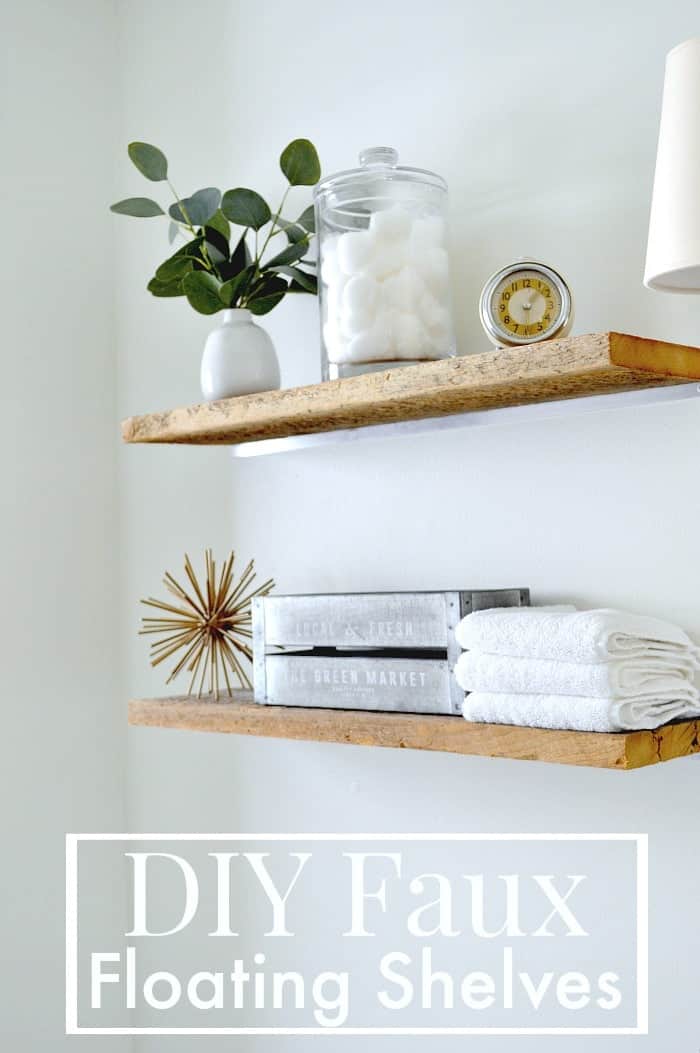
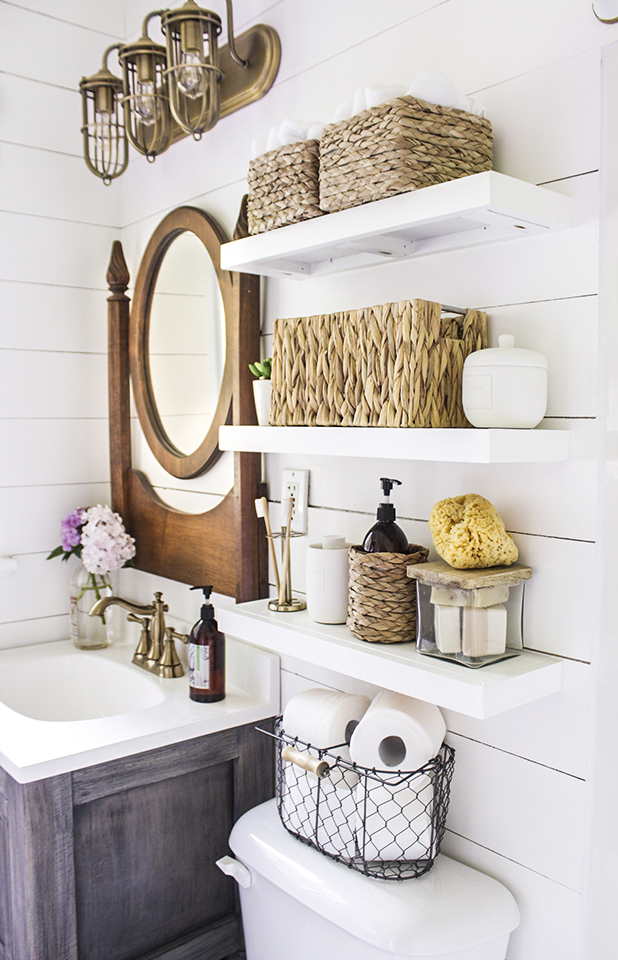
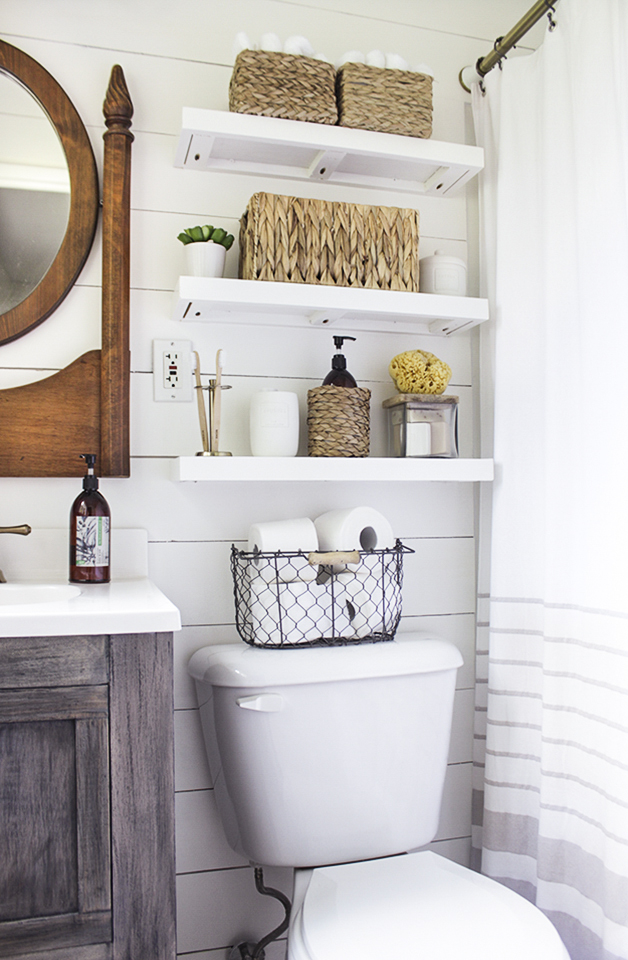
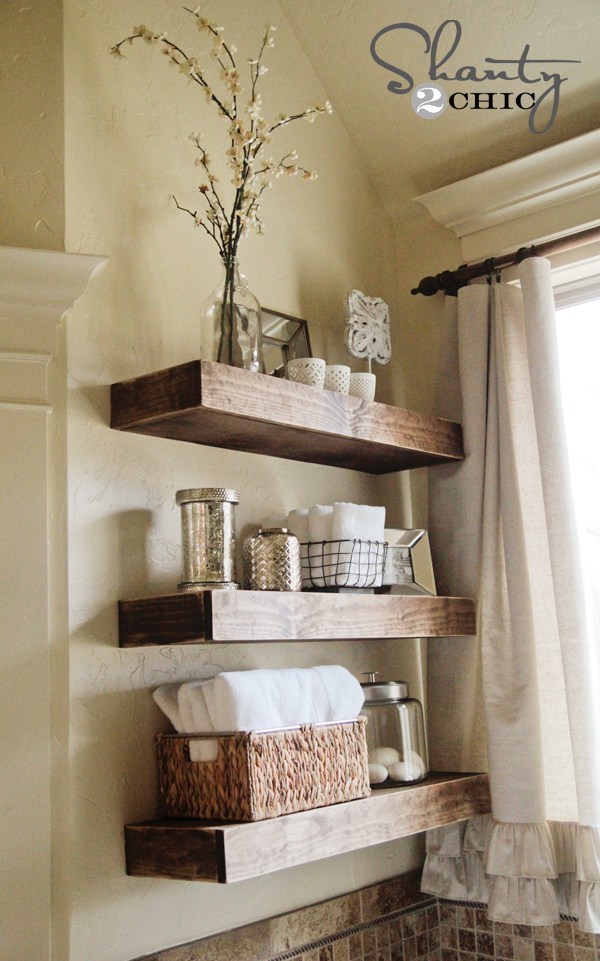
The final step involves styling and organizing your newly installed floating bathroom shelves. Consider using baskets or decorative containers to corral smaller items, and strategically place toiletries, plants, or decorative accents to enhance the visual appeal. Floating shelves offer a clean and modern look, and their versatility allows you to adapt them to your changing bathroom decor over time.
Making floating bathroom shelves is a DIY project that combines practicality with aesthetics. By carefully selecting materials, identifying wall studs, and ensuring proper installation, you can create sturdy and stylish shelves that elevate your bathroom’s storage capacity and overall design. The customization options, from choosing wood types and finishes to arranging decor items, make this project a great way to express your style while enhancing the functionality of your bathroom space.
How To Build Bathroom Floating Shelves for Extra Storage
16 Easy and Stylish DIY Floating Shelves u0026 Wall Shelves Floating

DIY Floating Shelves – How To Build Extra Bathroom Storage

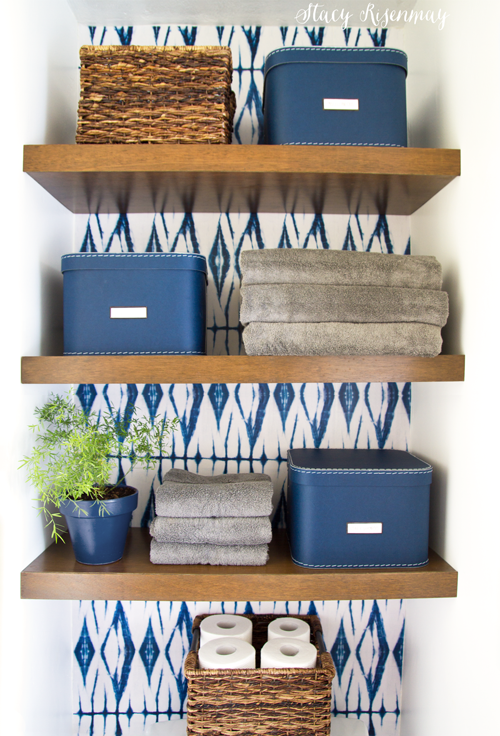
DIY Floating Bathroom Shelves – Stacy Risenmay
How To Build Bathroom Floating Shelves for Extra Storage
DIY Floating Shelves – How To Build Extra Bathroom Storage

DIY Floating Shelves – How to Measure, Cut, and Install

DIY Floating Bathroom Shelves – Shades of Blue Interiors
Easy DIY Floating Shelves – Floating Shelf Tutorial Video u0026 Free Plans
Thrifty and Chic – DIY Projects and Home Decor

Related articles:
- Bathroom Shelf with Towel Bar
- DIY Farmhouse Bathroom Shelf
- Bathroom Shelf Design Ideas
- DIY Small Bathroom Shelf
- Bathroom Corner Shelf DIY
- Bathroom Glass Wall Shelf Unit
- Bathroom Corner Holder Shelf
- Industrial Bathroom Shelf Unit
- Rustic Bathroom Shelf with Hooks
- Metal Free Standing Bathroom Shelf
Floating bathroom shelves are an excellent way to add storage to your bathroom without taking up valuable floor space. In this article, we’ll take a look at how to make floating bathroom shelves in a few easy steps so that you can create a stylish and functional storage solution for your bathroom.
Materials Needed:
- 2×4 lumber
- 1×3 lumber
- Wood screws
- Wood glue
- Level
- Stud finder
- Drill
Step 1: Measure and Cut the Shelves
The first step is to measure and cut the shelves to size. Start by measuring the space where you want to install the shelves. Once you have your measurements, use a saw to cut your lumber to size. For this project, we’ll be using 2×4 lumber for the brackets and 1×3 lumber for the shelf itself.
What is the ideal depth for floating bathroom shelves?
The ideal depth for floating bathroom shelves is between 4 and 6 inches. This depth provides enough space for storing items like towels, toiletries, and decorations without taking up too much wall space.
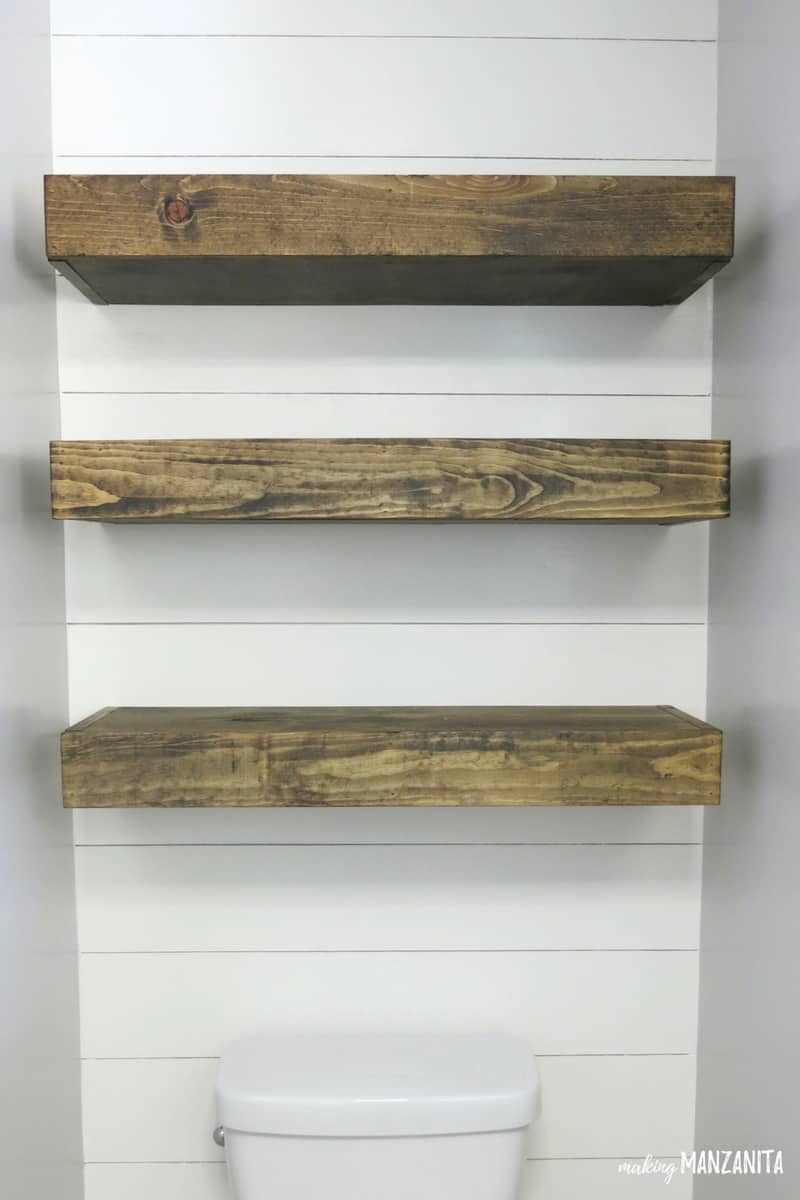
Step 2: Sand and Stain
Once you’ve cut your shelves to size, sand them down using fine-grit sandpaper. This will help smooth out any rough edges or splinters. Next, apply a stain or finish of your choice to protect the wood from moisture and give it a polished look.
Can I paint my floating bathroom shelves instead of staining them?
Yes, you can paint your floating bathroom shelves instead of staining them. However, keep in mind that paint may not hold up as well over time as a stain or finish would.
Step 3: Install Brackets
Next, it’s time to install the brackets that will hold up your shelves. Use a stud finder to locate the studs in your wall where you want to install the brackets. Mark these locations with a pencil and then use a level to ensure that your brackets are straight. Once you’ve found the studs and ensured that everything is level, attach the brackets to the wall using wood screws.
Can I install floating bathroom shelves without using brackets?
No, it’s not recommended to install floating bathroom shelves without using brackets. The weight of the shelf and its contents could cause it to fall off the wall, which could be dangerous and damaging.
Step 4: Attach Shelves
Finally, attach the shelves to the brackets using wood glue and screws. Apply a small amount of wood glue to the top of each bracket and then place your shelf on top. Use screws to secure the shelf in place, making sure that they’re driven into the bracket and not just the shelf itself.
How much weight can floating bathroom shelves hold?
The weight capacity of your floating bathroom shelves will depend on several factors, such as the size of your shelves, the type of lumber used, and how securely they’re installed. In general, though, you can expect your shelves to hold anywhere from 10-20 pounds each.
Step 5: Decorate Your Shelves
Once your shelves are installed, it’s time to have some fun decorating them! You can use them to store towels, toiletries, candles, plants, or anything else you like. Just make sure not to overload them with too much weight or clutter.
What are some creative ways to decorate my floating bathroom shelves?
Some creative ways to decorate your floating bathroom shelves include:
- Using decorative baskets or boxes to store smaller items
- Hanging artwork or mirrors above the shelves
- Adding a pop of color with brightly colored towels or accessories
- Incorporating natural elements like plants or seashells for a spa-like vibe
Making your own floating bathroom shelves is a simple DIY project that can add both storage and style to your bathroom. By following these steps and taking the time to measure, cut, sand, stain, and install your shelves properly, you can create a functional and aesthetically pleasing storage solution that will last for years to come. So go ahead and give it a try! Your bathroom will thank you for the extra storage space and personalized touch.