Mixing grout for bathroom tile is a crucial step in the tiling process that requires precision and attention to detail to achieve optimal results. Grout is a cement-based material used to fill the gaps between tiles, providing structural support and preventing moisture penetration. Properly mixed grout ensures a strong and durable bond between tiles while enhancing the overall appearance of the tiled surface. To mix grout for bathroom tile, start by gathering the necessary materials, including grout powder, water, a mixing bucket, a margin trowel, and a clean sponge.
The first step in mixing grout is to measure out the correct proportions of grout powder and water. Refer to the manufacturer’s instructions on the grout packaging for the recommended water-to-powder ratio, as this may vary depending on the type and brand of grout being used. Using a measuring cup or bucket, carefully add the appropriate amount of water to the mixing bucket, ensuring accuracy to achieve the desired consistency. It’s essential to add the water gradually while stirring continuously to prevent lumps and ensure a smooth, workable grout mixture.

Once the water is added, slowly pour the grout powder into the mixing bucket, using the margin trowel to incorporate it into the water. Avoid dumping the entire bag of grout powder into the water at once, as this can lead to clumping and uneven mixing. Instead, add the powder in small increments, stirring thoroughly after each addition until a smooth, lump-free consistency is achieved. The goal is to achieve a thick, paste-like consistency that holds its shape when scooped up with the margin trowel, but is still easy to spread and work into the tile joints.
After the grout is thoroughly mixed, allow it to rest for a few minutes to hydrate before proceeding with application. This resting period allows the grout to reach its optimal consistency and ensures proper bonding and adhesion to the tile surfaces. During this time, check the grout mixture for any lumps or dry spots and mix it again if necessary to achieve a uniform texture. Once the grout has rested, it’s ready to be applied to the tile joints using a grout float, pressing it firmly into the gaps and ensuring full coverage.

As you work, periodically check the consistency of the grout mixture and adjust it as needed by adding small amounts of water or grout powder. The goal is to maintain a workable consistency throughout the grouting process to ensure smooth and even application. Avoid adding too much water to the grout mixture, as this can weaken its bonding strength and lead to shrinkage or cracking once dry. Additionally, be mindful of the temperature and humidity conditions in the bathroom during the grouting process, as extreme heat or cold can affect the drying time and performance of the grout.
Once the grout has been applied to all the tile joints, allow it to set for the recommended amount of time specified by the manufacturer, typically around 15 to 30 minutes. During this initial setting period, use a damp sponge to remove any excess grout from the tile surfaces and smooth out the joints. Be gentle when wiping the grout lines to avoid disturbing the freshly applied grout. After the initial setting period, allow the grout to cure for 24 to 48 hours before exposing it to moisture or heavy foot traffic. By following these steps and techniques for mixing grout for bathroom tile, homeowners can achieve professional-quality results and enjoy a beautifully tiled bathroom for years to come.
How to Grout Tile in 6 Simple DIY Steps Architectural Digest

How to Grout Ceramic Wall Tile
/how-to-grout-ceramic-wall-tile-1824821-hero-b2c7e9ae8a764011ace51090a427f2e2.jpg)
How To Mix Grout

How to Mix Grout

How to Regrout Bathroom Tile: 5 Easy Steps True Value

How to Mix, Grout, and Seal Your Tile Diy kitchen projects

How to Mix Grout

11 Tips to Grout Shower Tile

How to clean grout on floor and wall tile Real Homes
How to Mix Grout
How to Choose The Best Grout Colors For White Subway Tiles?

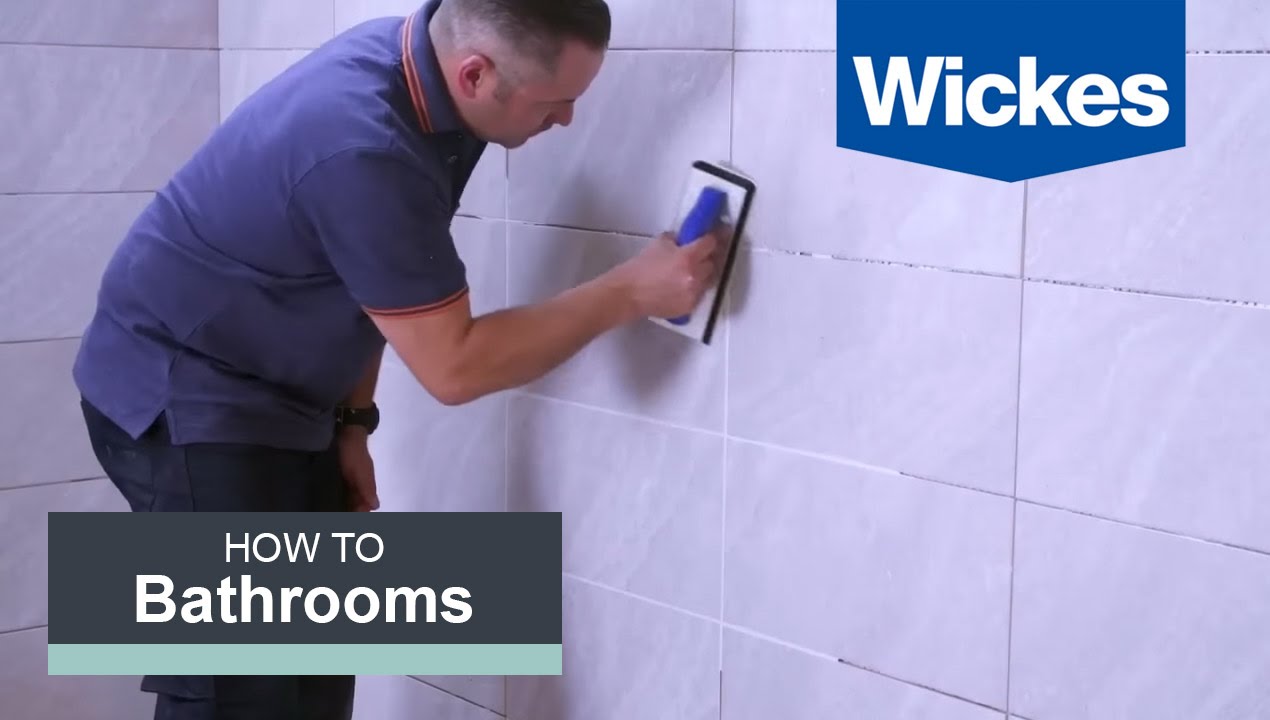
How to Grout Tiles with Wickes
Related articles:
- Restore Old Bathroom Tile
- Rustic Bathroom Tile Designs
- Vertical Bathroom Tile Designs
- Bathroom Tile Makeover
- Modern Bathroom Tile Ideas
- Blue Glass Mosaic Bathroom Tiles
- Bathroom Tile Shower Design Ideas
- Modern Bathroom Tile Texture
- Modern Bathroom Tile Layout
- Bathroom Tiles Painted Over
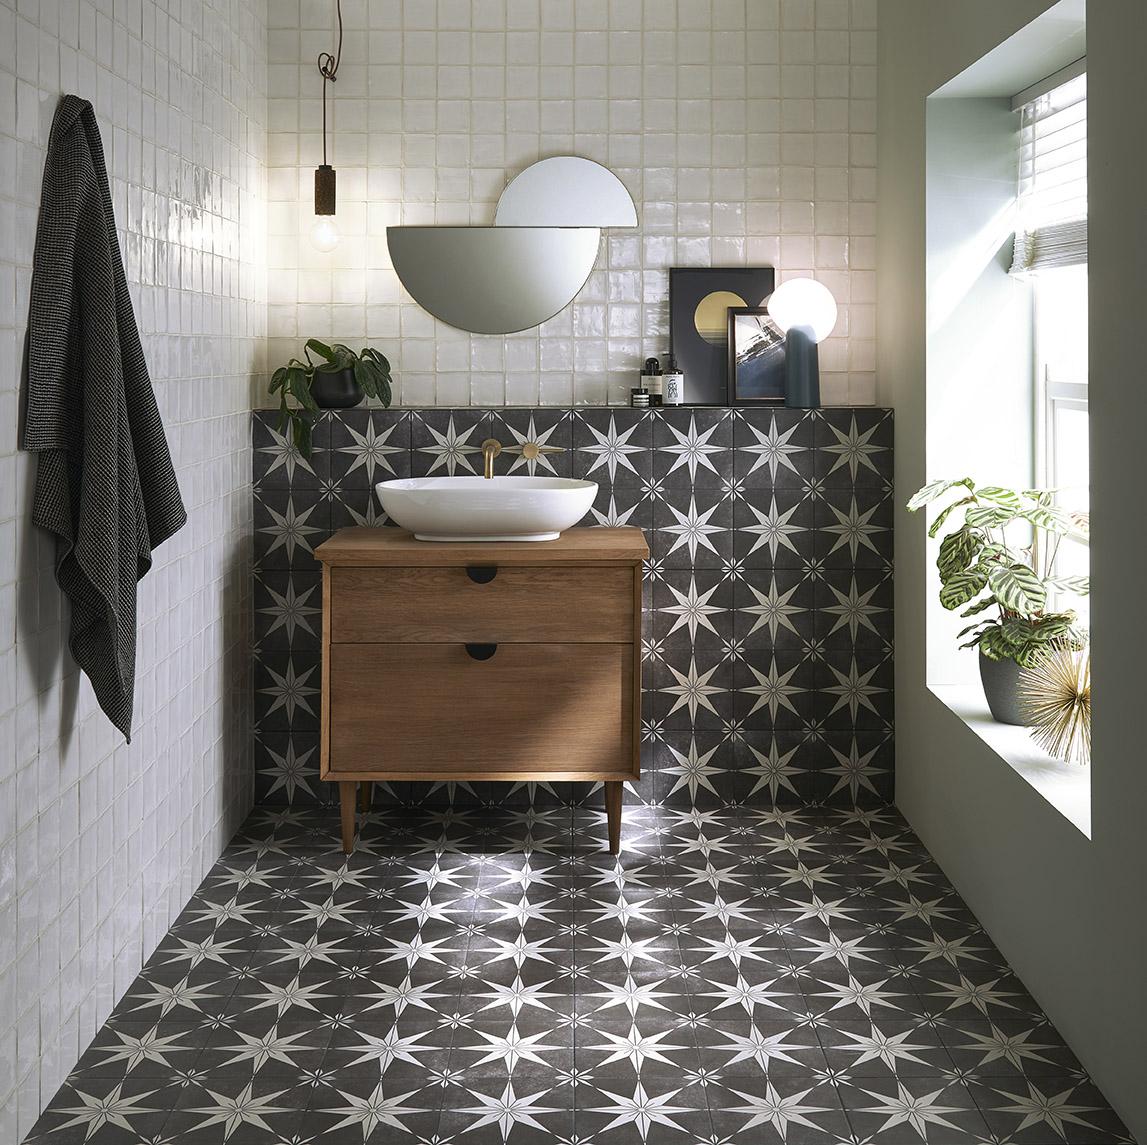
When it comes to tiling a bathroom, mixing grout is an essential step in the process. Grout fills the gaps between tiles, providing a smooth, even surface that’s easy to clean and maintain. In this article, we’ll cover the steps for mixing grout for bathroom tile, including what you’ll need, how to prepare, and the best techniques for getting the job done right.
Getting Started: What You’ll Need
Before you start mixing your grout, it’s essential to have all of the necessary tools and materials on hand. Here’s what you’ll need:
– Grout mix: Choose a high-quality grout mix that’s suitable for your bathroom tile. Look for products that are labeled specifically for bathrooms or wet areas.
– Water: You’ll need clean water to mix with your grout powder.
– Mixing container: You can use a bucket or any other large container to mix your grout.
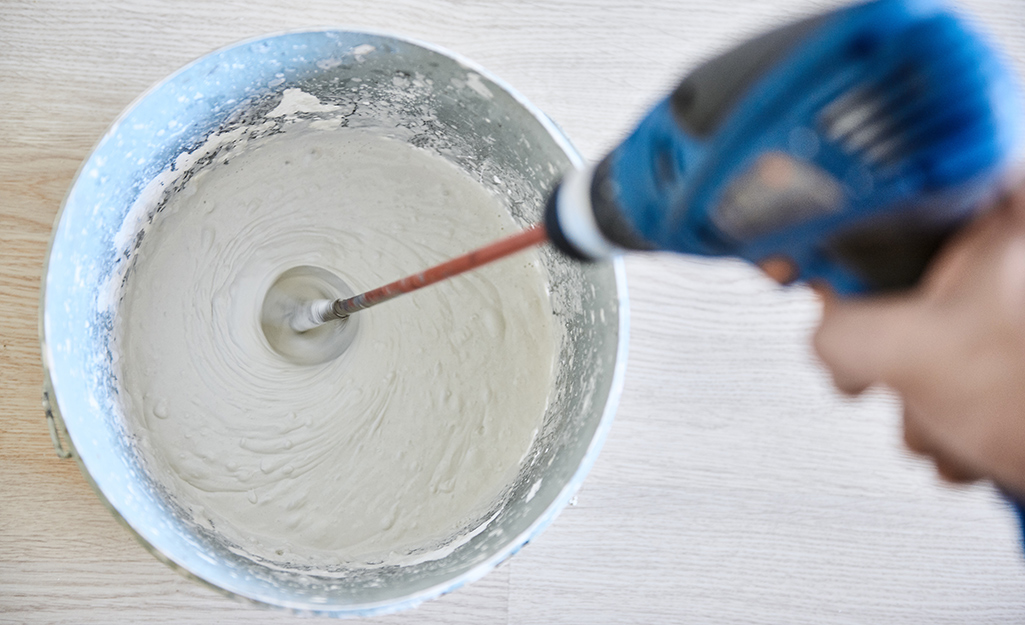
– Mixing tool: A drill with a mixing attachment or a large stirring stick will work well for mixing your grout.
– Sponge or cloth: You’ll need a sponge or cloth to wipe away excess grout once you’ve applied it.
– Grout float: A rubber grout float will help you apply the grout evenly and smoothly.
– Gloves and safety glasses: It’s always a good idea to wear gloves and safety glasses when working with grout.
Preparing Your Work Area
Before you start mixing your grout, it’s essential to prepare your work area. Here are some steps you should take:
1. Clean the tiles thoroughly: Make sure your tiles are clean and free of any dirt, dust, or debris before applying grout.
2. Seal any cracks or gaps: If there are any cracks or gaps between your tiles, fill them with caulk before applying the grout.
3. Protect surrounding surfaces: Cover any nearby surfaces with plastic sheeting or drop cloths to protect them from grout splatters.
4. Prepare your mixing container: Fill your mixing container with clean water and make sure it’s large enough to hold all of the grout you’ll need for your project.
Mixing Your Grout
Now that you’ve prepared your work area, it’s time to mix your grout. Here are the steps you should follow:
1. Measure out the grout: Use a measuring cup or scale to measure out the amount of grout you’ll need for your project. Follow the manufacturer’s instructions on the package for the proper ratio of water to grout powder.
2. Add the water: Slowly pour the water into your mixing container while stirring with a drill or stirring stick. Continue stirring until all of the powder is evenly moistened and there are no lumps.
3. Check the consistency: The consistency of your grout should be thick and smooth, like peanut butter. If it’s too thin, add more grout powder. If it’s too thick, add more water.
4. Let it rest: Let your grout sit for 5-10 minutes to allow any air bubbles to rise to the surface.
5. Mix again: Stir your grout one more time before using it to ensure that it’s evenly mixed and smooth.
Applying Your Grout
Once you’ve mixed your grout, it’s time to apply it to your bathroom tiles. Here are some tips for getting the best results:
1. Use a rubber float: A rubber float will help you apply the grout evenly and smoothly, ensuring that all of the gaps between tiles are filled completely.
2. Work in small sections: Start in one corner of the room and work in small sections, applying only as much grout as you can comfortably work with in 10-15 minutes.
3. Apply at an angle: Hold your float at a 45-degree angle and use it to press the grout into the gaps between your tiles.
4. Wipe away excess: After applying each section of grout, use a damp sponge or cloth to wipe away any excess grout from the tile surface.
5. Let it cure: Allow your grout to cure for at least 24 hours before using your bathroom shower or tub.
FAQs
Q: How long does it take for grout to dry?
A: Grout typically takes 24-48 hours to dry completely. However, this can vary depending on factors such as humidity levels and the type of grout you’re Using.
Q: Can I use leftover grout from a previous project?
A: It’s not recommended to use leftover grout from a previous project. Over time, grout can become hard and difficult to work with, so it’s best to use fresh grout for each new project.
Q: Do I need to seal my grout?
A: Sealing your grout can help protect it from stains and water damage. It’s generally recommended to seal your grout every 1-2 years, depending on usage and wear and tear. Check with the manufacturer of your specific grout for their recommended sealing schedule.
Q: Can I apply grout over existing grout?
A: It’s not recommended to apply grout over existing grout. The new layer of grout may not adhere properly and can result in a patchy or uneven finish. It’s best to remove the old grout and start fresh with a clean surface.
Q: What should I do if my grout is cracking?
A: If your grout is cracking, it may be due to movement in the substrate or improper installation. You may need to remove the affected area and reapply new grout. Additionally, you can use a silicone caulk to fill any gaps or cracks that may have formed.
Q: How do I clean my grout?
A: To clean your grout, use a mixture of water and vinegar or a mild detergent solution. Apply the solution to the grout lines and scrub with a soft-bristled brush. Rinse with clean water and dry with a towel. Avoid using abrasive cleaners or tools that can damage the surface of the grout.