A bathroom cabinet makeover can dramatically transform the look and feel of your bathroom without the need for a complete renovation. This DIY project is not only cost-effective but also allows for creative expression, ensuring your bathroom reflects your style. Whether your bathroom cabinets are outdated or simply in need of a refresh, a makeover can enhance both functionality and aesthetics.
The first step in a bathroom cabinet makeover is to assess the current state of your cabinets. Examine the structure to ensure it is sound and identify any areas that need repair. Loose hinges, broken drawers, or warped doors should be fixed before proceeding. This ensures that your makeover efforts are built on a solid foundation, guaranteeing longevity and durability.
Next, consider the style you want to achieve. Are you looking for a modern, sleek look, or do you prefer something more rustic or traditional? Your choice of paint, hardware, and decorative elements will depend on the desired aesthetic. Collect inspiration from home decor magazines, online platforms, or even friends’ homes to narrow down your vision. Having a clear plan will make the makeover process smoother and more focused.
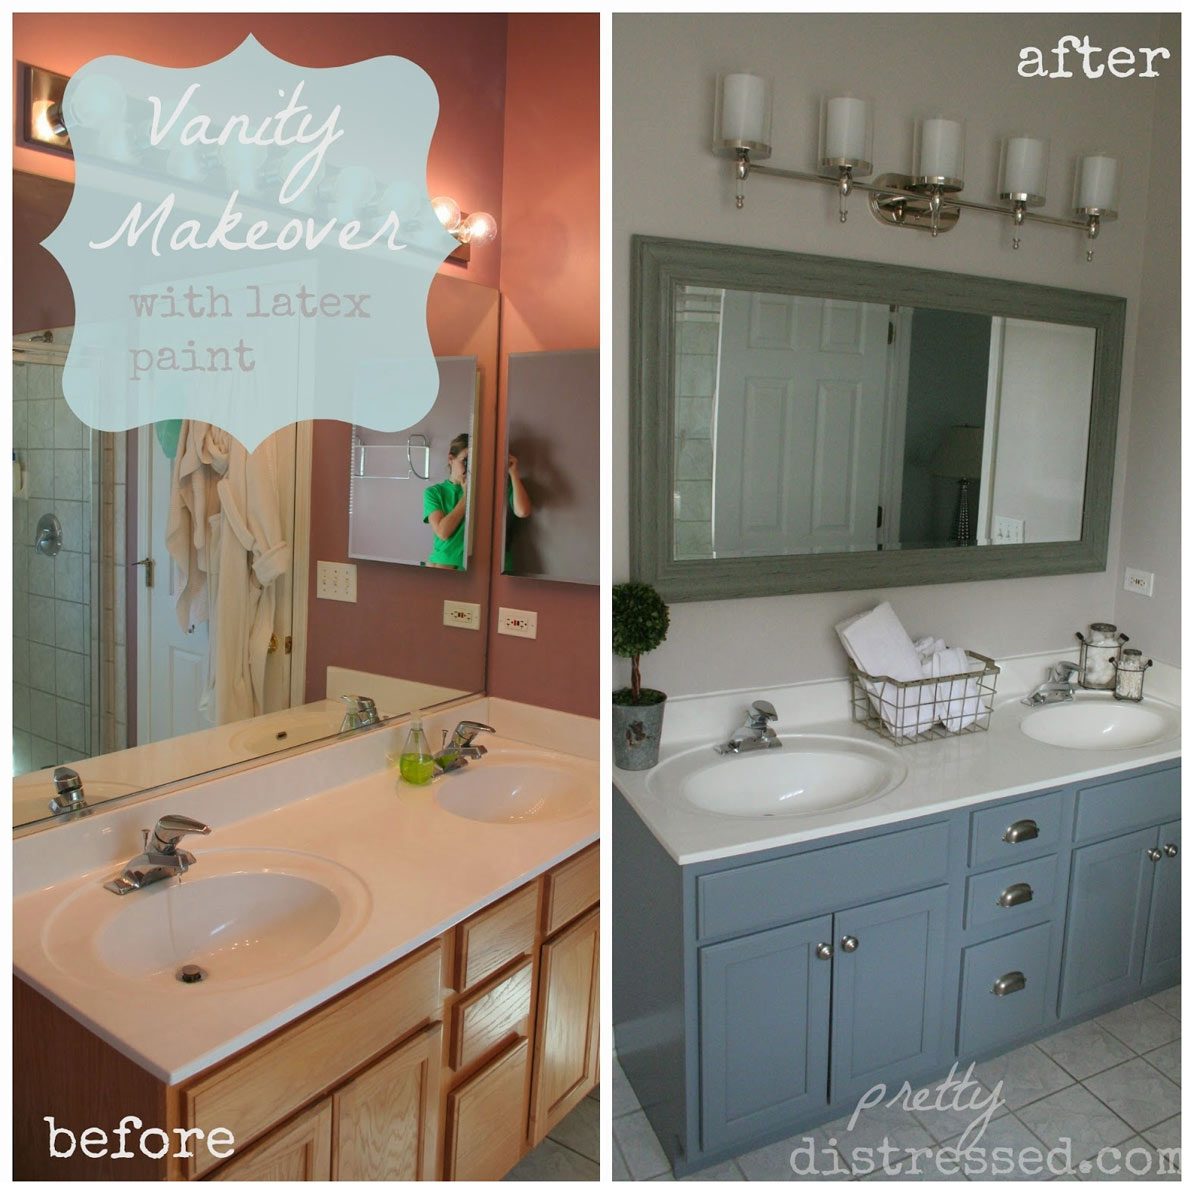
One of the most impactful changes you can make is painting the cabinets. Painting is relatively simple and can dramatically alter the appearance of your bathroom. Start by removing all cabinet doors and hardware. Clean the surfaces thoroughly to remove any dirt, grease, or soap residue. Sanding the surfaces lightly will help the paint adhere better. Choose a high-quality paint that is suitable for bathroom conditions, which can include high humidity and temperature fluctuations.

For a modern look, consider using a high-gloss finish in a bold color. If you prefer a more traditional or rustic style, a matte or satin finish in a neutral tone might be more appropriate. Applying a primer before painting can help achieve a smooth and long-lasting finish. Be patient and allow ample drying time between coats to prevent smudging or uneven coverage.
Replacing or updating the hardware is another effective way to give your bathroom cabinets a fresh look. Drawer pulls, knobs, and hinges come in a variety of styles and finishes, from sleek stainless steel to vintage brass. This small change can make a big difference in the overall look of your cabinets. Make sure to choose hardware that complements the new paint color and overall bathroom decor.
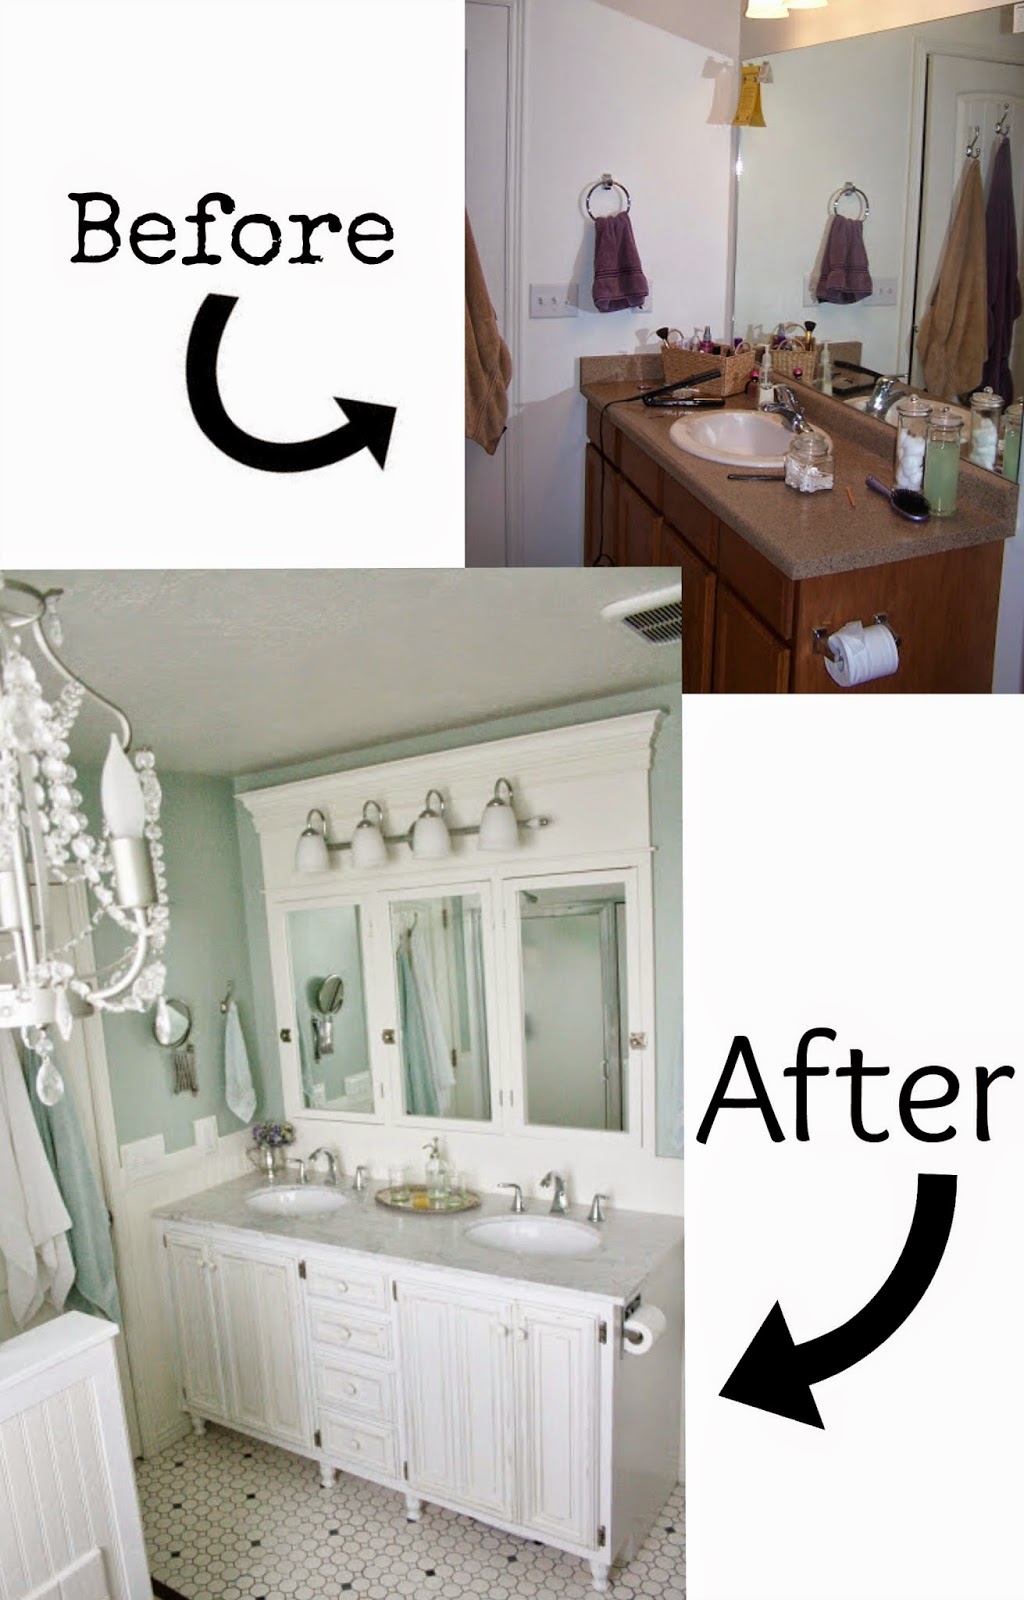
Adding decorative elements like molding or trim can elevate the look of plain cabinets. Crown molding, baseboards, or even beadboard panels can add a touch of sophistication and detail. These elements can be painted to match the cabinets or in a contrasting color for added visual interest. If you have glass-front cabinets, consider adding frosted or patterned film for a decorative touch that also provides privacy.
If you’re feeling particularly adventurous, you can also reface the cabinet doors. Refacing involves replacing the existing doors with new ones or adding a veneer to the current doors. This can be a more involved project but offers a completely new look without the need for a full cabinet replacement. Ready-to-install doors and veneers are available in a variety of styles and materials, making it easy to find an option that suits your taste.
Updating the interior of your cabinets is just as important as the exterior. Consider installing pull-out shelves, lazy Susans, or drawer organizers to enhance functionality. Lining the shelves and drawers with decorative paper or mats can also add a nice touch and protect the surfaces. This not only improves organization but also makes the cabinets more user-friendly and visually appealing.
Lighting can also play a crucial role in your bathroom cabinet makeover. Installing under-cabinet lighting or inside cabinet lights can create a warm, inviting glow and make it easier to find items stored inside. Battery-operated LED lights are a great option as they are easy to install and energy-efficient. Good lighting can highlight your hard work and make your bathroom look more spacious and luxurious.
Consider adding a backsplash behind the cabinets to tie the entire look together. Tiles, beadboard, or even peel-and-stick options can add texture and color to your bathroom. The backsplash can complement the cabinet color and overall bathroom decor, creating a cohesive and polished appearance. It’s a small addition that can have a big impact on the overall aesthetic.

Upgrading the countertop can also enhance the look of your bathroom cabinets. While this can be a more expensive part of the makeover, options like laminate or butcher block can be more budget-friendly while still providing a fresh, updated look. Choose a countertop material that complements the cabinet color and style, and ensure it is durable enough to withstand bathroom conditions.
Don’t forget about the mirror and other accessories. A new mirror or updated mirror frame can complement your cabinet makeover. Consider adding matching towel racks, soap dispensers, and other accessories to create a coordinated look. These finishing touches can pull the entire design together and make the bathroom feel complete.
If your bathroom has open shelving, consider adding baskets or bins for storage. This keeps items organized and adds a decorative element to the space. Choose baskets or bins that match the overall color scheme and style of your bathroom. Open shelving can be a great place to display decorative items like candles, plants, or artwork, adding personality to your bathroom.
Ventilation is also an important consideration in a bathroom cabinet makeover. Ensure that the bathroom is well-ventilated to prevent moisture buildup, which can damage cabinets over time. Installing a good exhaust fan or ensuring existing ventilation is functioning properly can help protect your cabinets and maintain a healthy bathroom environment.
Lastly, consider the overall functionality of your bathroom layout. While a cabinet makeover can significantly enhance the look of your bathroom, it’s also an opportunity to rethink the layout and storage solutions. Ensure that the cabinets are not only beautiful but also practical and easy to use. This holistic approach will ensure that your bathroom is both stylish and functional.

Common Mistakes to Avoid:
When undertaking a bathroom cabinet makeover, several common mistakes can detract from the final result. One of the most frequent errors is failing to properly prepare the surfaces before painting. Skipping the cleaning or sanding steps can result in paint not adhering properly, leading to a subpar finish. Take the time to thoroughly clean and sand the surfaces to ensure the best outcome.
Another mistake is choosing the wrong type of paint. Bathrooms are high-moisture environments, so it’s essential to use paint that is specifically designed for these conditions. Using regular wall paint can lead to peeling and bubbling over time. Opt for a high-quality, moisture-resistant paint to ensure durability.
Inadequate drying time between paint coats is another common issue. Rushing the painting process can cause smudges and uneven coverage. Patience is key; allow each coat to dry fully before applying the next one. This will ensure a smooth, professional-looking finish.
Neglecting to update the hardware can also hinder the overall effect of the makeover. Old, worn-out hardware can detract from the fresh look of newly painted cabinets. Investing in new knobs, pulls, and hinges can make a significant difference in the final appearance. Choose hardware that complements the new style and color of the cabinets.
Finally, not considering the overall bathroom decor can result in a disjointed look. It’s important to ensure that the cabinet makeover fits within the broader context of your bathroom design. Take into account the colors, styles, and materials used in the rest of the bathroom to create a cohesive and harmonious look.

What type of paint should I use for bathroom cabinets?
For bathroom cabinets, it’s crucial to use paint that can withstand the high humidity and moisture levels typical of bathrooms. Choose a high-quality, water-resistant paint with a semi-gloss or satin finish. These finishes are durable, easy to clean, and provide a protective barrier against moisture. Priming the cabinets before painting can also help ensure better adhesion and longevity of the paint job.
How can I ensure a smooth finish when painting my cabinets?
Achieving a smooth finish when painting cabinets involves several key steps. First, clean the surfaces thoroughly to remove any grease, dirt, or soap residue. Next, sand the cabinets lightly to create a surface that the paint can adhere to. Apply a primer suitable for the type of paint you will be using. Use high-quality paint and brushes or rollers designed for smooth finishes. Allow ample drying time between coats to avoid smudging and achieve an even, professional-looking finish.
Can I replace the cabinet doors without replacing the entire cabinet?
Yes, you can replace the cabinet doors without replacing the entire cabinet structure. This process, known as refacing, involves installing new doors and possibly covering the existing cabinet frames with a veneer or new panels. Refacing is a cost-effective way to update the look of your cabinets without the expense and effort of a full replacement. Ensure that the new doors match the existing cabinet structure in size and style for a seamless look.
How do I choose new hardware for my cabinets?
When choosing new hardware for your cabinets, consider the overall style and color scheme of your bathroom. Modern styles may benefit from sleek, stainless steel or brushed nickel hardware, while traditional or rustic styles might look better with antique brass or oil-rubbed bronze. Ensure the size and style of the hardware are proportionate to the cabinets and easy to use. Visiting hardware stores or browsing online can provide a wide range of options to suit your preferences.
How can I improve the functionality of my bathroom cabinets?
Improving the functionality of your bathroom cabinets can be achieved through better organization and additional features. Consider installing pull-out shelves, drawer organizers, or lazy Susans to make better use of the available space. Adding bins or baskets can help keep items organized and easily accessible. Lighting can also enhance functionality; installing under-cabinet or interior lighting can make it easier to find items and add a touch of elegance to your cabinets.
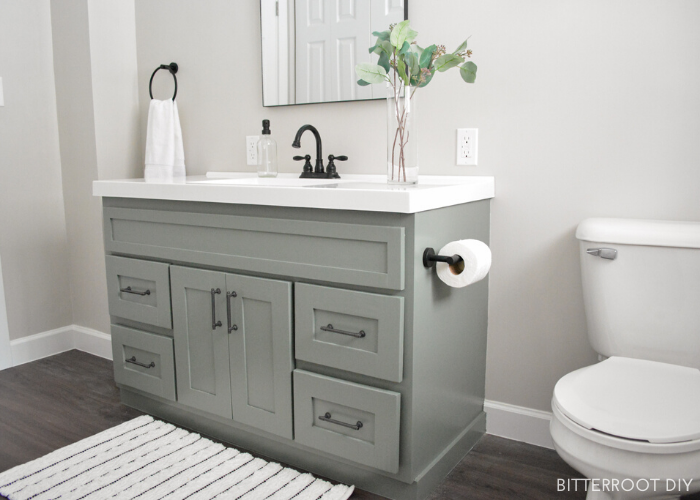
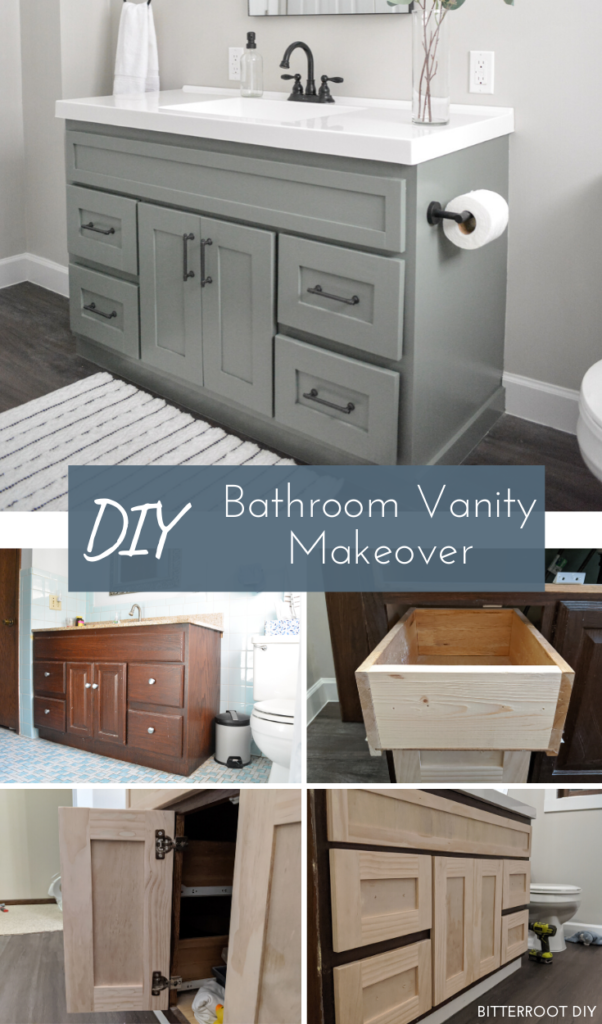
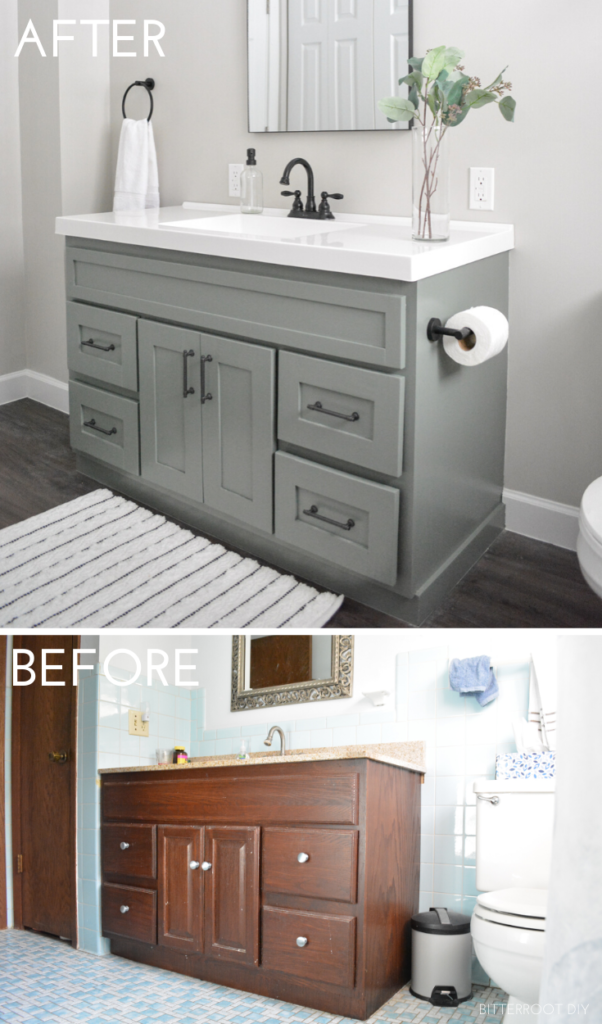
DIY Bathroom Vanity Makeover – Bitterroot DIY
Budget-Friendly DIY Bathroom Vanity Makeovers

Best DIY Bathroom Vanity Makeovers Pneumatic Addict

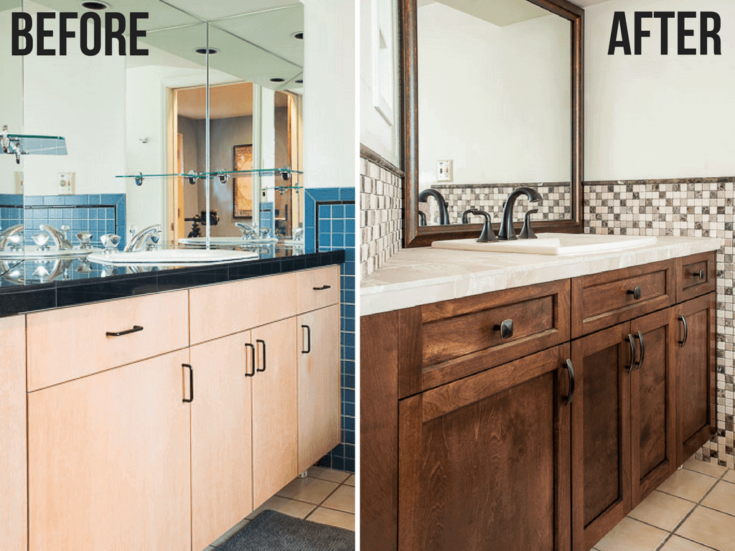
Before-and-After Vanity Makeovers You Need to See Better
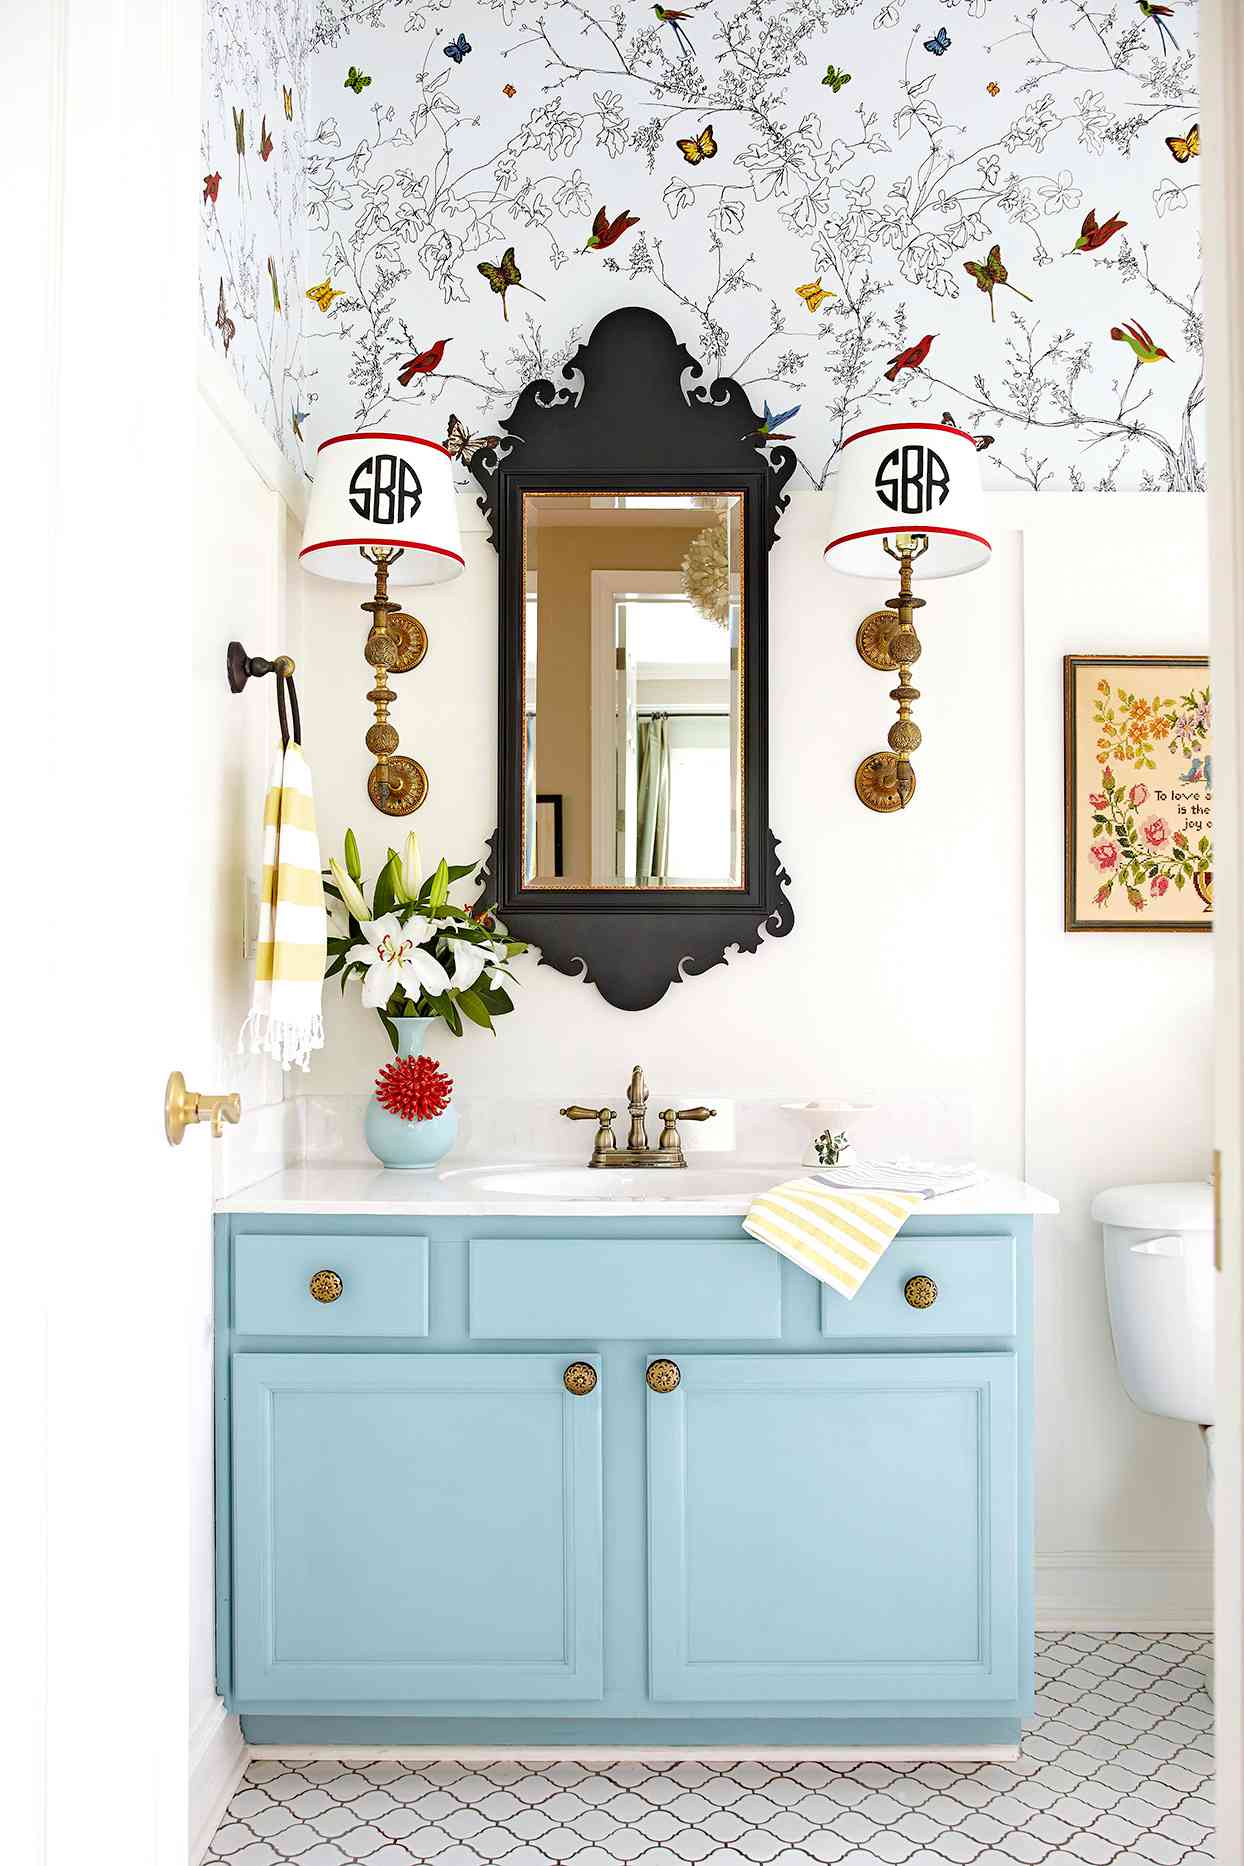
Astonishing DIY Bathroom Vanity Makeovers
Best DIY Bathroom Vanity Makeovers Pneumatic Addict
Astonishing DIY Bathroom Vanity Makeovers

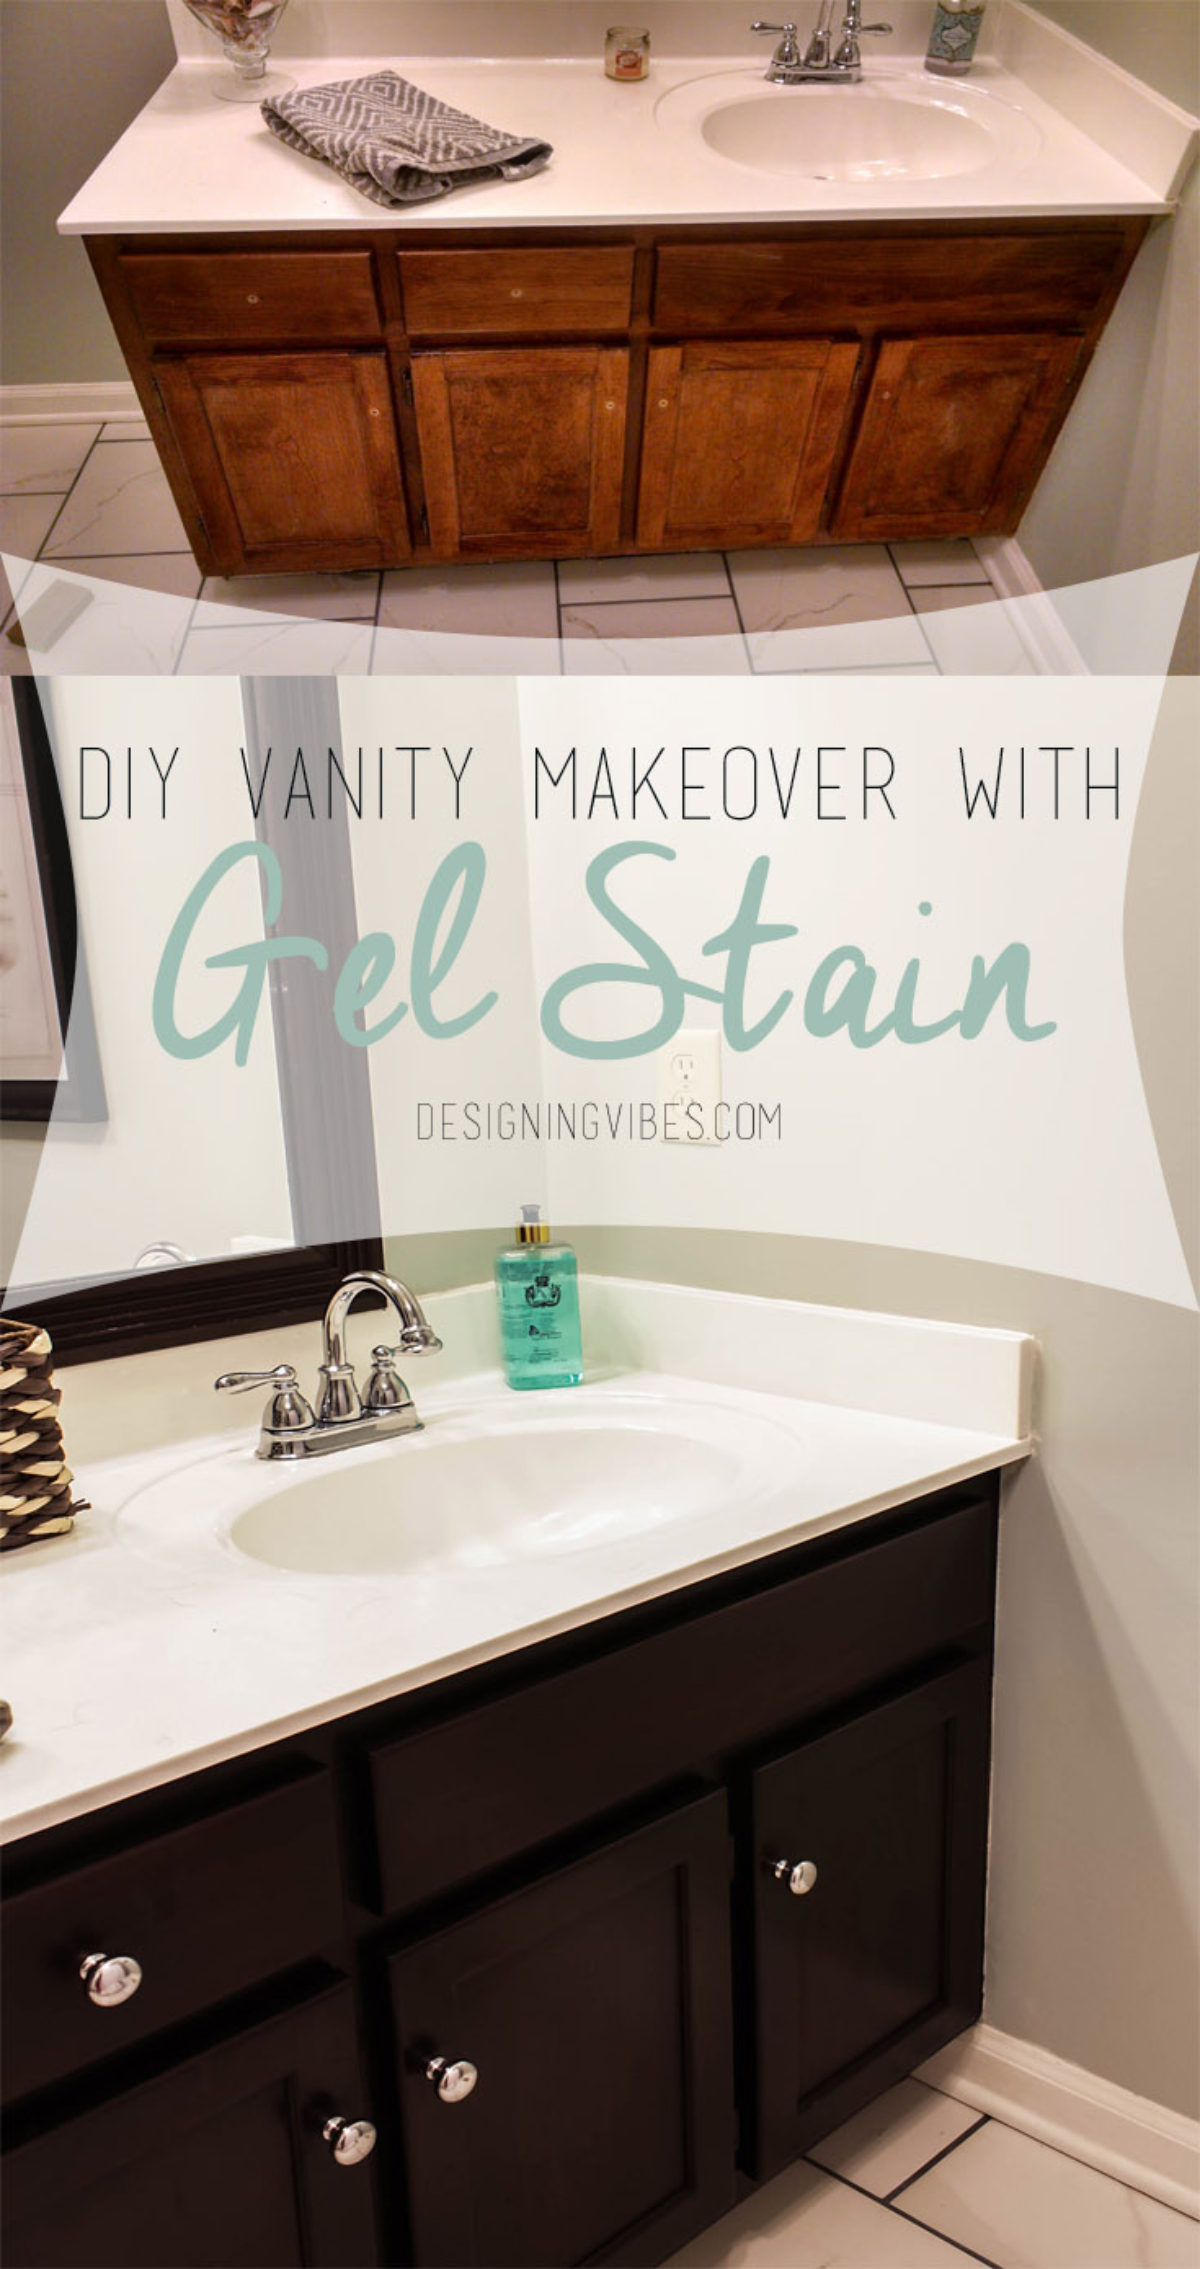
Transforming Bathroom Vanity with Gel Stain- Java Gel Stain
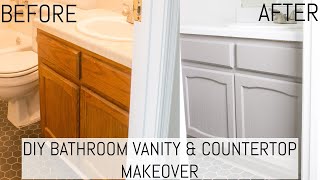
DIY Bathroom Vanity and Countertop Makeover
DIY Bathroom Vanity Makeover – Bitterroot DIY
Related articles:
- Refinishing Bathroom Cabinets Yourself
- Bathroom Cabinets Phoenix
- Modern Mirrored Bathroom Cabinet With 3 Shelves White
- Build A Bathroom Cabinet
- Bathroom Cabinet Under Sink Storage
- Tall Rotating Bathroom Cabinet
- Keuco Recessed Bathroom Cabinet
- Hanging Bathroom Cabinet Over Toilet
- Solid Oak Bathroom Cabinet
- Bathroom Cabinet Organizer Shelves
Bathroom Cabinet Makeover DIY: A Comprehensive Guide
Are you tired of looking at your outdated bathroom cabinets? Updating your bathroom cabinets is a simple and cost-effective way to give your bathroom a fresh new look. With a little bit of time and effort, you can transform your bathroom cabinets into something beautiful and functional.
In this comprehensive guide, we will take you through the steps of a bathroom cabinet makeover DIY project. We will cover everything from removing the old hardware to painting and installing new hardware. So, grab your tools and let’s get started!
Step 1: Remove the Old Hardware
The first step in any bathroom cabinet makeover DIY project is to remove the old hardware. This includes the knobs, handles, and hinges. Use a screwdriver to remove the screws that hold the hardware in place. Set the hardware aside in a safe place so you can reuse it later if desired.
FAQs:
Q: Can I use the same holes for my new hardware?
A: It depends on the size of your new hardware. If your new knobs or handles are larger than your old ones, you may need to drill new holes.
Q: What if my old hardware is stuck?
A: If your old hardware is stuck, try using a lubricant like WD-40 to loosen it up. If that doesn’t work, you may need to use pliers or a wrench to remove it.
Step 2: Clean and Sand the Cabinets
Once you have removed the old hardware, it’s time to clean and sand the cabinets. Start by wiping down the cabinets with a damp cloth to remove any dirt or grime. Then, use sandpaper to rough up the surface of the cabinets. This will help the paint adhere better.
FAQs:
Q: What type of sandpaper should I use?
A: Use medium-grit sandpaper (around 120 grit) for this step.
Q: Do I need to sand the entire cabinet or just the areas I’m painting?
A: Sand the entire cabinet to ensure an even surface for painting.
Step 3: Prime the Cabinets
Before you can paint your cabinets, you need to prime them. Priming helps the paint adhere better and ensures a smooth finish. Use a paintbrush or roller to apply a coat of primer to the cabinets. Let the primer dry completely before moving on to the next step.
FAQs:
Q: What type of primer should I use?
A: Use a high-quality oil-based primer for best results.
Q: Do I need to sand between coats of primer?
A: Sand lightly between coats of primer with fine-grit sandpaper (around 220 grit) for a smoother finish.
Step 4: Paint the Cabinets
Now it’s time to paint your cabinets! Use a paintbrush or roller to apply a coat of paint to the cabinets. Let the first coat dry completely before applying a second coat. Depending on the color and type of paint you are using, you may need more than two coats.
FAQs:
Q: What type of paint should I use?
A: Use a high-quality semi-gloss or satin finish paint for best results.
Q: Do I need to sand between coats of paint?
A: Sand lightly between coats of paint with fine-grit sandpaper (around 220 grit) for a smoother finish.
Step 5: Install New Hardware
Once the paint has dried completely, it’s time to install your new hardware. Use a tape measure and level to make sure your new hardware is installed evenly. Use a screwdriver and screws to attach your new knobs, handles, and hinges.
FAQs:
Q: How do I know where to place my new hardware?
A: Measure the distance between the old holes and mark the same distance on your cabinet doors or drawers for your new hardware.
Q: What if my new hardware doesn’t fit in the old holes?
A: If your new hardware doesn’t fit in the old holes, you may need to drill new holes.
Step 6: Add Finishing Touches
Now that your cabinets are painted and your new hardware is installed, it’s time to add some finishing touches. You can add decorative trim, wallpaper, or a fresh coat of paint to the inside of your cabinets for a pop of color. You can also add baskets or bins for extra storage.
FAQs:
Q: Can I paint the inside of my cabinets a different color?
A: Yes! Painting the Inside of your cabinets a different color can add a fun pop of color and personality to your kitchen.
Q: What type of decorative trim should I use?
A: Use a trim that matches the style and design of your cabinets. For example, if you have shaker-style cabinets, use a simple and classic trim.
Congratulations, you have successfully painted and updated your kitchen cabinets! Enjoy your refreshed kitchen space.
Additional Tips:
1. Take your time. Painting cabinets can be a time-consuming project, but the end result is worth it.
2. Use high-quality materials. Invest in good quality paint, primer, brushes, and rollers for the best results.
3. Remove all hardware before painting. Take off the knobs, handles, and hinges before you start painting to ensure a smooth finish.
4. Label your cabinet doors and drawers. Use sticky notes or masking tape to label each door and drawer so you know where they go when it’s time to reassemble them.
5. Don’t rush the drying process. Let each coat of paint or primer dry completely before applying the next coat.
6. Consider hiring a professional. If you’re not comfortable with DIY projects or don’t have the time to tackle this project, consider hiring a professional painter to do the job for you.