Installing a bathroom mirror with glue can be a straightforward and efficient way to add a stylish and functional element to your bathroom decor. This method eliminates the need for visible screws or hardware, providing a clean and seamless look. Before starting the installation process, ensure you have the right adhesive for the job. A high-quality mirror adhesive or a clear construction adhesive is recommended for a secure and long-lasting bond.
Begin the installation process by thoroughly cleaning the wall surface where you plan to mount the mirror. Any dust, grease, or residue can compromise the adhesive bond, so use a mild cleanser and allow the surface to dry completely. Once the wall is prepared, carefully measure and mark the desired placement of the mirror, taking into consideration the height and any surrounding fixtures.
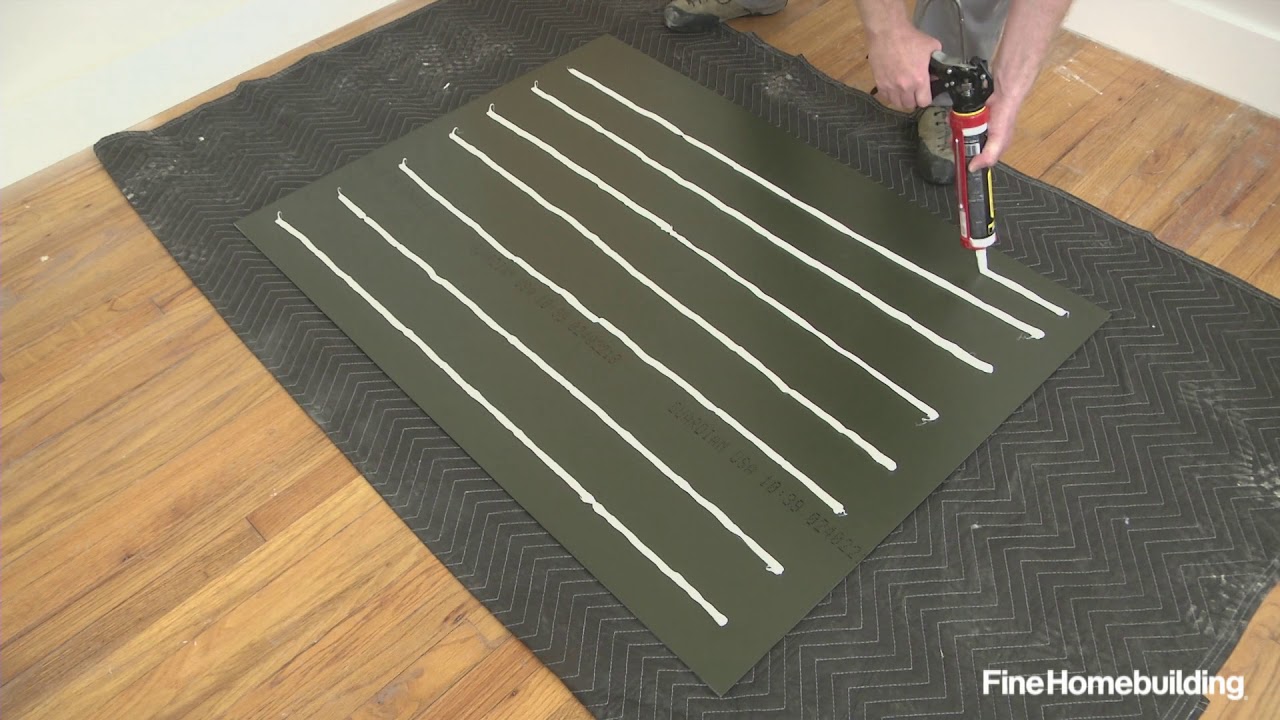
Apply the adhesive to the back of the mirror in a zigzag pattern or a series of dots, ensuring even coverage across the surface. It’s essential to follow the manufacturer’s instructions for the specific adhesive you’re using. Some adhesives may require a waiting period or a specific drying time before proceeding to the next steps.
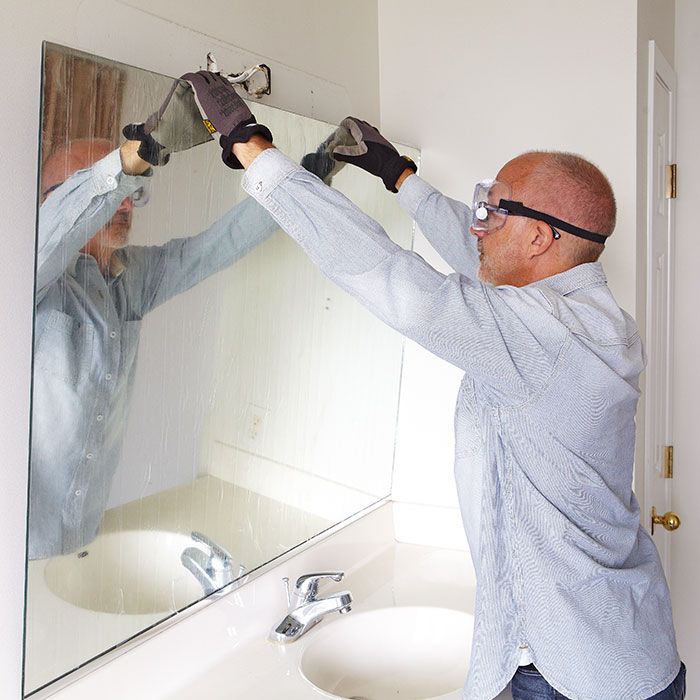
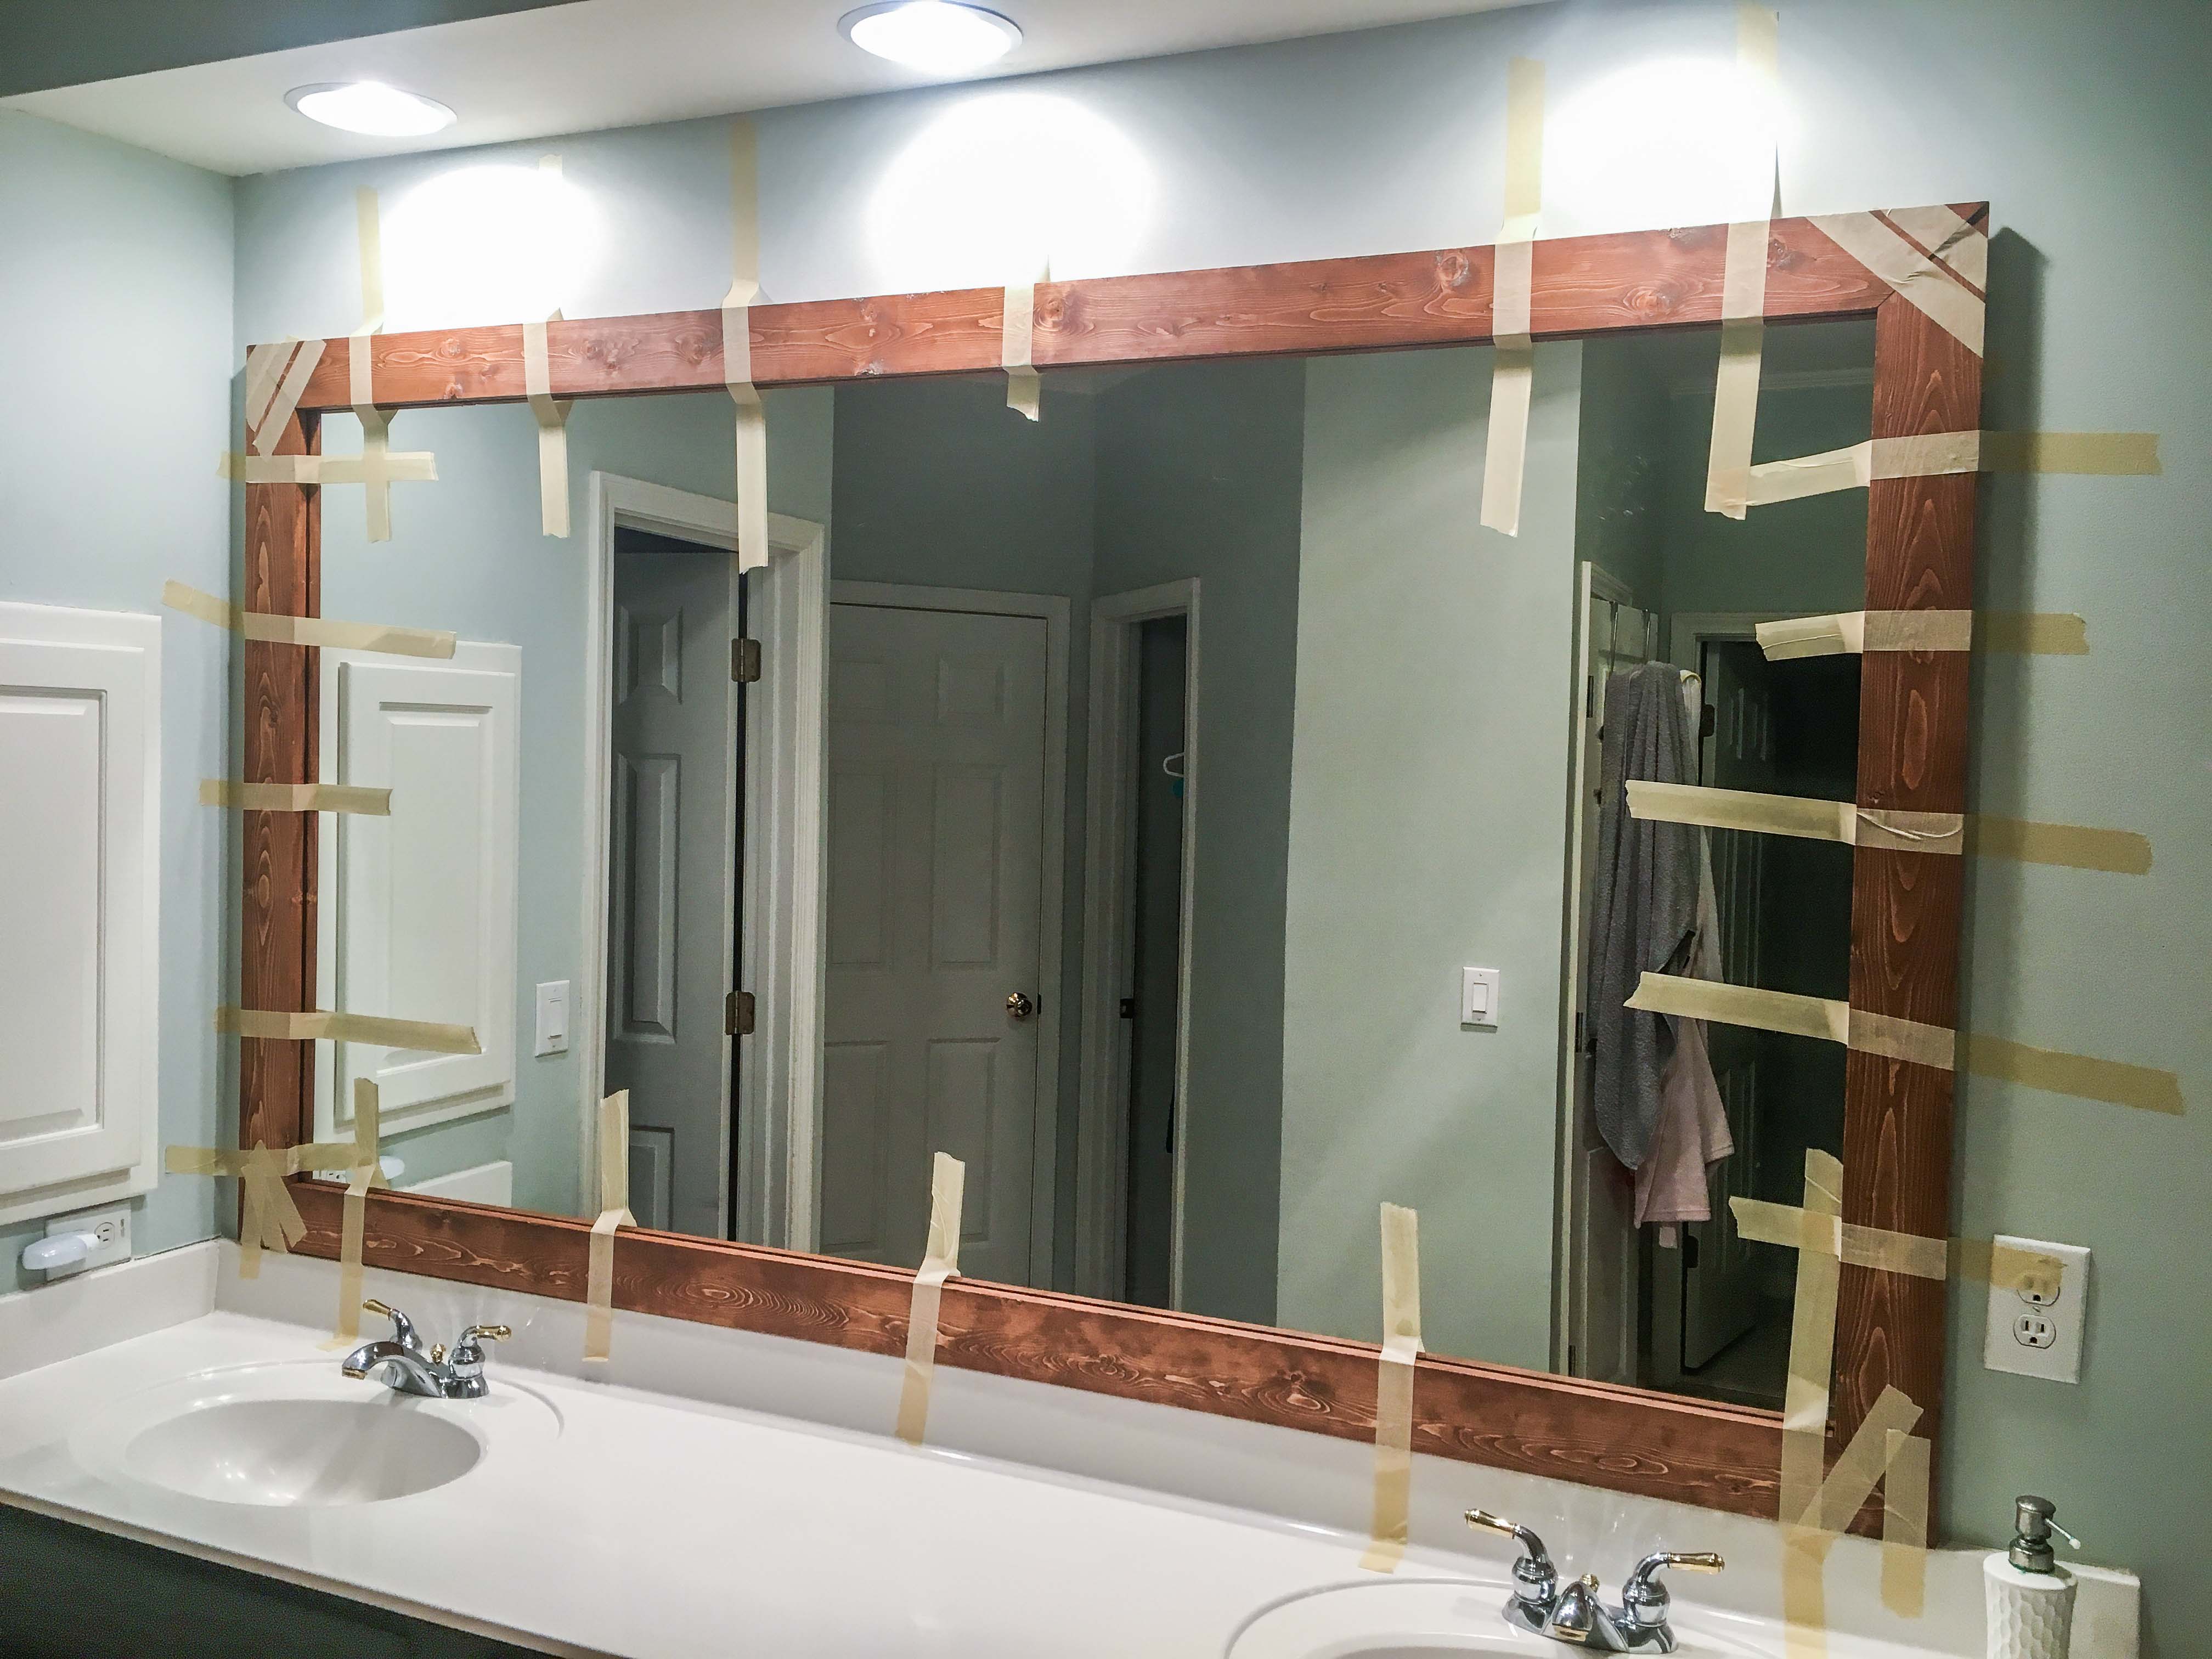
Carefully press the mirror against the wall in the predetermined position, applying even pressure to ensure proper adhesion. Use a level to make sure the mirror is perfectly straight and aligned. If adjustments are needed, make them promptly before the adhesive begins to set. Once the mirror is in place, you may need to support it temporarily using painter’s tape or other non-damaging methods to prevent it from sliding down while the adhesive cures.
Allow the adhesive to fully cure according to the recommended drying time. This can vary depending on the specific adhesive used, so refer to the product instructions for guidance. Avoid putting excessive weight on the mirror or exposing it to excessive moisture during the curing process.
The advantage of using glue for mirror installation is not only the seamless look it provides but also the stability and durability of the bond. When done correctly, a glued mirror can withstand daily use and environmental conditions in the bathroom. It’s important to note that removing a mirror installed with glue may require careful attention and, in some cases, professional assistance to avoid damage to the wall.
Installing a bathroom mirror with glue can be a DIY-friendly project that enhances the aesthetics of your bathroom. Proper surface preparation, precise measurements, and adherence to adhesive instructions are key to a successful installation. This method provides a sleek and modern appearance while ensuring a secure and lasting attachment of the mirror to the wall, making it a practical and stylish addition to your bathroom decor.
How to Remove a Glued Bathroom Mirror from the Wall
How To Remove A Mirror Glued To The Wall u2013 Forbes Advisor

Remove a Bathroom Mirror
Hanging a frameless wall mirror with glue (4 simple steps)
How to safely and easily remove a large bathroom builder mirror

How to DIY Upgrade Your Bathroom Mirror With a Stained Wood Frame
How to install a Mirror using Mastic (glue) in Few Minutes!!
How To Remove Mirror Off Wall safely !

DIY Bathroom Mirror Frame for Under $10, Hello Hayley Blog

How to Glue a Mirror to a Wall

10 Stunning Ways to Transform Your Bathroom Mirror Without
![]()
Related articles:
- Bathroom Mirrors Large Rectangular
- Narrow Bathroom Mirror Cabinet
- Bathroom Mirror Over Pedestal Sink
- Bathroom Mirrored Wall Cabinets With Lights
- Bathroom Mirrors Vanity Bathroom Mirrors
- Shabby Chic Bathroom Mirror With Shelf
- What Size Bathroom Mirror
- Wall Mounted Swivel Bathroom Mirror
- Zeus Illuminated Bathroom Mirror Cabinet
- Chrome Framed Bathroom Mirrors For Sale
Installing a bathroom mirror with glue is a great way to add a touch of elegance to your bathroom. Not only does it provide functionality, but it can also make your bathroom look more spacious and brighter. However, installing a mirror with glue requires proper preparation, the right tools, and technique. In this article, we will guide you through the step-by-step process of how to install a bathroom mirror with glue.
Materials and Tools Needed
To install a bathroom mirror with glue, you will need the following:
- Bathroom mirror
- Mirror adhesive (make sure it’s suitable for bathroom use)
- Measuring tape
- Level
- Pencil
- Painter’s tape
- Caulk gun
- Razor blade or utility knife
Step-by-Step Guide
Prepare the Surface
Before you start installing your mirror, clean the surface where you plan to put it. Use rubbing alcohol or glass cleaner to remove any dirt or grease. Make sure the surface is dry before proceeding.
Measure and Mark
Measure the length and width of your mirror and mark the spot where you want to install it using a pencil. Use a level to ensure that your marks are straight and even.
Apply Painter’s Tape
Apply painter’s tape on both sides of the marked lines. This will help protect your wall from any adhesive that might ooze out during installation.
Apply Adhesive
Using a caulk gun, apply a continuous bead of adhesive along the back of the mirror. Make sure you apply enough adhesive to cover the entire area where the mirror will be in contact with the wall.
Attach Mirror
Carefully place the mirror against the wall, aligning it with your marks. Press firmly on all edges to ensure that it adheres evenly.
Secure Mirror
Use painter’s tape to hold the mirror in place while the adhesive dries completely (refer to adhesive manufacturer’s instructions for drying time). Make sure the tape is tight enough to hold the mirror securely but not too tight that it will damage the mirror or the wall.
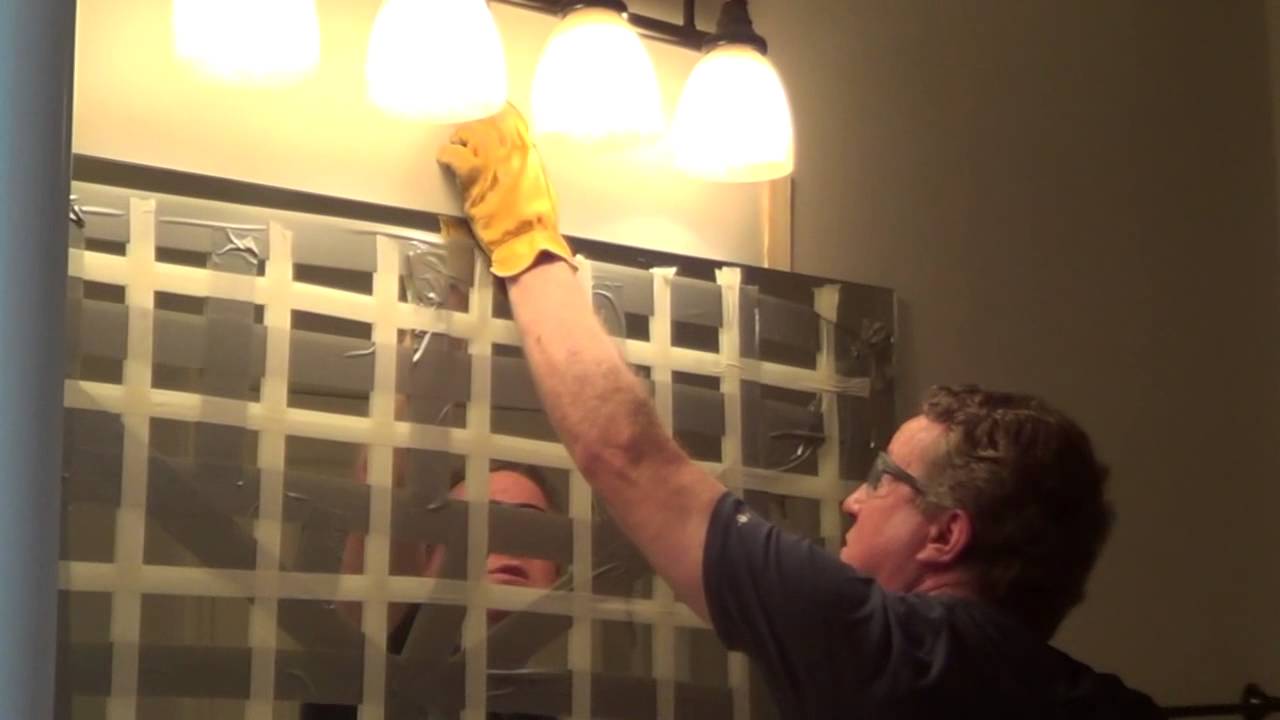
Remove Excess Adhesive
Once the adhesive has dried, carefully remove the painter’s tape. Use a razor blade or utility knife to remove any excess adhesive that may have oozed out during installation.
Can I install a bathroom mirror with regular glue?
No, it is not recommended to use regular glue to install a bathroom mirror. Regular glue does not have the strength and durability required for bathroom use and can easily deteriorate over time due to moisture and humidity. Always use mirror adhesive that is specifically designed for bathroom use.
Do I need to use a level when installing a bathroom mirror?
Yes, it is important to use a level when installing a bathroom mirror. A level will ensure that your mirror is straight and even, which will prevent it from looking crooked or unbalanced.
How long does it take for the adhesive to dry?
The drying time of the adhesive depends on the brand and type of adhesive you are using. Refer to the manufacturer’s instructions for specific drying times. Generally, most adhesives take 24-48 hours to fully dry and cure.
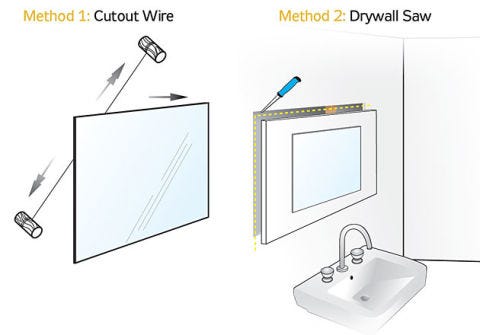
Can I remove the mirror after installation?
Yes, you can remove your bathroom mirror after installation if necessary. To remove it, simply use a razor blade or utility knife to cut through the adhesive around the edges of the mirror. Be careful not to damage the wall surface while removing the mirror.
Installing a bathroom mirror with glue is an easy and cost-effective way to add style and functionality to your bathroom. By following these steps and using proper tools and materials, you can install your own bathroom mirror in no time at all! Remember to always use high-quality adhesive that is suitable for bathroom use, measure carefully, and use a level to ensure your mirror is straight and even. With these tips in mind, you’ll be able to enjoy your new bathroom mirror for years to come!