With the usage of wall structure mount faucets, the old-fashioned bathroom of yours can appear extravagant with no spending more than your desired budget, a great transformation that has never ever been done. Waterfall faucets are obtainable in a wide variety of finishes as well as glass kinds, with frosted glass as well as black glass waterfall faucets adding an incredibly sophisticated look to the bathroom of yours, while clear glass waterfall faucets apply a slightly lighter touch with the same elegant design.
Here are Images about How To Repair A Single Handle Bathroom Faucet
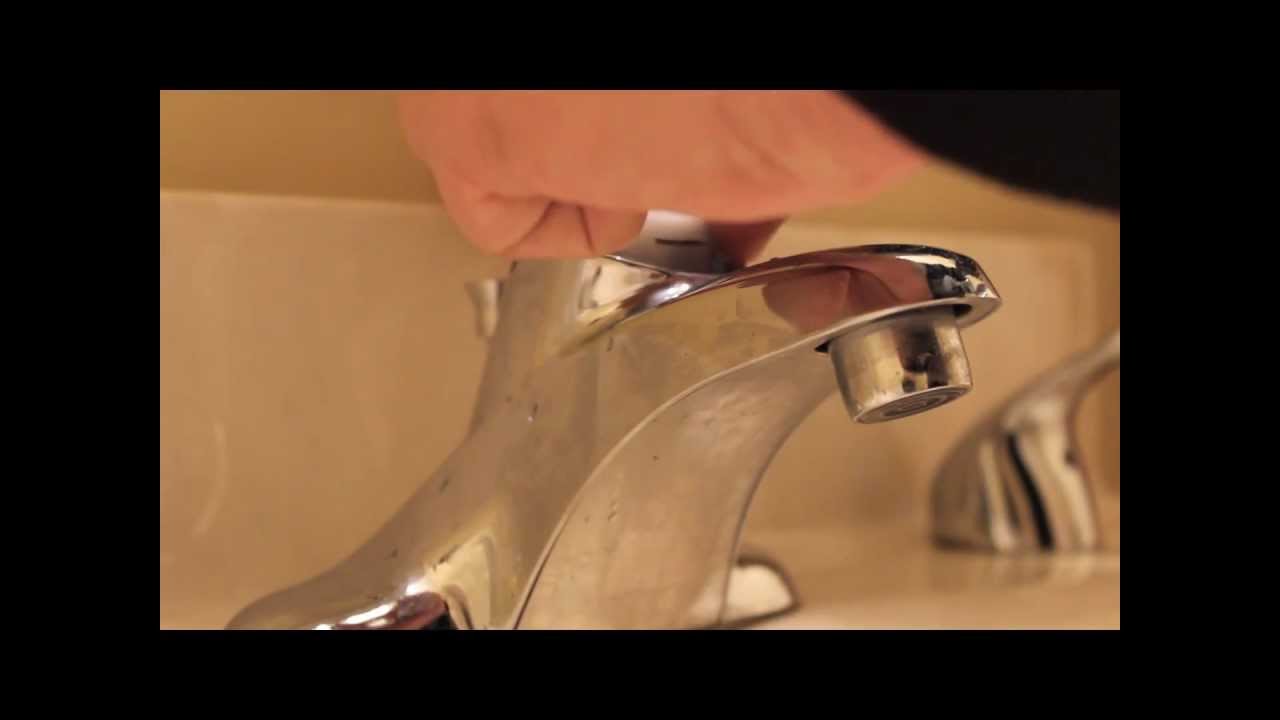
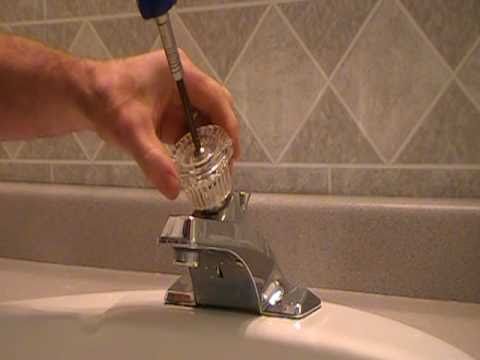
How To Repair A Single Handle Bathroom Faucet

Before selecting a bathroom faucets you will need to know a couple of facts. And now I recommend to do some test runs first before you use the faucet extensively and also search for leaks. Shower and tub facets present in the same collection as the sink faucet of yours will match well. These faucets also are sold in a broad assortment of finishes.
How to repair moen bathroom faucet dripping water – cartridge removal replace single lever
The succeeding point to be examined in bathroom faucets is the level of the finish. You will find three specific benefits of utilizing these over the other kinds. If you’re uncertain as to what type of vanity the bathroom of yours would fit best with, healthy you ought to think about searching for modern day vanity. Though it is pricey, it’s extremely durable and offers enduring performance.
Images Related to How To Repair A Single Handle Bathroom Faucet
Moen Bathroom Faucet Repair – Moen 1225

When you would like to see further selections without needing to leave the house of yours, then your best option is to search online. You need to have been supplied with bolts for this particular task. Since they are less likely to leak like compression valve faucets you will end up having a more durable bathroom sink faucet with absolutely no drips.
Delta Repair Kit For Single Handle Faucets
How to Fix the Leak on a Price Pfizer Single Handle Bathroom Faucet
Single-Handle Bathroom Sink Faucets – Handle Removal u2013 KOHLER

Magnum Cartridge: Repair and Replace (Single Handle Moen Bathroom Faucet)
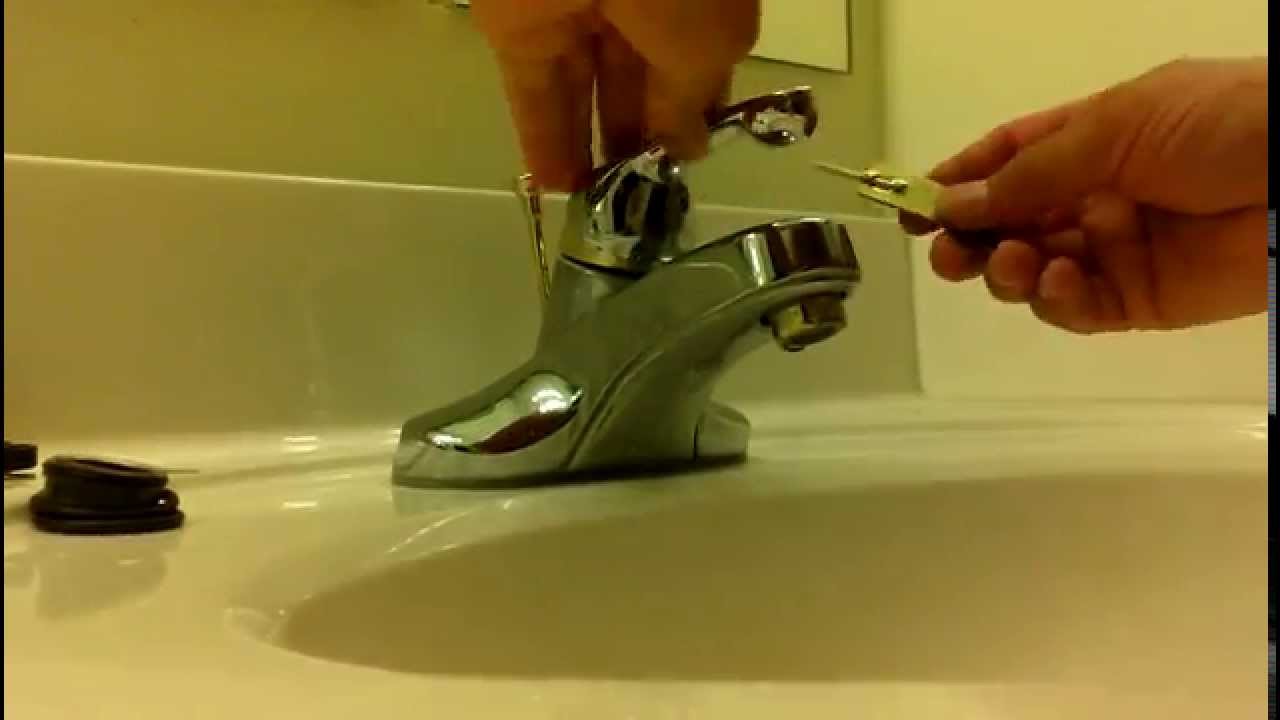
How to replace-repair a leaky moen cartridge in a bathroom set of faucets-single lever.Tips
Troubleshooting a Leaking Faucet : Delta Faucet

Bathroom – My Single Handle Bathroom Faucet is Leaking or Dripping
Troubleshooting a Leaking Faucet : Delta Faucet

How to Replace a Bathroom Faucet

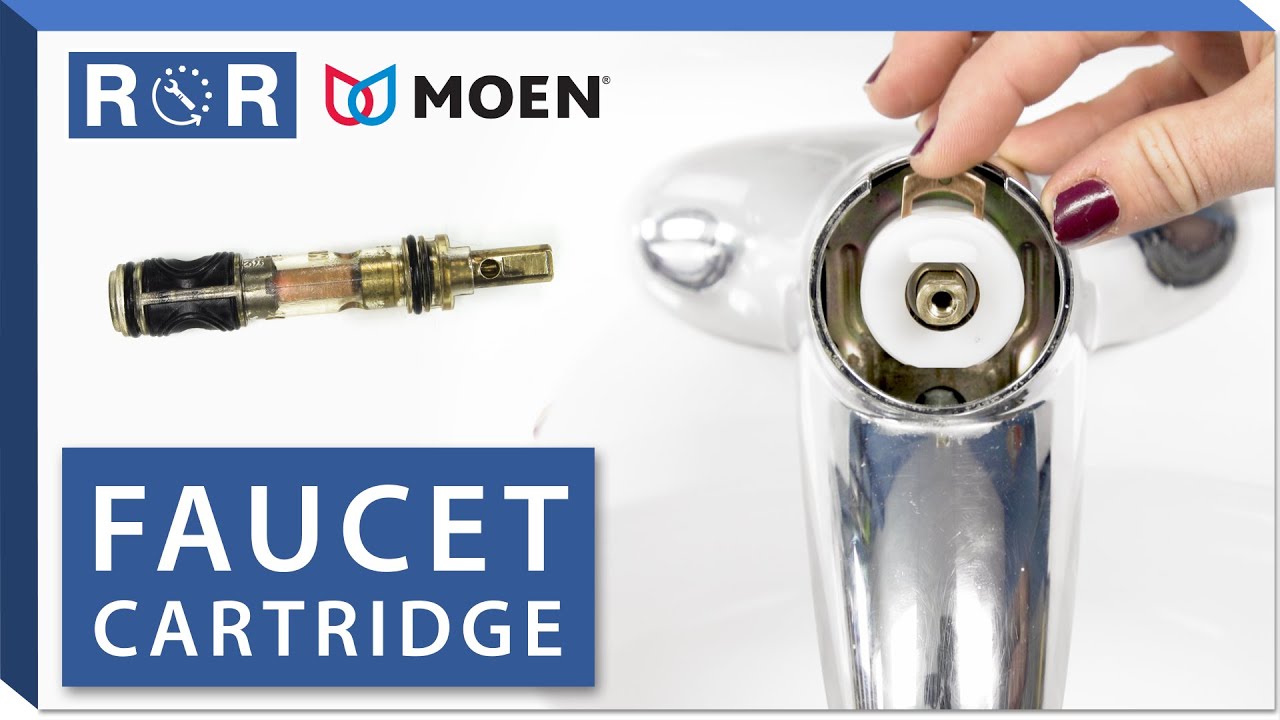
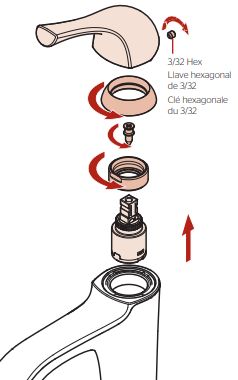
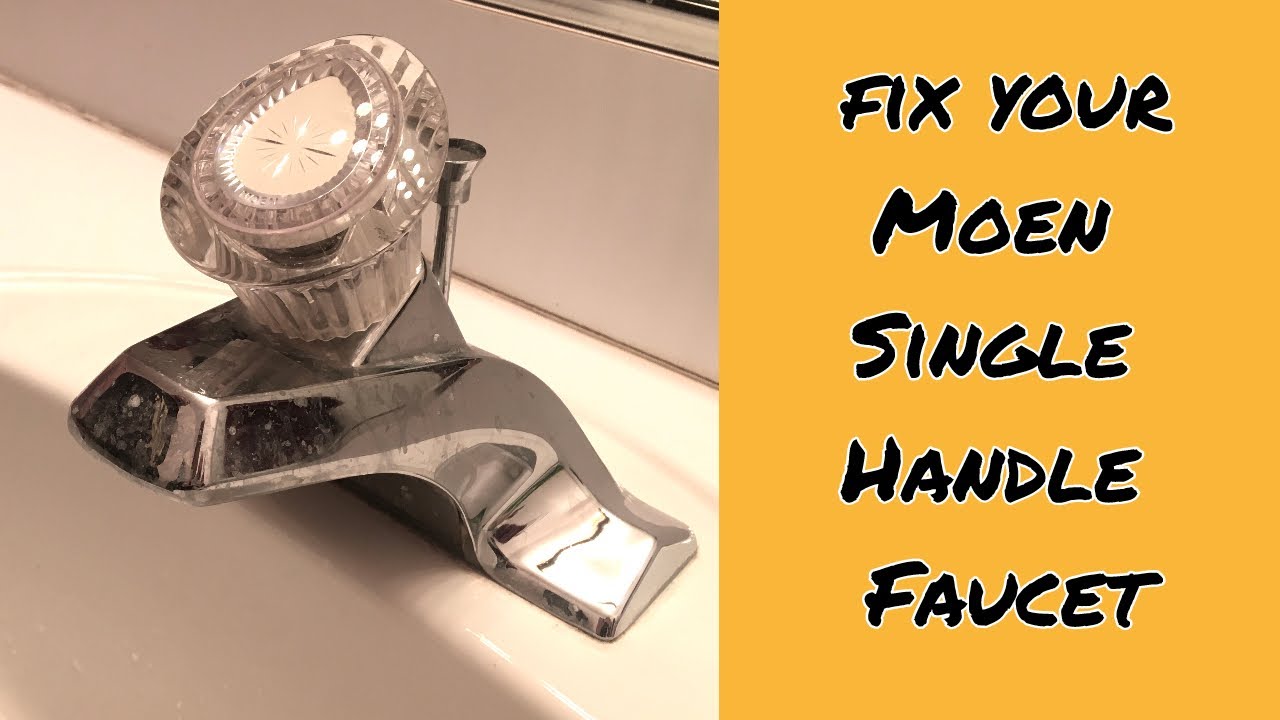
How to fix Moen Single-handle faucets
Delta Peerless Bathroom Single Handle Faucet Repair

Related articles:
- Pfister Bathroom Faucet Installation
- Old Fashioned Looking Bathroom Faucets
- Black Finish Bathroom Faucets
- Replace Valve Stem Bathroom Faucet
- 2 Tone Bathroom Faucets
- How To Fix A Leaky Moen Single Handle Bathroom Faucet
- Black Waterfall Bathroom Faucet
- Delta Mandara Bathroom Faucet
- Antique Brass Bathroom Faucets Single Handle
- Bathroom Faucet Installation Guide
How To Repair A Single Handle Bathroom Faucet
The single handle bathroom faucet is the most common type of faucet on the market, making repairs and maintenance a frequent occurrence. Although the process can be intimidating at first, repairing a single handle bathroom faucet doesn’t have to be difficult. With a few simple tools and some patience, you can easily make repairs and keep your faucet in perfect working order.
Tools Needed for Repair
Before getting started with any repair work on your single handle bathroom faucet, make sure you have all the necessary tools and supplies. Most repairs will require a few basic items such as pliers, screwdrivers, and an adjustable wrench. You may also need to purchase additional parts such as O-rings or washers for more complex repairs. Make sure you have everything you need before starting so that you don’t have to stop in the middle of the job.
Disassembling the Faucet
Once you have all your tools and supplies ready, it’s time to begin disassembling the faucet. Start by turning off the water supply to the faucet and then unscrewing the handle from the body of the fixture. Be careful not to overtighten any screws or bolts during this process as it could cause damage to the faucet. After removing the handle, use a wrench to unscrew the bonnet nut from beneath the sink and then carefully remove any pieces that are connected to it.
Inspecting Parts and Gaskets
After removing all of the parts from beneath your sink, it’s time to inspect them for any signs of wear or damage. Look closely at all of the washers, O-rings, gaskets, and other components for any signs of wear or damage. If any part appears worn out or damaged beyond repair, replace it with a new one of matching size and shape. This is also a good time to clean out any debris that may have built up inside of your faucet’s components over time.
Reassembling Faucet Components
Once you’ve inspected all of your parts for signs of wear or damage, it’s time to reassemble them back into place under your sink. Start by replacing all of your O-rings, washers, gaskets, and other components back into place in their respective locations. Then replace each piece back onto its corresponding connection point under your sink before finally replacing the bonnet nut and handle back onto their respective places. Make sure each piece is securely in place before moving onto the next step.
Testing For Leaks
Once you’ve reassembled all of your components back under your sink, it’s time to test for leaks by turning on your water supply again and running a few tests with both hot and cold water taps open simultaneously. If everything is connected properly and no leaks are present, you should be good to go! But if you do find a leak somewhere along one of your connections, check each individual part once again for any signs of wear or damage before trying again.
FAQs
Q: What tools do I need?
A: Before beginning any repair work on your single handle bathroom faucet, make sure you have all necessary tools including pliers, screwdrivers, an adjustable wrench, and possibly additional parts such as O-rings or washers for more complex repairs.
Q: How do I disassemble my faucet?
A: Start by turning off the water supply to your faucet then unscrewing its handle from its body before using a wrench to unscrew its bonnet nut from beneath your sink before carefully removing any pieces connected with it from thereon down into its components for inspection later on in this process.
Q: How do I inspect my parts?
A: After removing all parts from beneath your sink inspect them closely for signs of wear or damage such as cracked washers or torn O-rings; if any part appears worn out or damaged beyond repair replace it with a new one before proceeding further with re Assembly.
Q: How do I reassemble my faucet components?
A: Begin by replacing all of your O-rings, washers, gaskets, and other components back into place in their respective locations; then replace each piece back onto its corresponding connection point under your sink before finally replacing the bonnet nut and handle back onto their respective places. Make sure each piece is securely in place before moving onto the next step.
What tools are needed to repair a single handle bathroom faucet?
-Adjustable wrench
-Pliers
-Screwdriver
-Phillips screwdriver
-Replacement parts (valve stem, O-rings, valve seat)
-Teflon tape or pipe joint compound
-Penetrating oil (optional)
What type of wrench is needed to repair a single handle bathroom faucet?
A basin wrench is the type of wrench typically used to repair a single handle bathroom faucet. The basin wrench is specially designed to reach up and around to tight spaces, making it ideal for accessing the faucet connections beneath the sink.
What size wrench is needed to repair a single handle bathroom faucet?
The size of wrench needed to repair a single handle bathroom faucet will depend on the size of the nuts that secure the faucet to the sink. Common sizes are 1/2 inch, 9/16 inch, or 11/16 inch.