Installing a Kohler bathroom faucet can be a rewarding DIY project that not only enhances the aesthetics of your bathroom but also improves its functionality. Kohler is known for its high-quality fixtures, and their faucets are no exception. Here, we’ll walk you through the essential steps to install a Kohler bathroom faucet, ensuring a successful and leak-free installation.
First, preparation is key. Before you start, make sure to turn off the water supply to your bathroom sink. This can usually be done by shutting off the water valves located beneath the sink. Once the water supply is off, open the faucet to release any remaining water in the lines. Next, you’ll need to remove the old faucet. Use a wrench or pliers to disconnect the supply lines and a basin wrench to loosen and remove the nuts securing the faucet to the sink. Once the old faucet is detached, clean the sink surface thoroughly to ensure a clean and smooth installation for the new Kohler faucet.
Here are Images about Installing Kohler Bathroom Faucet
Installing Kohler Bathroom Faucet

Now, let’s move on to the installation of the Kohler faucet. Start by following the manufacturer’s instructions included with the faucet as specific models may have unique requirements. Typically, you’ll insert the faucet tailpieces through the mounting holes in the sink and secure them with mounting nuts provided. Hand-tighten the nuts initially and then use a wrench to snug them up, being careful not to over-tighten, which could damage the faucet or the sink.
The next step involves attaching the water supply lines. Kohler faucets often come with flexible supply lines for ease of installation. Connect the hot and cold supply lines to the corresponding valves beneath the sink. Again, hand-tighten initially and then use a wrench to secure them snugly.
Installation – Elliston Single-Handle Bathroom Sink Faucet
Before turning the water supply back on, carefully check all connections for leaks. If you notice any leaks, slightly tighten the affected connections until the leak stops. Once everything is secure and leak-free, slowly turn the water supply back on, and test your new Kohler faucet for both hot and cold water flow. Make any necessary adjustments to the water temperature and flow rate using the faucet’s handles.
Installing a Kohler bathroom faucet can be a DIY project that elevates your bathroom’s appearance and functionality. With careful preparation, following the manufacturer’s instructions, and ensuring secure connections, you can enjoy a leak-free and stylish faucet in your bathroom. Always remember to turn off the water supply before starting the installation and take your time to ensure each step is done correctly for a successful and satisfying result.
Installation – Elliston Widespread Bathroom Sink Faucet

This type of faucet was the first to be washerless. Different designs of faucets are on the market widely that could add as much as the elegance of a contemporary bathroom. One of the most popular and oftentimes easiest types of faucet designs to install may be the core set faucet design.
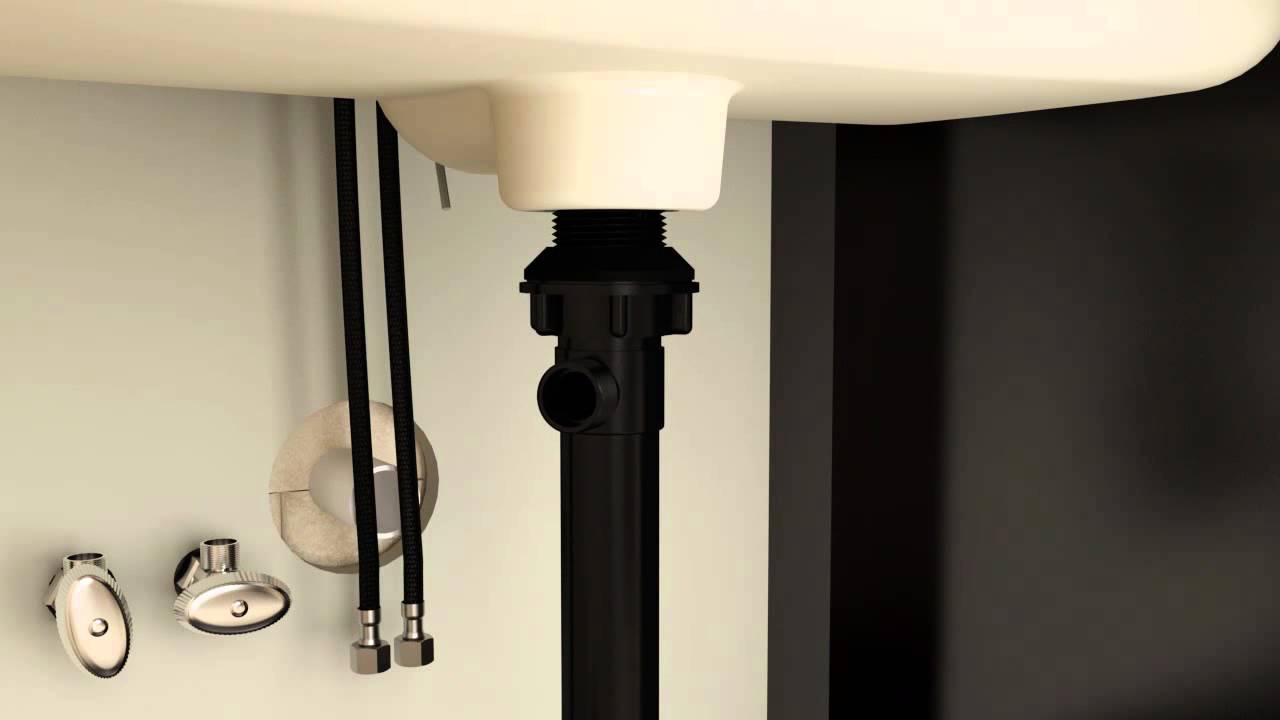
Bath Spout Slip-fit Assembly u2013 KOHLER

How to install a 3 piece Kohler faucet

Replace the Valve in a Two Handle Faucet u2013 KOHLER

Installation Bathtub Faucets Guide KOHLER
u0026$SectionHero$)
Installation Bathtub Faucets Guide KOHLER
u0026$SectionHero$)
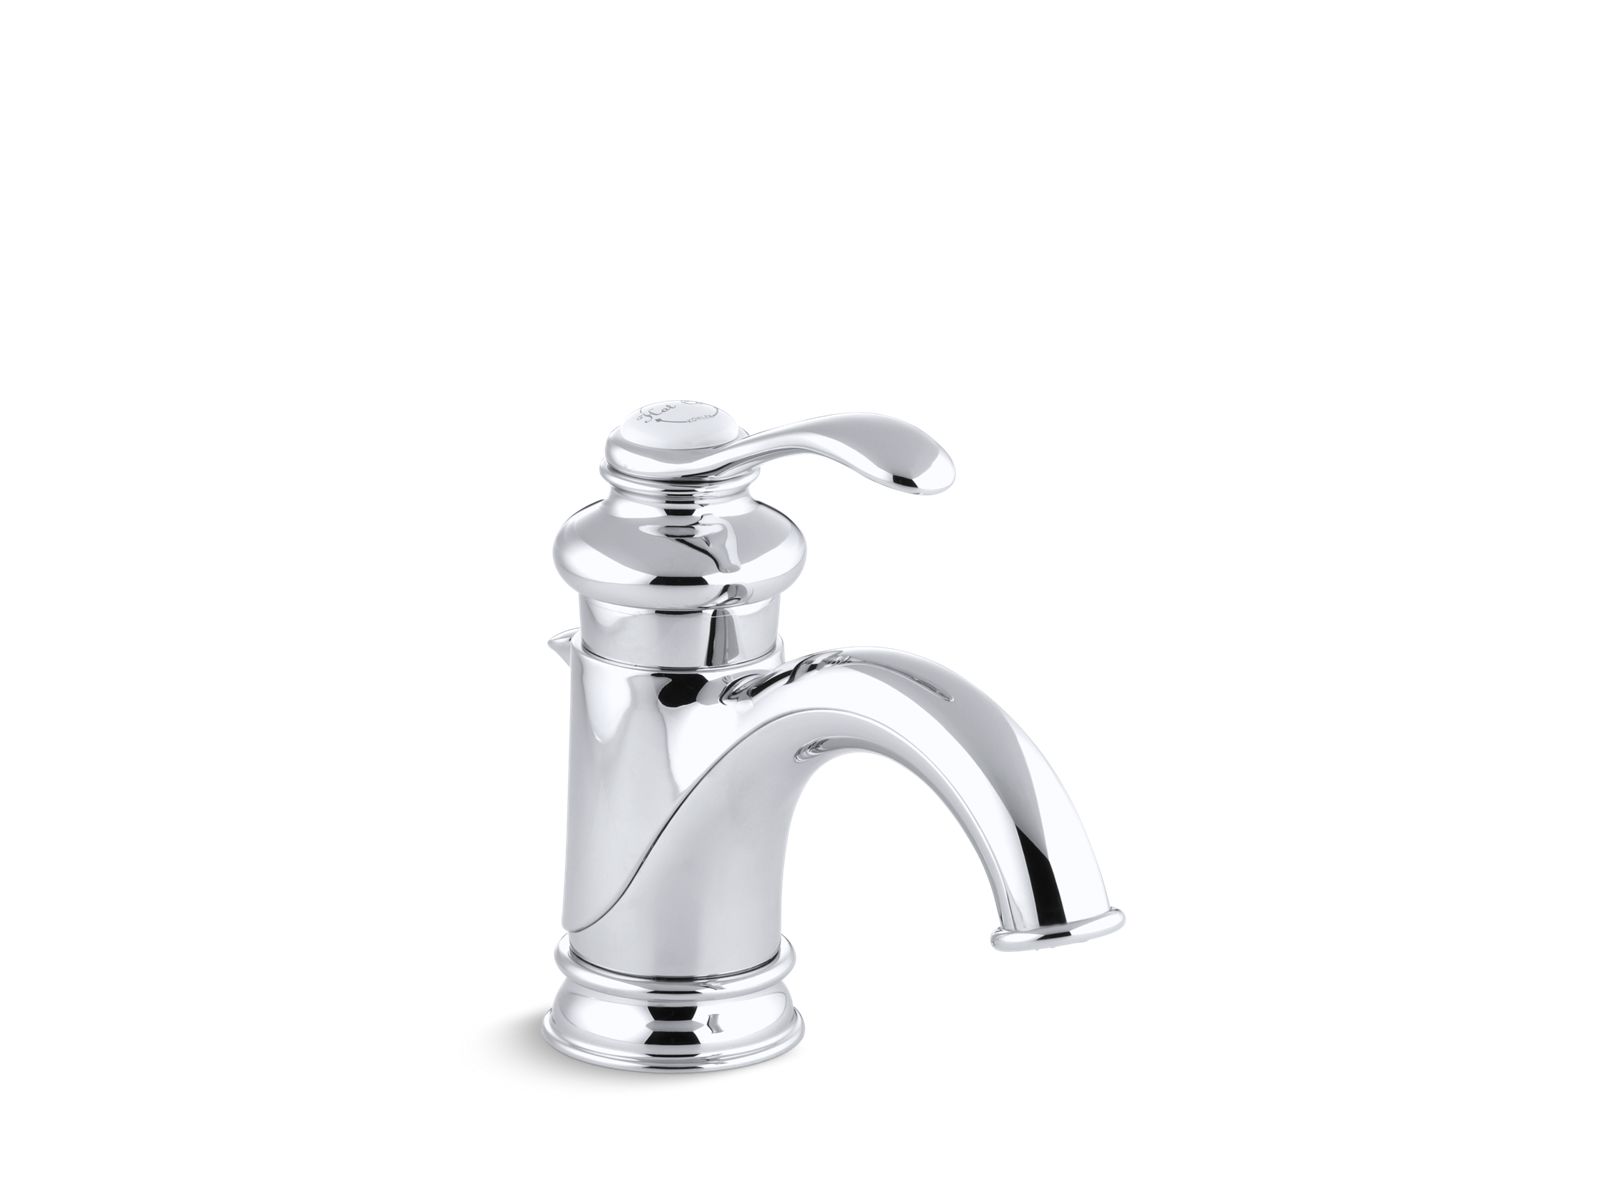
K-12182 Fairfax Single-Control Bathroom Sink Faucet KOHLER
Maxton® Widespread bathroom sink faucet

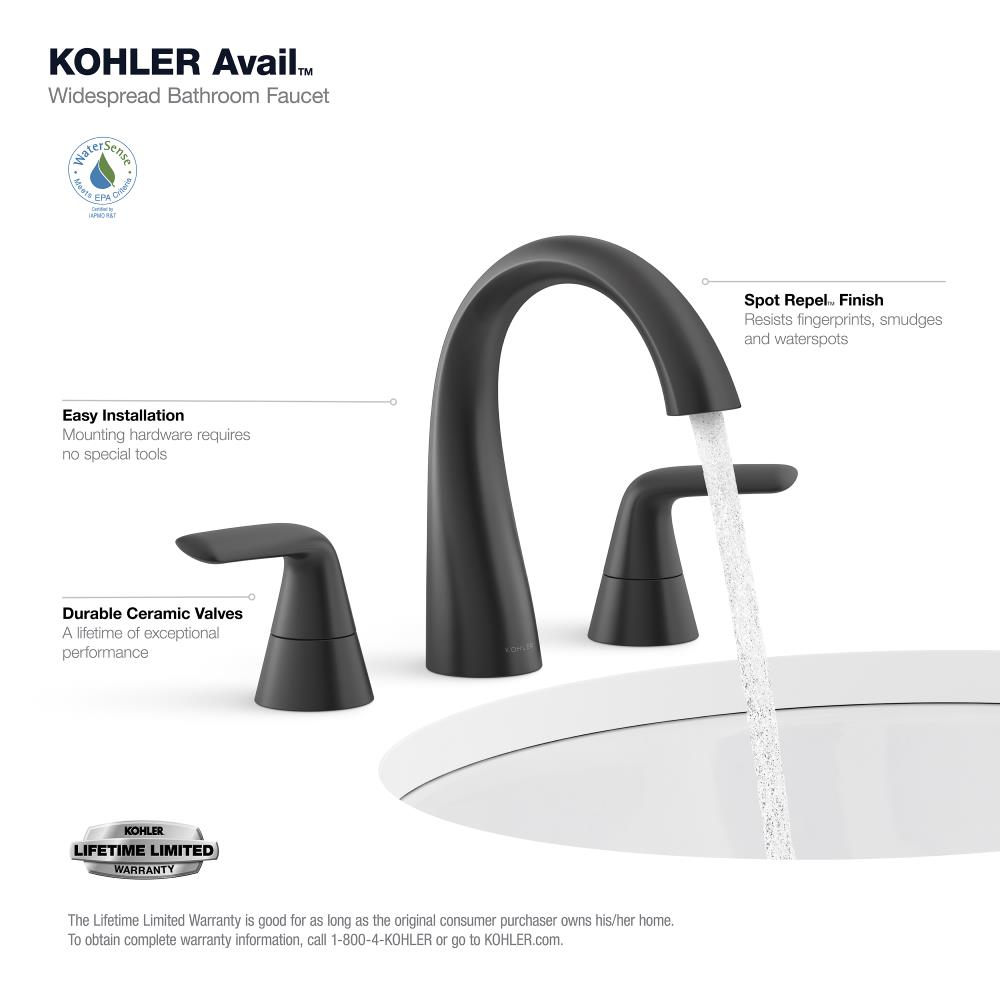
KOHLER Avail Matte Black 2-Handle Widespread WaterSense Bathroom
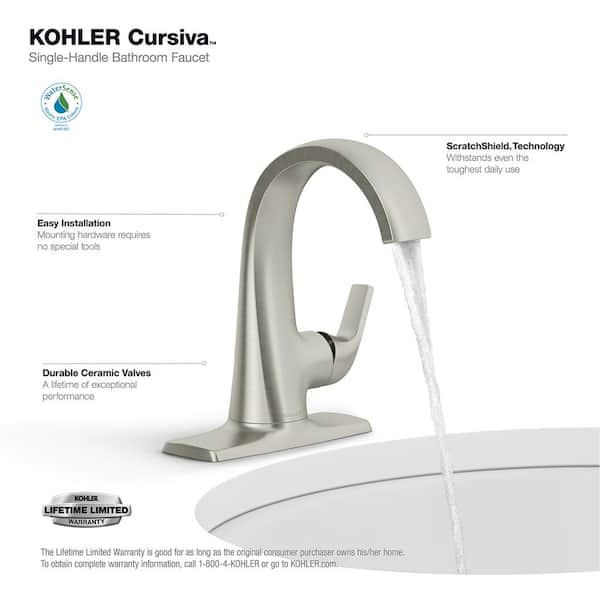
KOHLER Cursiva Single Hole Single-Handle Bathroom Faucet in
Capilano® Widespread bathroom sink faucet

Forté® Widespread bathroom sink faucet with sculpted lever handles

Related articles:
- Old Fashioned Looking Bathroom Faucets
- Black Finish Bathroom Faucets
- Replace Valve Stem Bathroom Faucet
- 2 Tone Bathroom Faucets
- How To Fix A Leaky Moen Single Handle Bathroom Faucet
- Black Waterfall Bathroom Faucet
- Delta Mandara Bathroom Faucet
- Antique Brass Bathroom Faucets Single Handle
- Bathroom Faucet Installation Guide
- Crane Bathroom Faucet Parts
Introduction
Installing a Kohler bathroom faucet is a great way to give your bathroom a fresh new look and upgrade its functionality. Kohler is one of the most respected names in plumbing fixtures and when it comes to selecting a quality product, you can’t go wrong with Kohler. Installing a new faucet is relatively easy, but there are some important steps to keep in mind to ensure that it is done correctly. This article will provide an overview of the process for installing a Kohler bathroom faucet, as well as answer some frequently asked questions about the installation process.
Gather the Necessary Tools and Materials
The first step in installing a Kohler bathroom faucet is to gather all the necessary tools and materials. You will need a wrench, a screwdriver, plumber’s tape or thread sealant, a bucket, and the appropriate parts for your particular model of faucet. It is also helpful to have some spare parts on hand in case something goes wrong during the installation process.
Shut Off the Water Supply
Once you have all the necessary tools and materials, you should shut off the water supply to your bathroom. This can be done by turning off the main water valve, or by shutting off the valves underneath the sink if they are available. Once you have shut off the water supply, open up any taps in your bathroom so that all of the water has been drained out of them before you begin the installation process.
Disassemble Existing Fixtures
The next step is to remove any existing fixtures that may be connected to your sink or countertop. This includes removing any old sink drain assembly or other plumbing components such as pipes or fittings. Once these have been removed, you will be able to access the sink’s mounting holes which are used for installing your new Kohler faucet.
Install New Components
After all of your existing fixtures have been removed and your sink is accessible, it’s time to start installing your new Kohler faucet. Begin by inserting any rubber gaskets or washers into their respective slots on each side of your sink’s mounting holes. Next, apply plumber’s tape or thread sealant around each mounting hole before inserting your new faucet into place. Finally, secure your new Kohler faucet with nuts and washers before connecting any necessary pipes or hoses that may be needed for water supply lines or drain assemblies.
Test for Proper Installation
Once all of your components are installed and connected properly, it’s time to test for proper installation. Turn on the main water supply and open up any taps in your bathroom to check for proper flow and pressure from your new Kohler faucet. If everything appears to be functioning properly, then you can move onto finalizing the installation process by connecting any remaining plumbing components such as drain assemblies or other fittings.
Frequently Asked Questions
Q: How long does it take to install a Kohler bathroom faucet?
A: The amount of time it takes to install a Kohler bathroom faucet will vary depending on several factors such as how many existing fixtures need to be removed and what type of plumbing components need to be connected during installation. However, most installations can be completed within an hour or two if all necessary tools and materials are readily available.
Q: Do I need professional help when installing my Kohler bathroom faucet?
A: While professional help may not always be necessary when installing a Kohler bathroom faucet, it is often recommended for those who do not have experience with plumbing projects or who may wish to save time by having someone else do the work for them. A qualified plumber will also be able to identify any potential problems that could arise during installation before they become an issue requiring costly repairs down the line.
How do you install a Kohler bathroom sink faucet?
1. Turn off the water supply to the sink.
2. Disconnect the water supply lines from the faucet.
3. Unscrew the mounting nuts holding the faucet to the sink and remove the old faucet.
4. Install the new faucet onto the sink and tighten the mounting nuts.
5. Connect the water supply lines to the faucet.
6. Turn on the water supply to check for leaks and turn off when finished.
What tools are needed to install a Kohler bathroom sink faucet?
Tools needed to install a Kohler bathroom sink faucet include an adjustable wrench, basin wrench, pipe wrench, putty knife, plumber’s tape, and a drill with the appropriate bit size. You may also need additional tools depending on the specific model of faucet you are installing.
What type of wrench is needed to install a Kohler bathroom sink faucet?
A 7/8-inch open-end wrench is typically needed to install a Kohler bathroom sink faucet. However, depending on the specific model of faucet being installed, a basin wrench or pipe wrench may also be required.