They will generally only have in stock the quite simple types. If you’re searching for a faucet that’s less upkeep a brushed chrome faucet would be an extremely sensible choice since it’s less prone to water stains. Also, there are various types of faucets with regards to the type of sink you have.
Here are Images about Kingston Brass Bathroom Faucet Installation Instructions
Kingston Brass Bathroom Faucet Installation Instructions
The big range of faucets available makes it a breeze to find the perfect finish for virtually any bathroom. Renovation of bathrooms is typical nowadays. You must likewise consider locations you wish to locate the faucets of yours. You usually have the option of shopping for cheap bathroom faucets alternatively.
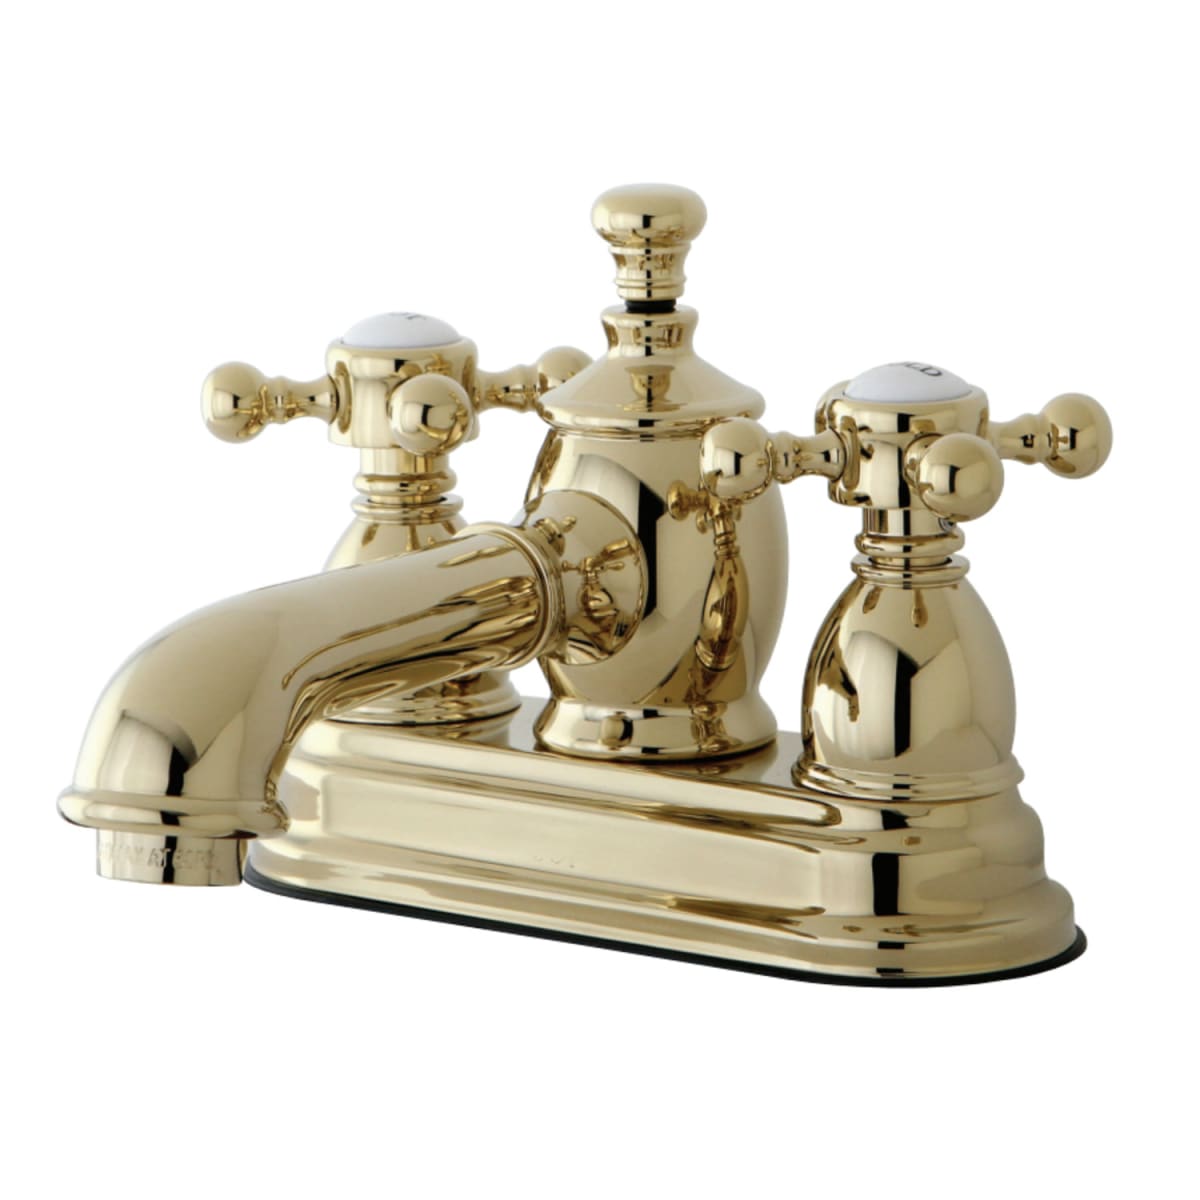
Kingston Brass KB964 Magellan Widespread Bathroom Faucet with Retail Pop-Up, Polished Chrome/Polished Brass

The appearance and design of popular one-time hole bathroom faucets greatly improves the visual appeal of the sink area and bathroom in general. The different kinds out there are compression valve faucets, those with washer and washer less ones. Hence, you have to select the type that fits correctly into your sink.
Images Related to Kingston Brass Bathroom Faucet Installation Instructions
Kingston Brass HKS7411ACL Traditional Single Hole Single-Handle
You can always find an inexpensive bathroom faucet but in the end the savings won’t add up because you are going to have a bathroom faucet which has a lower lifespan and possibly more internal issues that you’ll end up needing to deal with. These faucets enjoy a long history of needing periodic maintenance, typically replacing washers. faucet can be as elegant even beyond the boundaries in our imagination.
Kingston Brass Victorian Double Hole 2-Handle Vessel Bathroom
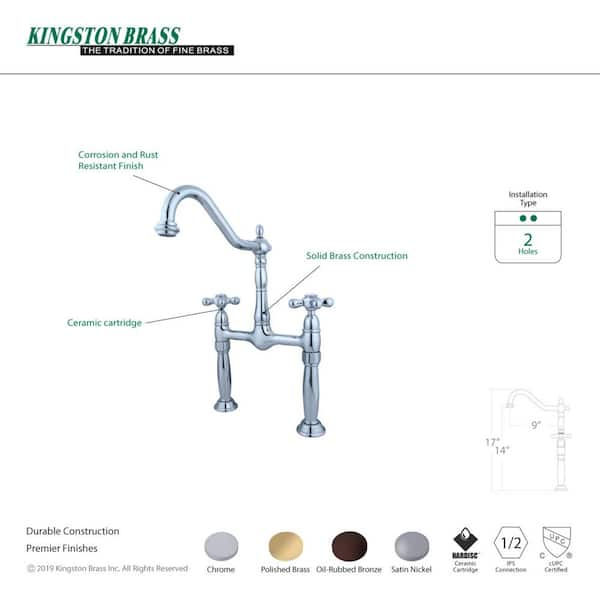
Kingston Brass KB961 Magellan Widespread Bathroom Faucet with Retail Pop-Up, Polished Chrome

How do I fix faucet handles that are too tight?
Kingston Brass KB974AL Victorian Widespread Lavatory Faucet with Metal lever handle, Polished Chrome and Polished Brass,8-Inch Adjustable Center

Restoration Bridge 8-in. Widespread 2-Handle Bathroom Faucet in Polished Brass

Kingston Brass KB1603PL 4 in. Centerset Bathroom Faucet, Antique Brass,4-Inch Center

Kingston Brass KS7002BX Polished Brass English Country 1.2 GPM
Kingston Brass KB5610AL Restoration 4 in. Centerset Bathroom Faucet, Matte Black

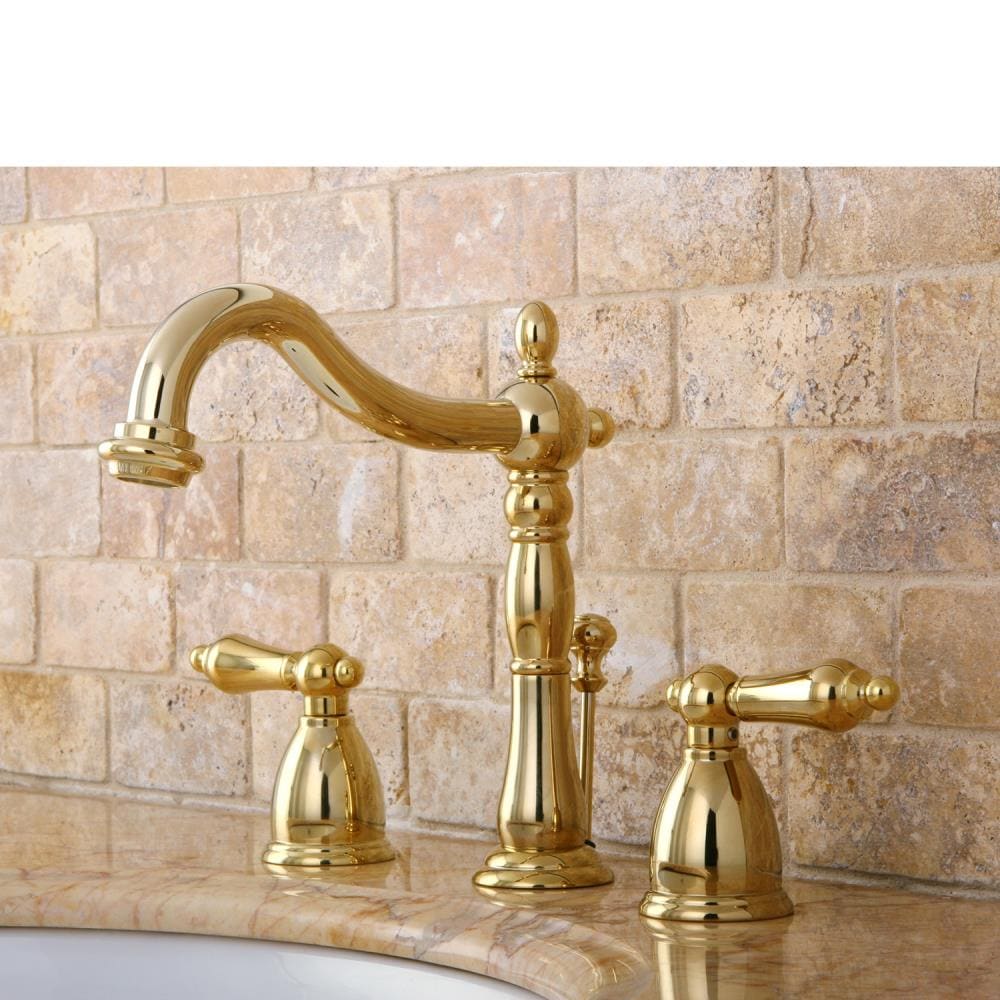
Kingston Brass Vintage Polished Brass 2-Handle Widespread Bathroom
Kingston Brass KS7028AL English Country Wall Mount Roman Tub Faucet, Brushed Nickel

Kingston Brass KC7060AX Vintage 8 in. Widespread Bathroom Faucet, Matte Black

Related articles:
- Top 10 Bathroom Faucet Brands
- Delta Bathroom Faucets Repair Parts
- 4 Polished Brass Bathroom Faucets
- Kohler 8 Widespread Bathroom Faucet
- Brushed Stainless Steel Bathroom Faucet
- Bathroom Faucet White Handles
- Wall Mount Bathroom Faucet Single Handle
- Bathroom Faucet Handle Fell Off
- Fresca Cascata Waterfall Brushed Nickel Bathroom Faucet
- Moen Vintage Bathroom Faucets
Installing a Kingston Brass Bathroom Faucet
A Kingston Brass bathroom faucet is one of the best options available when it comes to adding a touch of style and sophistication to your bathroom. Installing one of these high-end fixtures isn’t as difficult as you may think, and with the right tools and supplies, you can do it yourself in no time. Read on for Kingston Brass bathroom faucet installation instructions that will help you get the job done right.
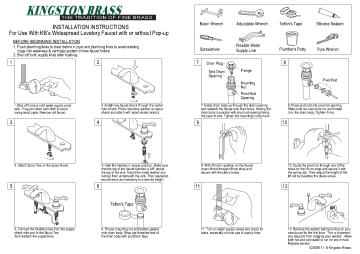
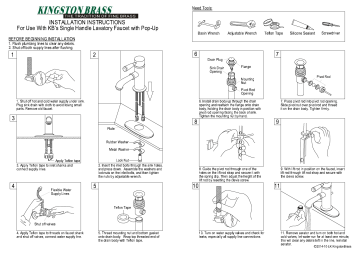
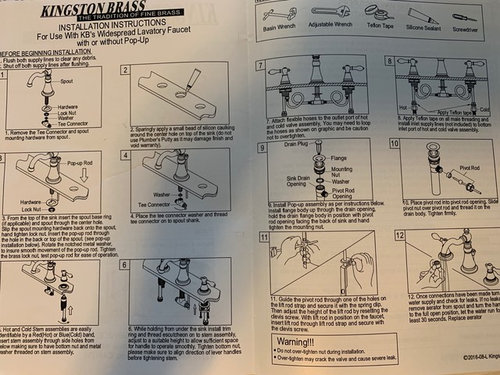
Tools and Supplies Needed
Before beginning your Kingston Brass bathroom faucet installation, make sure you have all the necessary tools and supplies. You’ll need:
– Adjustable wrench
– Tape measure
– Plumber’s putty
– Basin wrench
– Screwdriver
– Adjustable pliers
– Safety glasses
– Replacement washers
– Teflon tape
– Hex key or Allen wrench
– Sealant (optional)
– Silicone sealant (optional)
Preparing for Installation
Before installing your new Kingston Brass bathroom faucet, you’ll need to turn off the water supply to the sink. This will keep you from getting a nasty surprise during installation! Once the water supply is shut off, remove the old faucet by disconnecting the water lines and unscrewing any mounting nuts or bolts that may be present. Be sure to save any washers, nuts, bolts, or screws that you remove in case they’re needed later on. Once everything is removed, use a clean cloth to wipe away any dirt or debris from the sink area before beginning installation.
Installing the Faucet Base Plate
The first step in installing your new Kingston Brass bathroom faucet is to attach the base plate. Depending on your specific model, the base plate may come preassembled or require some assembly before installation. If assembly is required, follow all instructions provided by manufacturer carefully. Once the base plate is assembled, position it over the drain hole in the sink and mark its location with a pencil or marker. Then apply plumber’s putty around the edges of the drain hole and carefully press the base plate into place, making sure it’s properly aligned and level. Secure it with mounting screws if necessary.
Connecting Water Supply Lines
Next, connect your water supply lines to their respective ports on the bottom of the faucet body using Teflon tape to ensure a tight seal between them. The hot water line should be connected to the left port while the cold water line should be connected to the right port. Secure both connections with adjustable pliers before moving on to installing your faucet handle(s).
Installing Faucet Handle(s)
Once your water supply lines are connected, it’s time to install your new Kingston Brass bathroom faucet handle(s). To do this, use an adjustable wrench to loosen and remove any existing nuts or bolts from each handle hub before connecting them to their corresponding ports on either side of the main body of your faucet (hot water on left; cold water on right). Depending on your model, you may need an Allen wrench or hex key for this step; follow all manufacturer instructions carefully when doing so. After securing each handle in place with an adjustable wrench, replace any mounting washers that were removed during disassembly as necessary before turning on your water supply again.
Testing Your New Faucet
After completing installation of your new Kingston Brass bathroom faucet, it’s important to test it for leaks before using it for regular use. To do this, simply turn on both hot and cold water supplies at full pressure for about 10 seconds each and then check for any leaks around all joints and connections where possible. If no leaks are detected after testing both supplies at full pressure, then congratulations – you’ve successfully installed your new Kingston Brass bathroom faucet!
FAQs About Installing a Kingston Brass Bathroom Fauc Et
Q: Do I need any special tools for installing a Kingston Brass bathroom faucet?
A: Generally speaking, all you’ll need for installation is an adjustable wrench, a hex key or Allen wrench, and some Teflon tape. However, depending on your specific model, additional tools may be required; always refer to the manufacturer’s instructions for more details.
Q: Is it necessary to use sealant when installing a Kingston Brass bathroom faucet?
A: It’s not absolutely necessary to use sealant, but it can help provide an extra layer of protection against leaks. If you choose to use sealant, be sure to use silicone-based products designed for plumbing applications.
What tools are needed to install a Kingston Brass bathroom faucet?
Tools needed to install a Kingston Brass bathroom faucet include a wrench, pliers, screwdriver, adjustable wrench, and a drill. You may also need a hex key or Allen wrench, and Teflon tape. Additionally, depending on the specific model you are installing, additional tools may be required.