They will typically just have in stock the very simple types. If you’re looking for a faucet that’s less maintenance a brushed chrome faucet would be an extremely sensible choice since it is less susceptible to water stains. Additionally, there are different types of faucets dependent on the type of sink you’ve.
Here are Images about Moen Single Handle Bathroom Faucet Repair Instructions
Moen Single Handle Bathroom Faucet Repair Instructions
Faucet is one of the most crucial items in any bathroom. Individual hole bathroom faucets are made in a wide range of different styles and designs for you to choose from. With the Internet, there is no way that you are able to miss out on the best faucets. With its extended functionality, elegant appeal, and general efficiency, investing in them is definitely worth every penny.
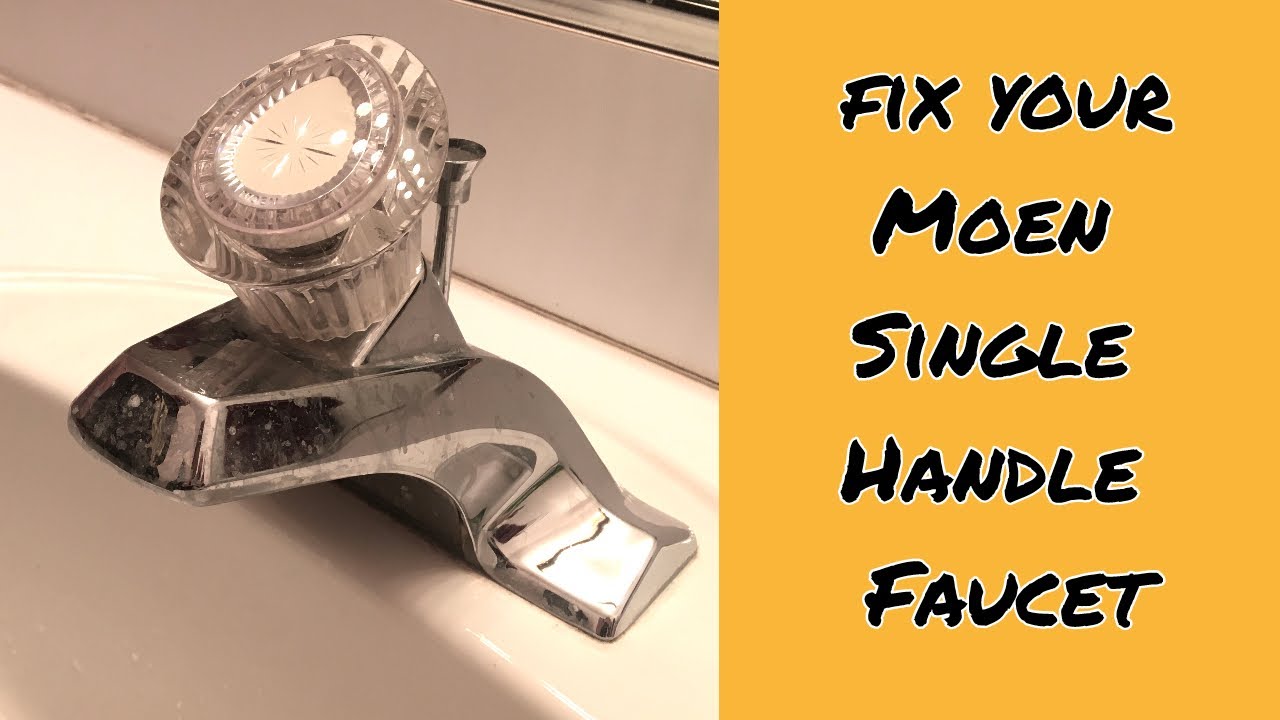
How to fix Moen Single-handle faucets
The bathroom faucet is one of most used products at home, plus one that guests will touch and discover when they see. The explanation for this’s the basic fact that the bathroom is used every day. This’s an important thing to consider especially in a household with children. Bathroom faucets are not simply for function anymore.
Images Related to Moen Single Handle Bathroom Faucet Repair Instructions
Magnum Cartridge: Repair and Replace (Single Handle Moen Bathroom Faucet)
You will find various styles of faucet handles available, therefore it will be very easy to check out the desired style of the handle. A Price Pfister bathroom faucet is not only an elegant addition to the bathroom of yours but also a useful and comfortable add-on with lifetime no dripping warranty.
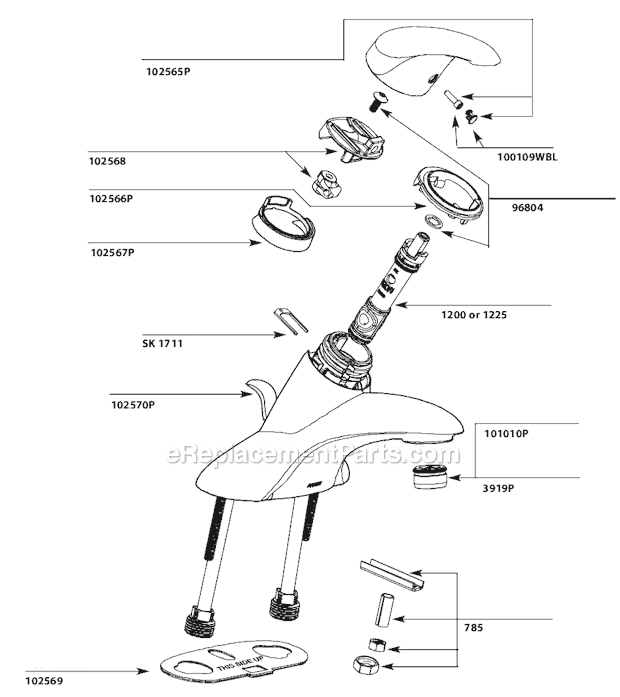
Moen Bathroom Faucet L4725 eReplacementParts.com
How to replace-repair a leaky moen cartridge in a bathroom set of faucets-single lever.Tips
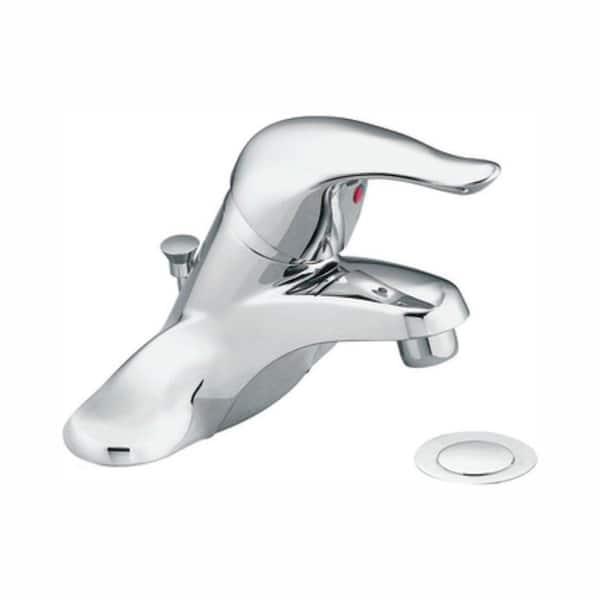
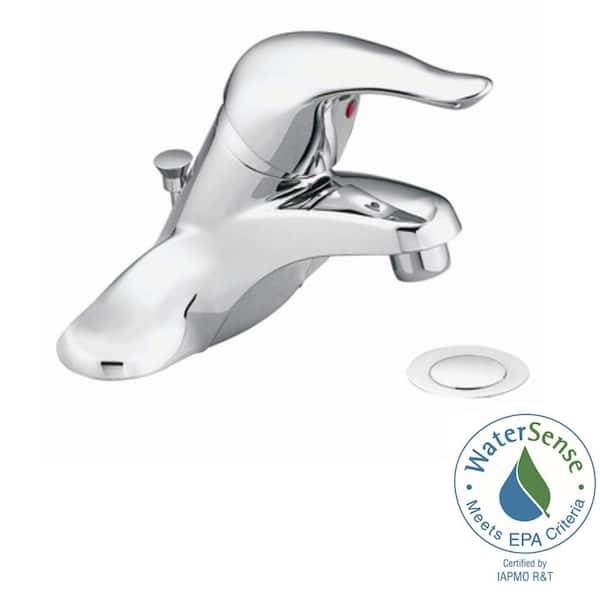
MOEN Chateau 4 in. Centerset Single-Handle Low-Arc Bathroom Faucet
Bathroom faucet cartridge replacement
Moen Part # 64601 – Moen Chateau 4 In. Centerset 1-Handle Bathroom

How to Fix a Leaking Moen 1225 Series Bathroom Faucet by Replacing the Cartridge
Troubleshooting a Leaking Faucet : Delta Faucet

Moen Bathroom Faucet 64601 eReplacementParts.com
_WW.gif)
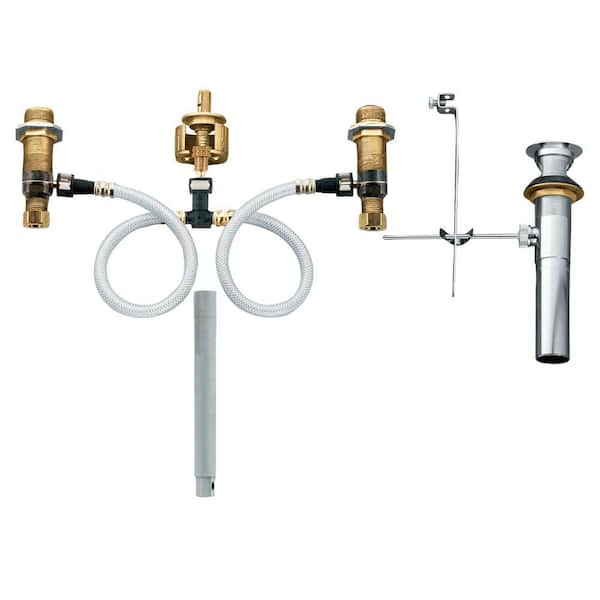
Widespread Bathroom Faucet Rough-In Valve with Drain Assembly – 1/2 in. IPS Connection
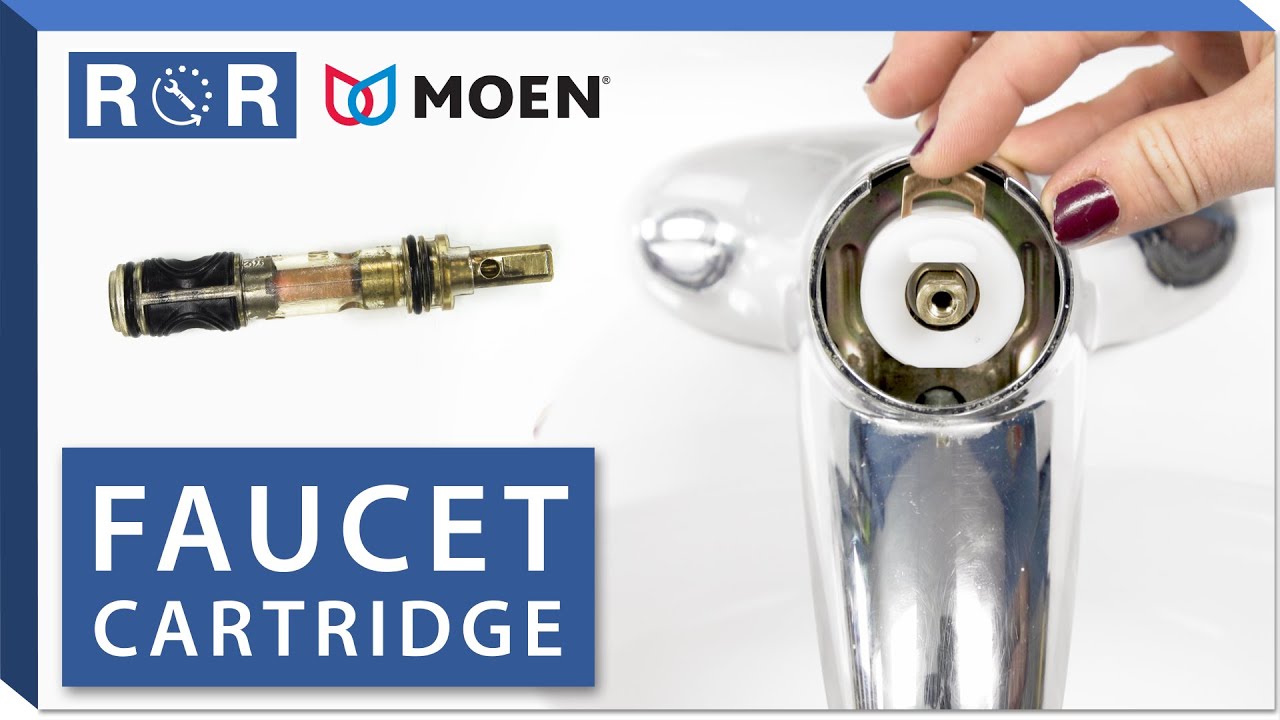
How do I replace my Moen bathroom faucet cartridge?
MOEN Chateau 4 in. Centerset Single Handle Low-Arc Bathroom Faucet
Related articles:
- Bathroom Faucet 8 Inch
- Black Wrought Iron Bathroom Faucets
- Commercial Automatic Bathroom Faucets
- Pfister Bathroom Faucet Installation
- Bathroom Faucet Leaking From Base
- Kohler Bathroom Faucets Polished Brass
- Bathroom Faucets Austin
- How To Remove A Moen Bathroom Faucet Handle
- Contemporary Wall Mounted Bathroom Faucets
- Kohler Contemporary Bathroom Faucets
Moen Single Handle Bathroom Faucet Repair Instructions
Fixing a leaky Moen single handle bathroom faucet is an easy task that can be accomplished in very little time. In this article, we will provide step-by-step instructions on how to repair a Moen single handle bathroom faucet. We will also provide some helpful tips and tricks to make the job even easier.
Tools Needed for Moen Single Handle Faucet Repair
Before you begin the repair process, it is important to have the right tools on hand. You will need:
-Adjustable wrench
-Flathead and Phillips screwdrivers
-Pliers
-Replacement parts (seal, valves, etc.)
-Teflon tape (optional)
Steps for Moen Single Handle Faucet Repair
Once you have gathered the necessary tools, you are ready to begin the repair process. Follow these steps to complete the repair:
Step 1: Shut off the Water Supply
The first step in any plumbing repair project is to shut off the water supply. This will help prevent additional damage as you work on the faucet. To do this, locate the main water shutoff valve and turn it clockwise until it stops. It is important to remember that this step must be done before any other work is done.
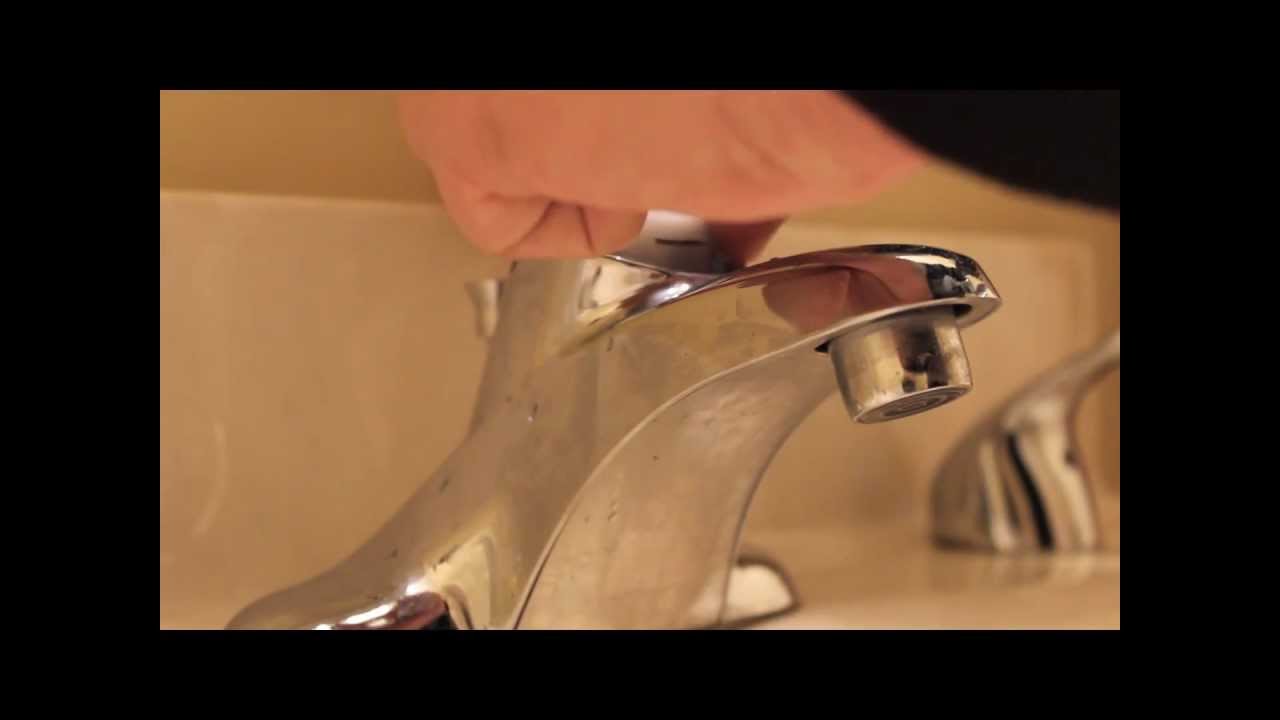
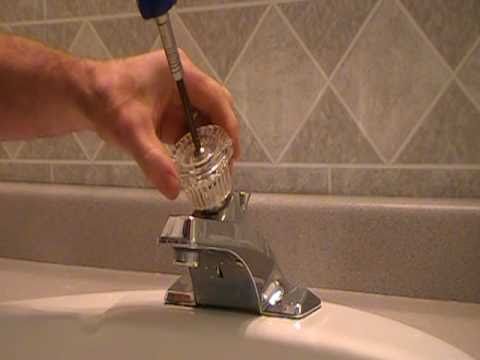
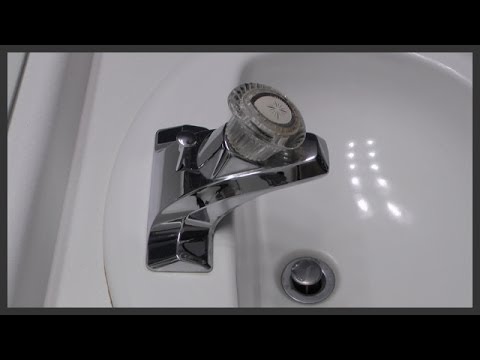
Step 2: Remove the Handle
With the water supply turned off, you can now remove the handle from the faucet. To do this, use an adjustable wrench to loosen and remove the retaining nut from underneath. Then, carefully pull out the handle from its mounting post and set aside.
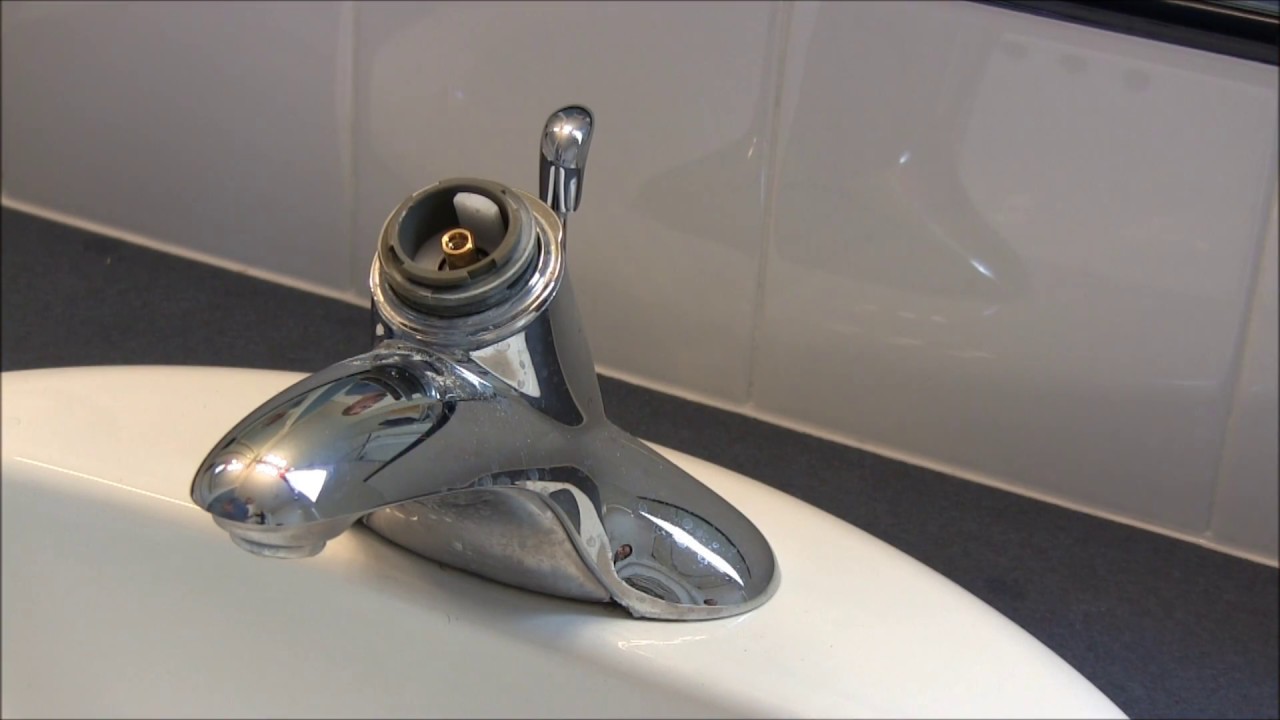
Step 3: Remove the Bonnet Nut
Now that you have removed the handle, you can access the bonnet nut at the top of the faucet body. Use a flathead screwdriver to loosen and remove it from its place. Once it is removed, carefully lift out all of its components (bonnet washer, stem washer, stem packing) and set aside in a safe place.
Step 4: Replace Damaged Components
At this point, it is time to replace any damaged or worn components that were removed during Step 3. If your faucet has any seals or valves that are worn or damaged, replace them with new ones of equal size and shape. Be sure to replace all of them before continuing with your repair project.
Step 5: Reassemble Components
Once you have replaced all of your damaged or worn components, you can reassemble them in their original order and positions. Start by placing the stem packing back into its spot then add in any additional seals or valves if applicable. Finish by replacing the bonnet nut and tightening it with a flathead screwdriver until secure.
Step 6: Replace Handle & Test Operation Once all of your components are reassembled, replace your handle onto its original mounting position using an adjustable wrench for added security. Finally, turn on your water supply again and test out your faucet’s operation – if everything works as expected then congratulations! You have successfully completed your Moen single handle bathroom faucet repair project!
FAQs About Moen Single Handle Faucet Repair
Q: I don’t see my parts listed – what should I do?
A: If you cannot find your parts at your local hardware store or online retailer then contact Moen directly for help locating them or ordering replacements parts if needed. They can also provide further assistance if needed with your repair project.
Q: Is Teflon tape necessary when reassembling my parts?
A: While Teflon tape isn’t necessary for this particular repair project, it may be beneficial for general plumbing applications where extra sealing protection is needed such as near joints or threaded connections. If you choose to use it in your repair project then ensure that you apply it correctly and evenly around each part before reassembly begins.
Q: Can I fix my leaky Faucet without replacing any parts?
A: In some cases, it may be possible to fix your leaky faucet without replacing any parts. This may involve tightening any loose connections or making adjustments to the components. However, if the issue persists then it is best to replace any worn or damaged parts as needed.
“How do I fix a Moen single handle bathroom faucet?”
1. Shut off the water supply to the faucet.
2. Unscrew the handle by unscrewing the set screw located on the underside of the handle with an Allen wrench.
3. Remove the retaining clip located behind the handle. If there is no retaining clip, you may need to remove the entire valve assembly.
4. Clean out any debris or mineral deposits in the valve assembly with a toothbrush and vinegar solution.
5. Replace any worn parts in the valve assembly, such as o-rings, washers, and seals.
6. Reassemble all pieces and turn on water supply to test for leaks.
7. Replace handle and set screw and tighten securely with an Allen wrench.
What is the correct cartridge size for a Moen single handle bathroom faucet?
The correct cartridge size for a Moen single handle bathroom faucet is 1225.