When it comes to installing your Pegasus bathroom faucet, fear not, because it’s a straightforward process that even a DIY novice can conquer. First and foremost, gather all your tools and materials before you begin. You’ll typically need an adjustable wrench, pliers, a bucket, and some plumber’s tape. Start by turning off the water supply to the sink, usually located beneath it. Once the water is off, open the faucet to release any remaining water and relieve pressure.

Next up, disconnect the existing faucet by loosening the nuts connecting the water supply lines. This is where your adjustable wrench and pliers come into play. After removing the old faucet, clean the surface thoroughly to ensure a smooth installation for your shiny new Pegasus faucet. Now, let’s dive into the installation of the Pegasus faucet itself. Most models come with clear instructions, but a general guideline involves securing the faucet onto the sink using a mounting nut. Tighten it adequately to avoid any wobbling issues.
Moving on to the water supply lines, use plumber’s tape to secure a leak-free connection. Double-check all your connections, ensuring they are snug and secure. Once everything is in place, turn the water supply back on and watch as your new Pegasus faucet comes to life. It’s not just a functional upgrade; it’s a stylish addition to your bathroom space. The Pegasus brand often blends functionality with aesthetic appeal, giving your bathroom a touch of elegance. So, whether you’re a seasoned DIY enthusiast or just starting, installing a Pegasus bathroom faucet can be a rewarding and achievable task.
Now, let’s talk about the maintenance aspect. Like any household fixture, your Pegasus faucet requires a bit of TLC to ensure it stays in prime condition. Regular cleaning with a mild soap and water solution will keep it looking brand new. Be sure to avoid abrasive cleaners or harsh chemicals that could damage the finish. Additionally, check for any leaks or drips periodically. If you notice any, it’s essential to address them promptly to prevent water damage. Remember, a well-maintained Pegasus faucet not only enhances the aesthetics of your bathroom but also contributes to the overall functionality of your space.
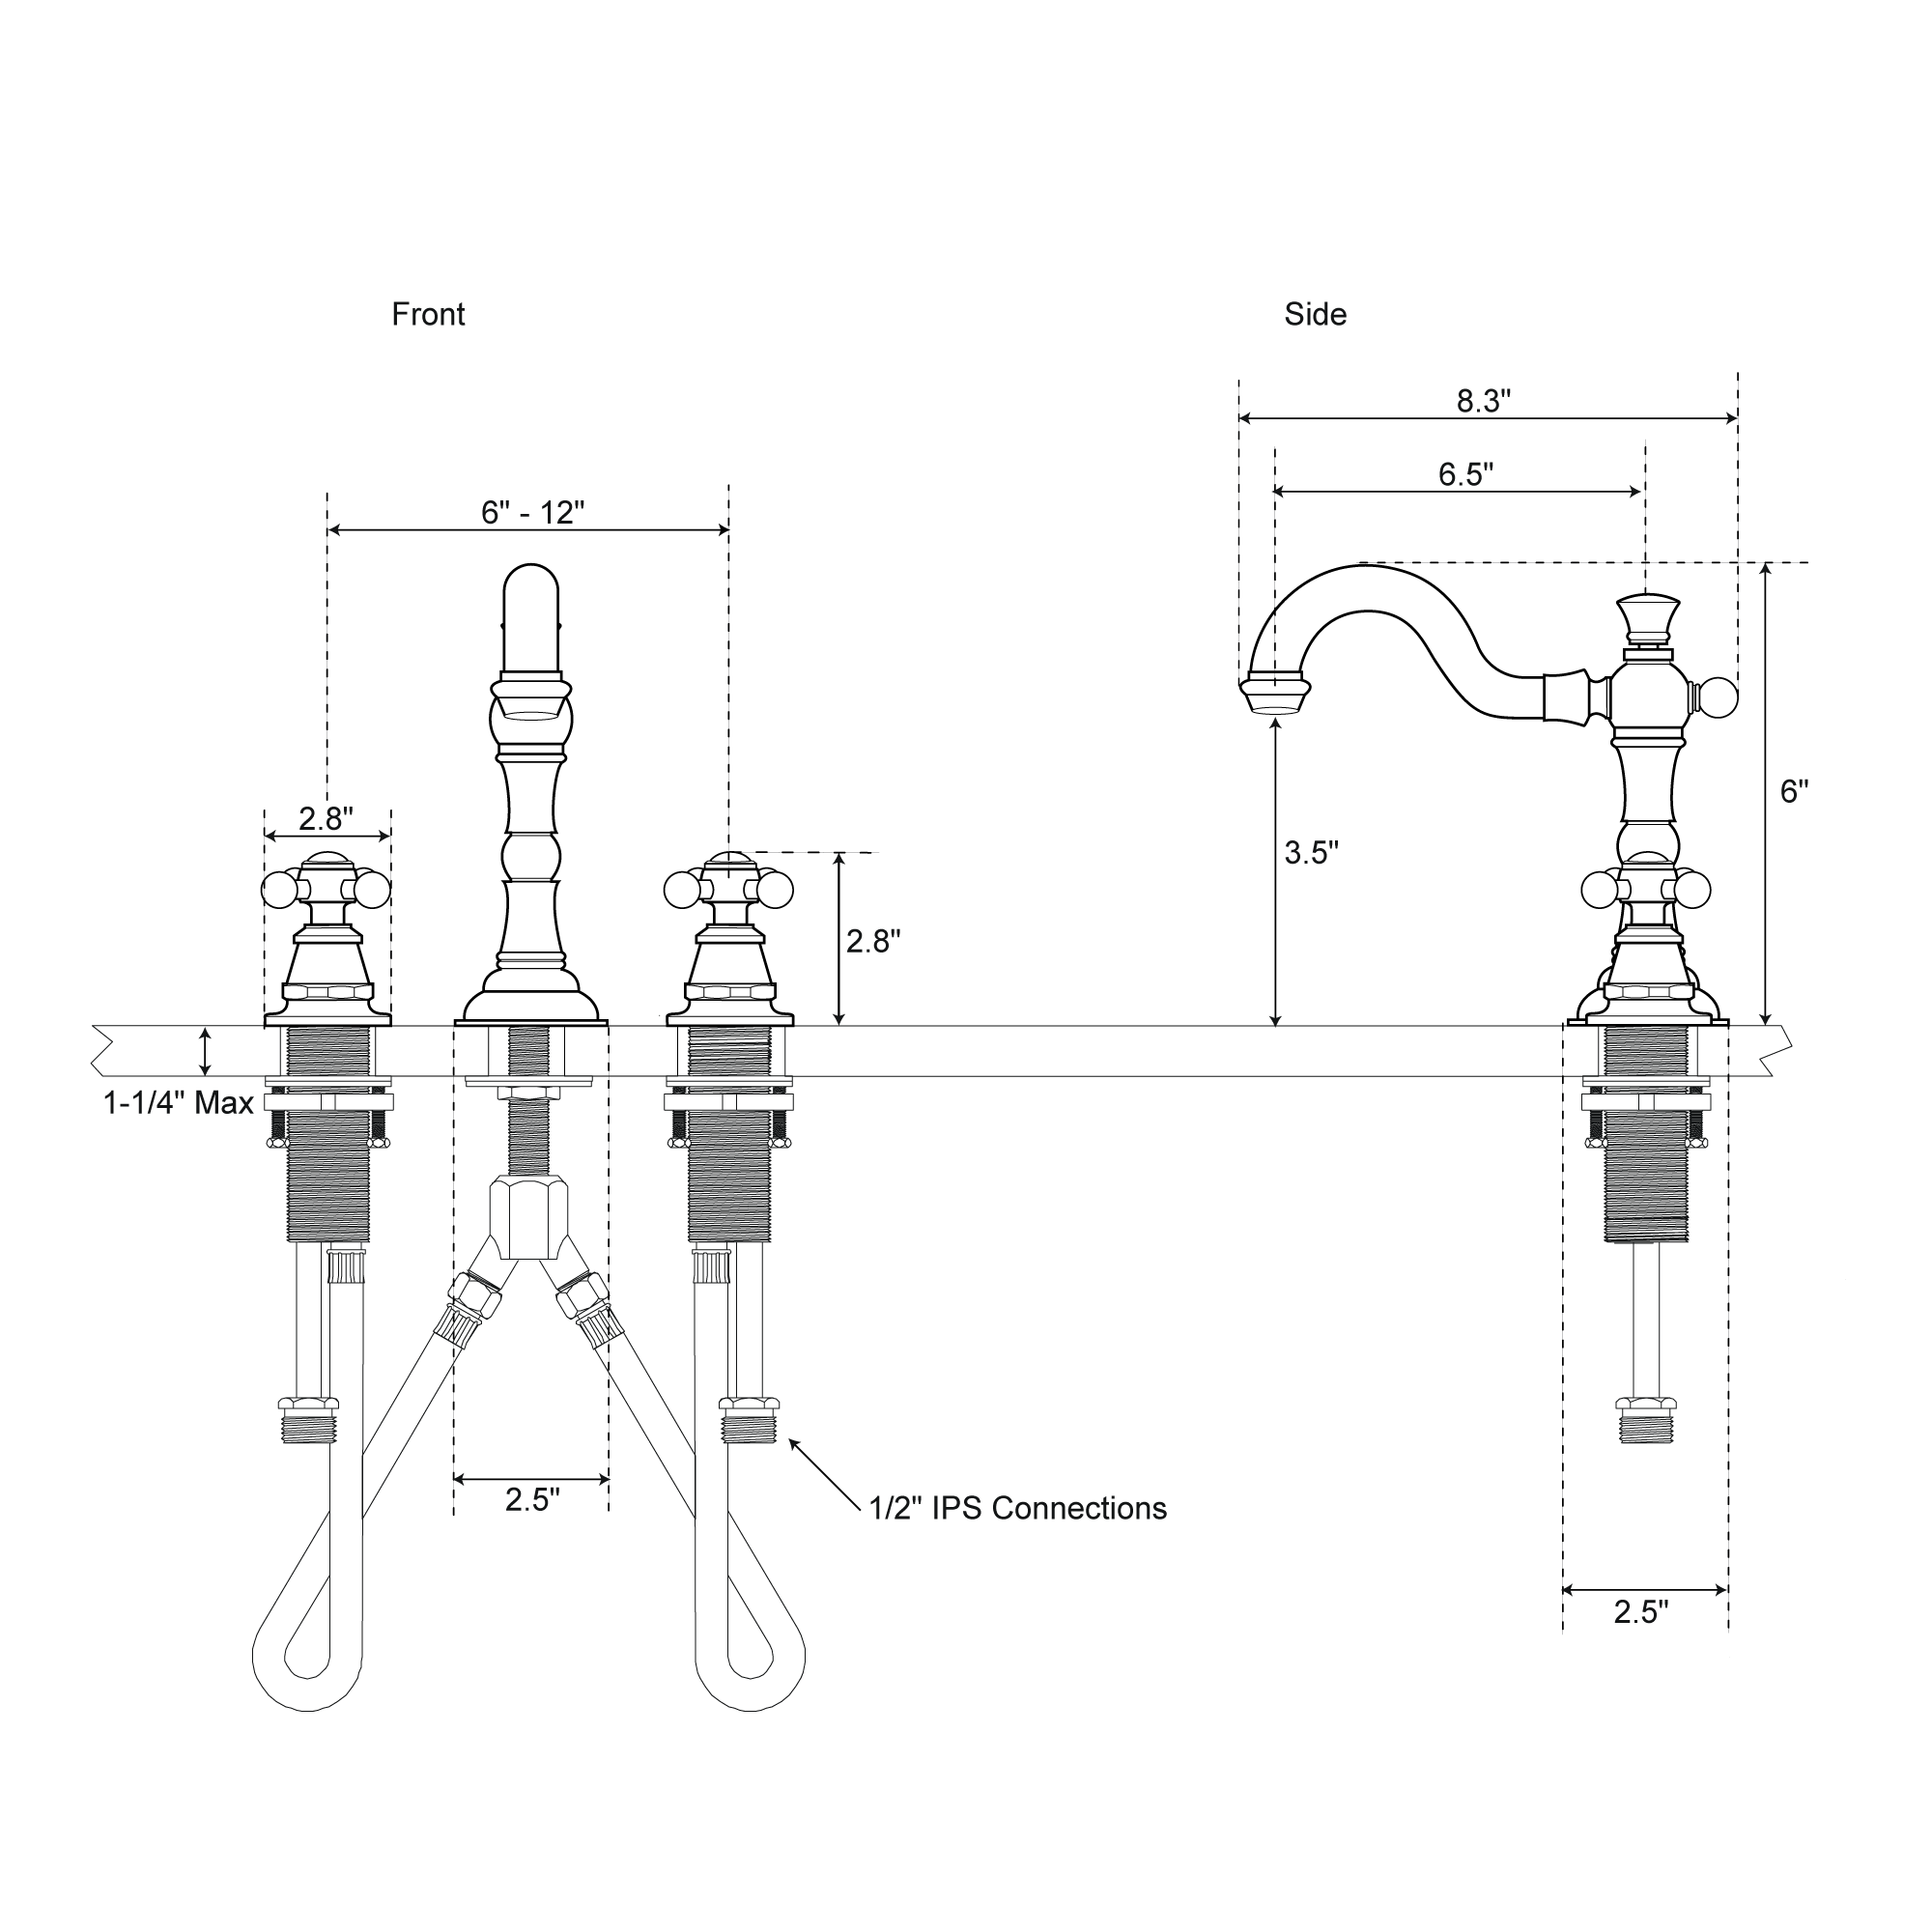
How to Install a Pegasus 4 inch mini widespread faucet from Home Depot

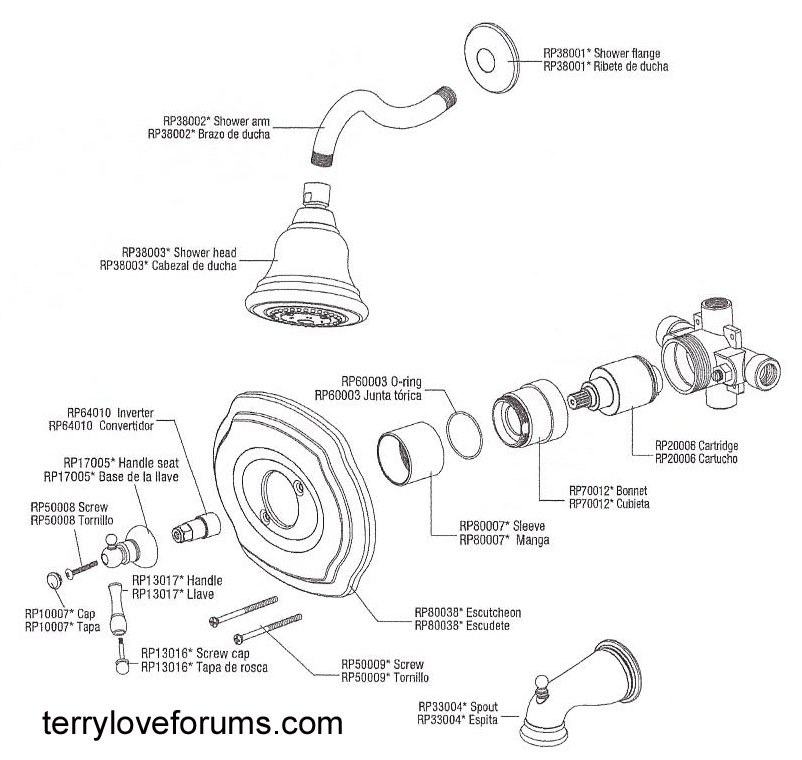
Pegasus 874-5196H Estates Single-Handle Tub and Shower Faucet in
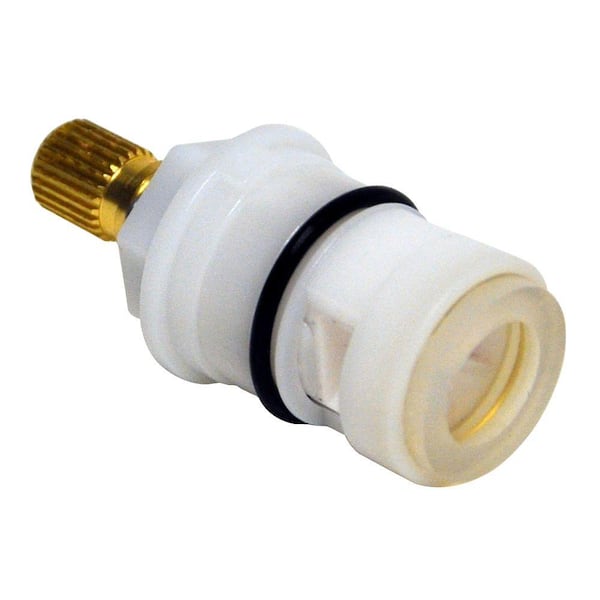
DANCO 3Z-16H Hot Stem for Glacier Bay and Pegasus Faucets-10323
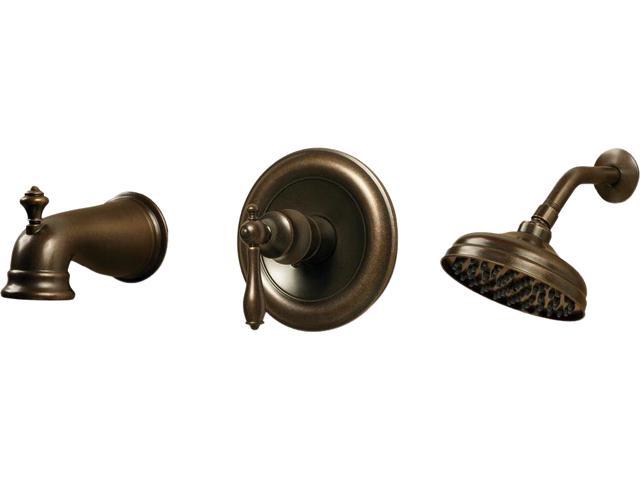
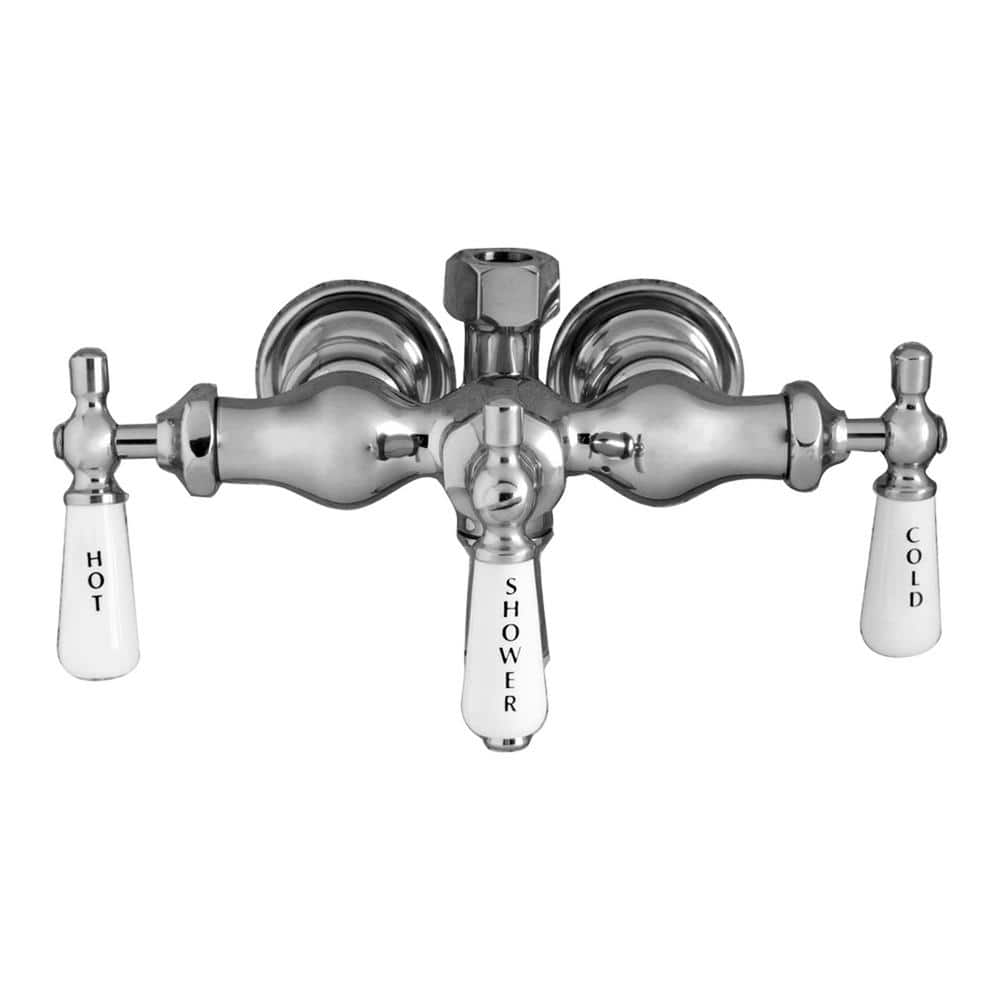
Pegasus 3-Handle Claw Foot Tub Faucet with Old Style Spigot and Lever Handles for Acrylic Tub in Polished Chrome-4073-PL-CP – The Home Depot
Danco Replacement Cartridge for Glacier, Pegasus Tub Shower Faucet

Related articles:
- How To Repair Bathroom Faucet Leak
- Antique Nickel Bathroom Faucet
- Best Modern Bathroom Faucets
- Brass Gold Bathroom Faucets
- Bathroom Faucets For Pedestal Sinks
- Oil Rubbed Brass Bathroom Faucets
- Bathroom Faucet Polished Nickel
- Bathroom Faucets Double Handle
- How To Fix A Leaking Bathroom Faucet Handle
- Modern Brass Bathroom Faucets
Installing a Pegasus bathroom faucet can be a challenging task, but with a few simple steps, you’ll be able to complete the job in no time. Whether you’re looking to upgrade your existing fixture or install a brand new one, you’ll need to understand the basic installation instructions for getting the job done right.
Preparing for Installation
Before beginning the installation process, make sure to read through all of the instructions included with your Pegasus faucet. You’ll want to take the time to gather all the necessary tools and supplies before getting started. This includes items such as a screwdriver, basin wrench, plumber’s putty, and any other materials provided with your faucet. Additionally, double-check that the faucet is compatible with the sink and basin you’ll be using.
Installing the Faucet Body
Once everything is ready, begin by installing the faucet body. Start by turning off the water supply valves and disconnecting any existing plumbing from underneath the sink. Then, place a towel in the basin to protect it from scratches as you work. Next, apply plumber’s putty around the hole at the back of your sink or countertop where your faucet will be installed. Slide the faucet body into position and secure it with mounting nuts on both sides of the deck plate. Finally, tighten these nuts using a wrench or screwdriver until they are snug against the base of your sink or countertop.
Connecting Supply Lines
Next, connect your supply lines to your new Pegasus bathroom faucet. Begin by connecting one line to each side of your faucet body and then attach them to their corresponding hot and cold supply lines beneath your sink or countertop. If there are no existing supply lines in place (as would be the case when installing a brand new fixture), then you’ll need to measure and cut pieces of tubing that fit between both valves and your faucet body. Make sure all connections are secure before continuing on with this step.
Attach Handles & Drain Assembly
After connecting all of your supply lines, it’s time to install your handles and drain assembly. To do this, start by attaching both handles onto either side of your faucet body and then secure them in place with set screws located on their underside. You may also want to choose coordinating handle caps for an added touch of style. Once that’s done, simply fix your drain assembly into position by tightening its mounting nut beneath your sink or countertop.
Testing Your New Fixture
Once everything has been connected properly and tightened into place, you’re ready to turn on the water supply valves and test out your new Pegasus bathroom faucet! Open up both valves slowly in order to avoid any potential water damage or flooding caused by an unexpected burst of pressure. Then check for any leaks around each connection point before giving yourself a pat on the back for a job well done!
FAQs About Pegasus Bathroom Faucets
Q: Can I install my new Pegasus bathroom faucet myself?
A: Yes! With a few simple steps and some basic tools such as a screwdriver and basin wrench, you’ll be able to easily install your new fixture without needing professional help. Just make sure that you double-check all connections before testing out your new faucet in order to avoid any potential water damage or flooding caused by loose fittings or other issues.
Q: What type of plumber’s putty should I use when installing my Pegasus bathroom faucet?
A: Most hardware stores will carry an array of different types of plumber’s putty designed for different applications such as sinks and tubs. For best results when installing a Pegasus bathroom faucet, we recommend using non-toxic plumber’s putty that is specifically designed for use around fixtures made from porcelain or metal materials like stainless steel or chrome-plated brass fixtures.
What tools are needed for installing a Pegasus bathroom faucet?
The tools that are needed for installing a Pegasus bathroom faucet are a slip-joint pliers, adjustable wrench, basin wrench, flathead and Phillips screwdrivers, adjustable pliers, and a putty knife.
What is the average cost of a Pegasus bathroom faucet installation?
The average cost of a Pegasus bathroom faucet installation ranges from $100 to $250, depending on the complexity of the job. This cost includes the cost of the parts and labor.
What tools are needed for installing a Pegasus bathroom faucet?
Tools needed for installing a Pegasus bathroom faucet include a basin wrench, adjustable wrench, Phillips head screwdriver, and a putty knife.
What type of wrench is needed to install a Pegasus bathroom faucet?
A 7/16-inch open-end wrench is typically needed to install a Pegasus bathroom faucet.
What tools are required to install a Pegasus bathroom faucet?
Tools required to install a Pegasus bathroom faucet include adjustable pliers, a basin wrench, a drill and drill bits, an adjustable wrench, a putty knife, and a screwdriver.