Consider splash and make sure you’ve enough clearance. The necessary installation style is dependent on the holes drilled into the sink. This is because you are going to find various sorts of faucets created for different kinds of sinks and tubs. Today that you’ve your faucet put together, you simply need to attach it to the wall and position it right on the cracks you’ve particularly drilled.
Here are Images about Replacing Bathroom Faucet Washer
Replacing Bathroom Faucet Washer
Furthermore, make certain that the handle is not difficult to operate and features a matching finish. First, you have to consider the type of handle that you want for your faucet. Faucets for undermount bathroom sinks are also a good choice for a new concept for the contemporary bathroom layout of yours.
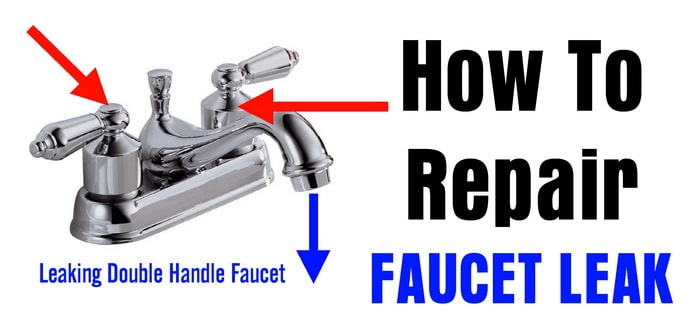
How To Repair A Leaking Double Handle Faucet
If needed, employ a plumber for this such that you won’t generate unwanted crashes. No matter which finish you choose, your bathroom is going to appear sophisticated with Delta bathroom add-ons. Trust me, the final thing you will prefer is made for the bathroom to look odd to the eyes.
Images Related to Replacing Bathroom Faucet Washer
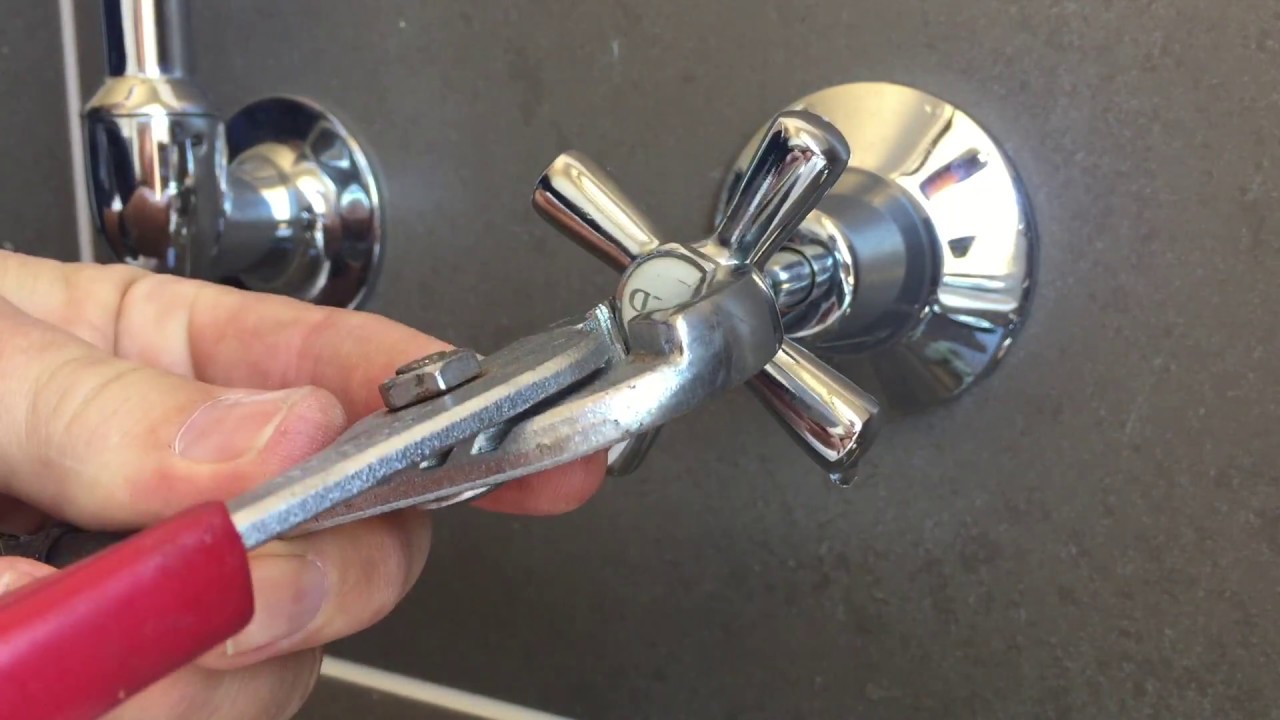
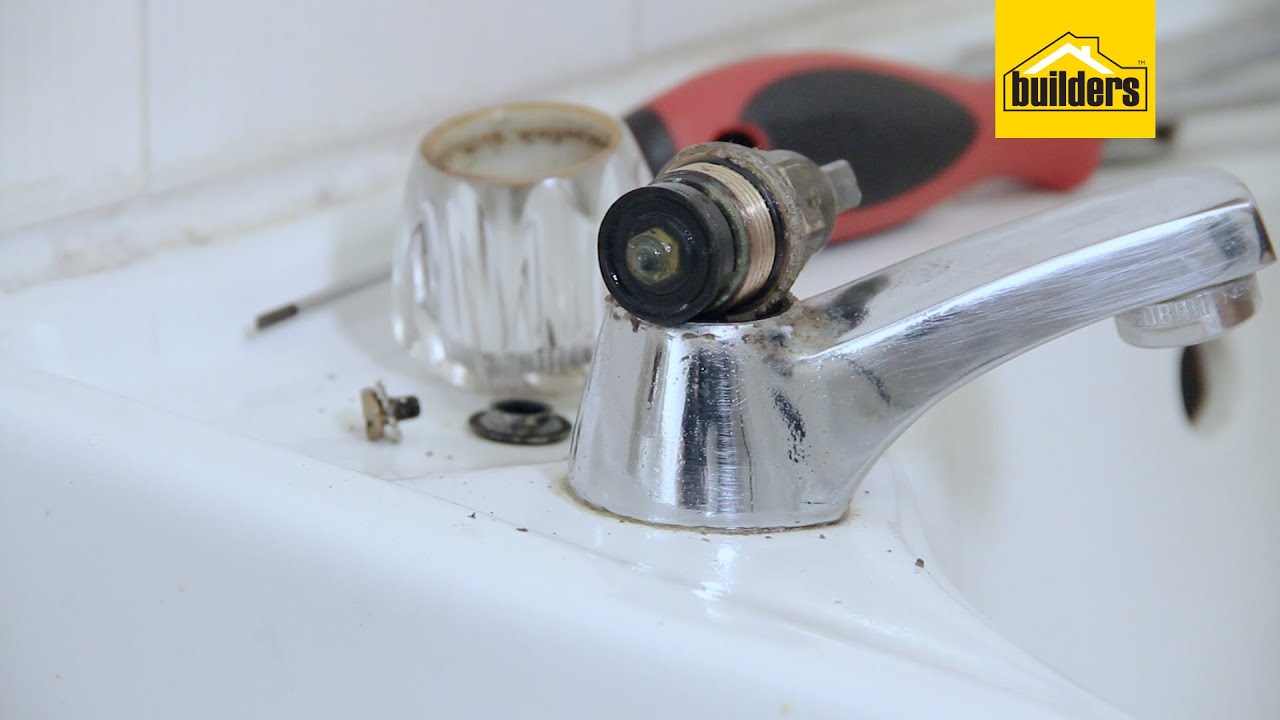
Dripping Delta faucet, replacing washers.

When you are preparing the style and design of the bathroom of yours and also the sort of bathroom sink faucet that will fit into your plans always try to consider the bathtub as well as shower hardware with all the vanity sink faucet theme. Tighten it using the allen wrench of yours or perhaps a simple screwdriver, whichever is called for.
How to Repair (Not Replace) Any Leaking Bathroom Faucet (Sink or
How to Fix a Leaking Bathtub Faucet (DIY) Family Handyman

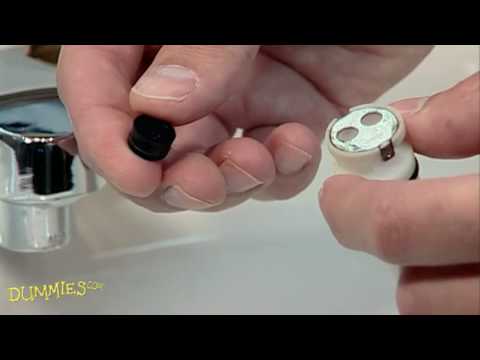
How to Replace a Washer in a Leaky Faucet For Dummies
How to Fix a Bathroom Faucet: 14 Steps (with Pictures) – wikiHow

How to Change a Faucet Washer Plumbing By Jake

How to Fix a Washer Type Faucet Repair a Bathroom or Kitchen

How to Change a Tap Washer
How to Fix a Leaky Faucet
Fix a Leaky Faucet Double Handle DIY

How to Install a Two-Handle Faucet – dummies
How to remove the handles from this faucet – Home Improvement

Related articles:
- How To Repair Bathroom Faucet Leak
- Antique Nickel Bathroom Faucet
- Best Modern Bathroom Faucets
- Brass Gold Bathroom Faucets
- Bathroom Faucets For Pedestal Sinks
- Oil Rubbed Brass Bathroom Faucets
- Bathroom Faucet Polished Nickel
- Bathroom Faucets Double Handle
- How To Fix A Leaking Bathroom Faucet Handle
- Modern Brass Bathroom Faucets
Replacing a Bathroom Faucet Washer: A Step-by-Step Guide
When a bathroom faucet washer is worn out, it can cause water to leak from the faucet, leading to a wet and slippery floor. Replacing the washer is an easy repair that can help save both time and money. In this article, we’ll take you through all the steps of replacing a bathroom faucet washer, from gathering the necessary supplies to testing the new washer for leaks.
What You Will Need
Before you begin replacing your bathroom faucet washer, you will need to gather the following supplies:
• New washer
• Adjustable wrench
• Pliers
• Screwdriver
• Drain cleaner or baking soda (optional)
• Rags or paper towels (optional)
• Rubber gloves (optional)
• Old toothbrush (optional)
Once you have assembled all of the necessary tools and supplies, you are ready to begin.
Disassembling the Faucet
The first step in replacing your bathroom faucet washer is to disassemble the faucet. Start by turning off the water supply to the faucet. This will prevent any water from leaking out while you are working on it. Once the water supply has been shut off, use an adjustable wrench to loosen and remove the faucet handle from the stem. Next, use your pliers to loosen and remove the stem from the faucet body. Finally, use your screwdriver to remove any screws or nuts that may be holding the stem in place. Once these steps have been completed, your faucet should be completely disassembled and you are ready for the next step.
Cleaning Out Sediment
The next step in replacing your bathroom faucet washer is to clean out any sediment that may have accumulated inside of the faucet body. To do this, you can either use a commercial drain cleaner or some baking soda mixed with warm water. If using commercial drain cleaner, follow all instructions carefully and wear rubber gloves for safety reasons. If using baking soda and water, pour this mixture into the faucet body and let it sit for 15 minutes before rinsing it out with clean water. Once all of the sediment has been cleaned out of your faucet body, you are ready for the next step.
Installing New Washer
Now it’s time to install your new washer! Start by placing your new washer into position inside of the stem and then tighten it down securely with your pliers or adjustable wrench. Once your new washer is in place, reassemble your faucet by reversing all of the steps used when disassembling it earlier. Make sure that everything is tightened securely and that there are no loose parts or pieces before moving on to the next step.
Testing New Washer for Leaks
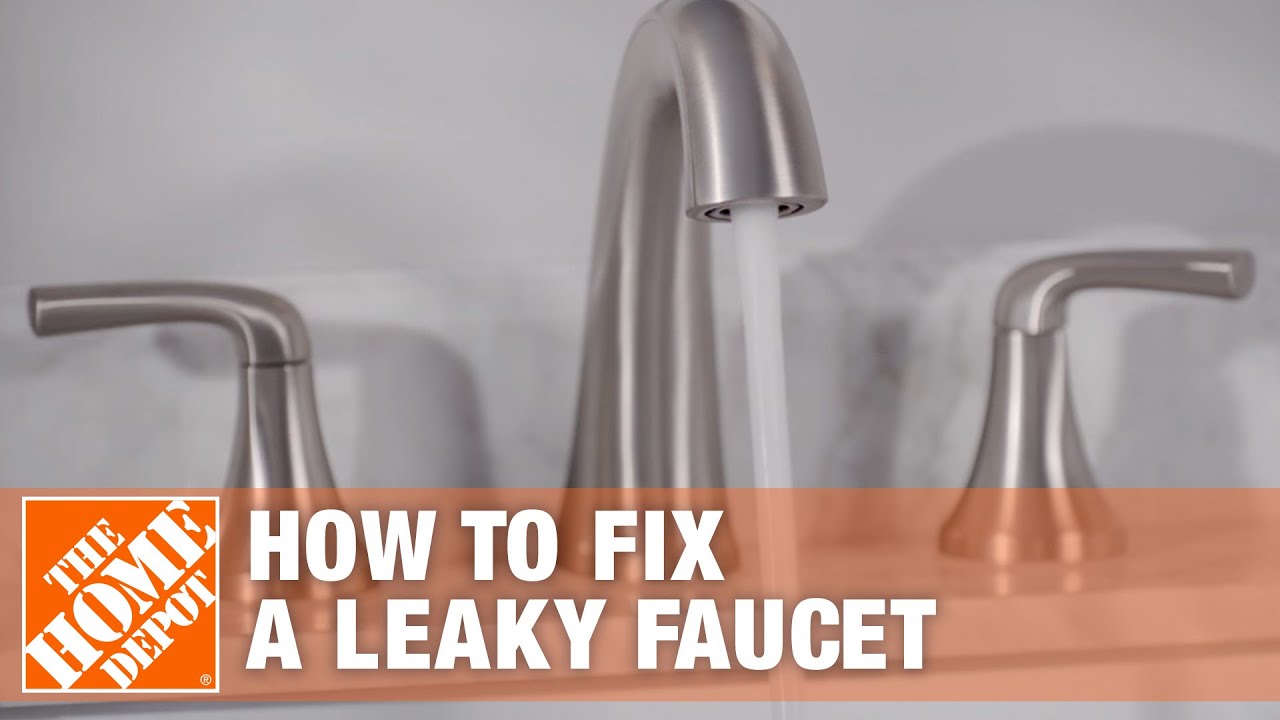
The final step in replacing your bathroom faucet washer is to test it for leaks. To do this, turn on the water supply and check all around your faucet for any signs of leakage or dripping. If you find any leaks or drips, double check all of your connections and tighten them as needed until they are secure and there are no more leaks present. Once all of these steps have been completed, your new washer should be installed correctly and you can enjoy a leak-free bathroom once again!
FAQs about Replacing Bathroom Faucets Washers
Q: How often should I replace my bathroom faucet washers?
A: It is recommended that you replace your bathroom faucets washers every two years in order to ensure optimal performance and a leak-free experience.
Q: What type of tools do I need when replacing my bathroom faucets washers? A: You will need an adjustable wrench, pliers, screwdriver, drain cleaner or baking soda (optional), rags or paper towels (optional), rubber gloves (optional), And an old toothbrush (optional).
What tools are needed to replace a bathroom faucet washer?
To replace a bathroom faucet washer, you will need a flat-head screwdriver, adjustable wrench or pliers, a basin wrench, and a new washer. You may also need rags, rubber gloves, and an old toothbrush for cleaning.
“What steps are needed to replace a bathroom faucet washer?”
1. Turn off the water supply to the faucet.
2. Remove the faucet handle by loosening the screws holding it in place.
3. Unscrew the stem of the faucet and remove it.
4. Take out the old washer and replace it with a new one of the same size.
5. Reassemble the stem and faucet handle, and turn on the water supply.
6. Turn on the faucet to check for leaks or other problems before using it again.
What tools are needed to replace a bathroom faucet washer?
– Adjustable wrench
– Pipe wrench
– Flathead screwdriver
– Pliers
– Faucet washer(s)
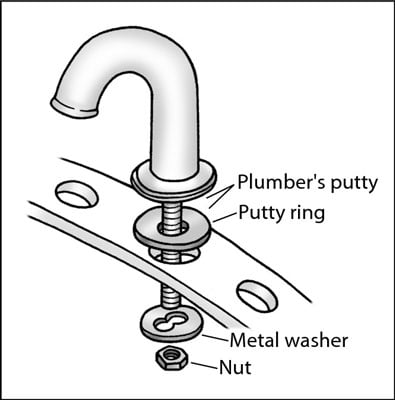
– Plumber’s putty
– Teflon tape
– Rags or paper towels
– Rubber gloves (optional)
– Old toothbrush (optional)
What type of wrench is needed to replace a bathroom faucet washer?
A basin wrench or adjustable wrench is typically used to replace a bathroom faucet washer. A basin wrench is a special type of wrench designed specifically for reaching into tight spaces and removing old faucet parts. An adjustable wrench can also be used if you do not have a basin wrench.