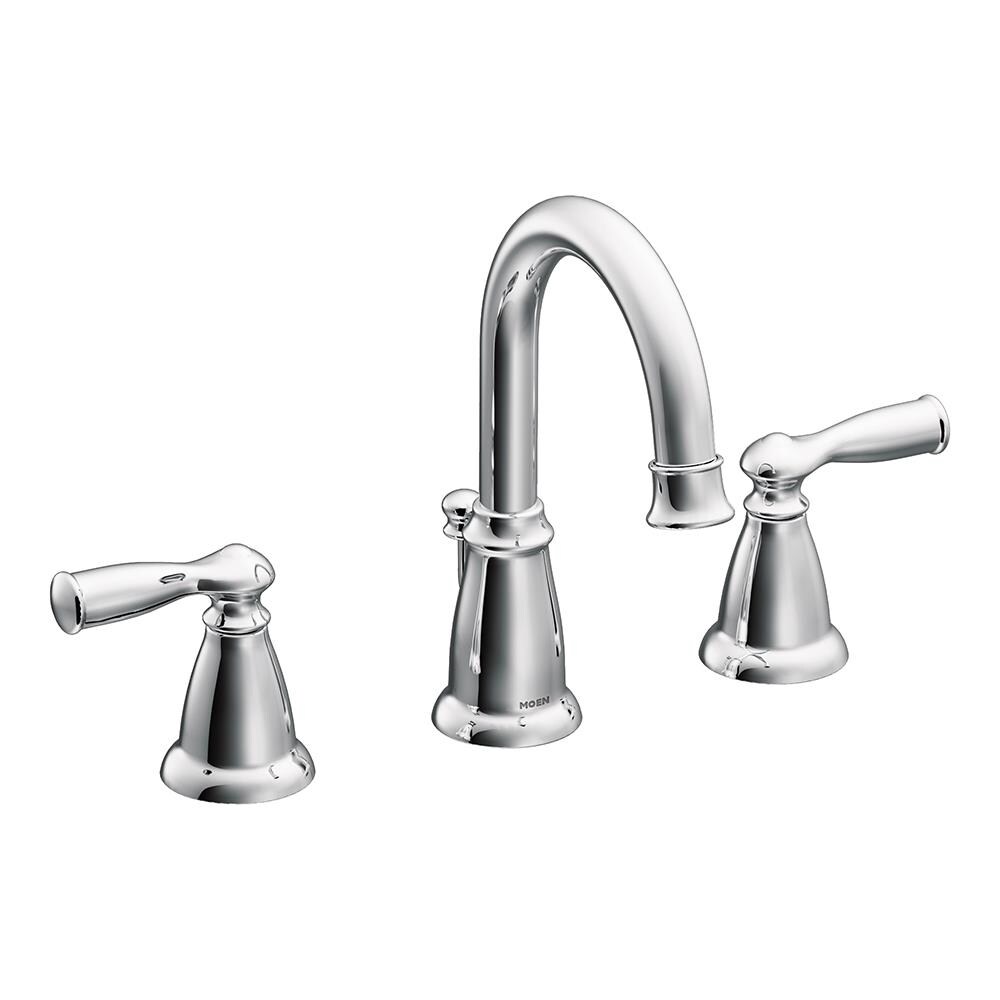
Installing a Moen Banbury bathroom faucet is a straightforward process, provided you follow the manufacturer’s detailed instructions. Begin by turning off the water supply to the sink to ensure a mess-free installation. The Moen Banbury faucet typically comes with a comprehensive installation manual that includes step-by-step instructions and illustrations to guide you through the process. Start by positioning the faucet on the sink and securing it in place with the provided mounting nuts. The faucet’s design often features a single-handle or two-handle configuration, and the installation steps may vary slightly based on the model.

Once the faucet is securely mounted, connect the water supply lines to the corresponding valves. Moen often utilizes the Duralock Quick-Connect system, which simplifies the installation of water lines, making it a DIY-friendly process. Ensure a snug fit by tightening the connections with an adjustable wrench. After connecting the water lines, turn on the water supply and check for any leaks. Moen Banbury faucets are designed with quality in mind, but a thorough check ensures a trouble-free experience.

In addition to the basic installation steps, Moen Banbury faucets may come with additional features like a pop-up drain assembly. If your faucet includes this component, follow the instructions to install the pop-up drain correctly. This step is crucial for proper drainage and ensures that the entire faucet system functions seamlessly. Overall, by carefully adhering to Moen’s installation instructions, homeowners can successfully install the Banbury bathroom faucet, enjoying a stylish and functional addition to their bathroom with confidence in a job well done.
Images Related to Moen Banbury Bathroom Faucet Installation Instructions
MOEN Banbury 4 in. Centerset Double Handle Low-Arc Bathroom Faucet

How to Install a Moen Centerset Faucet

Moen WS84924SRN Widespread Bathroom Sink Faucets download

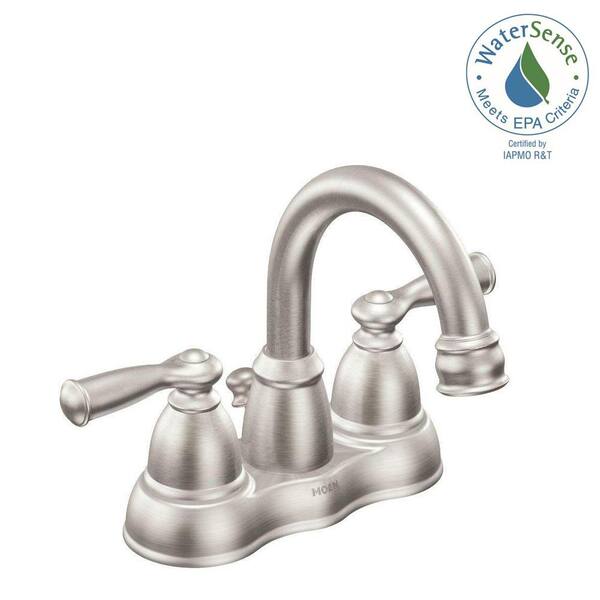
Moen WS84924SRN Banbury Two-Handle High Arc Bathroom Faucet, Spot Resist Brushed Nickel

Moen 84972SRN Halle Spot Resist Brushed Nickel 2-handle Widespread

Moen BANBURY 2H WS HARC CHR CHROME in the Bathroom Sink Faucets
MOEN Banbury 4 in. Centerset 2-Handle High-Arc Bathroom Faucet in
Moen CA84912 Double Handle Centerset Bathroom Faucet from the

Moen CA87553
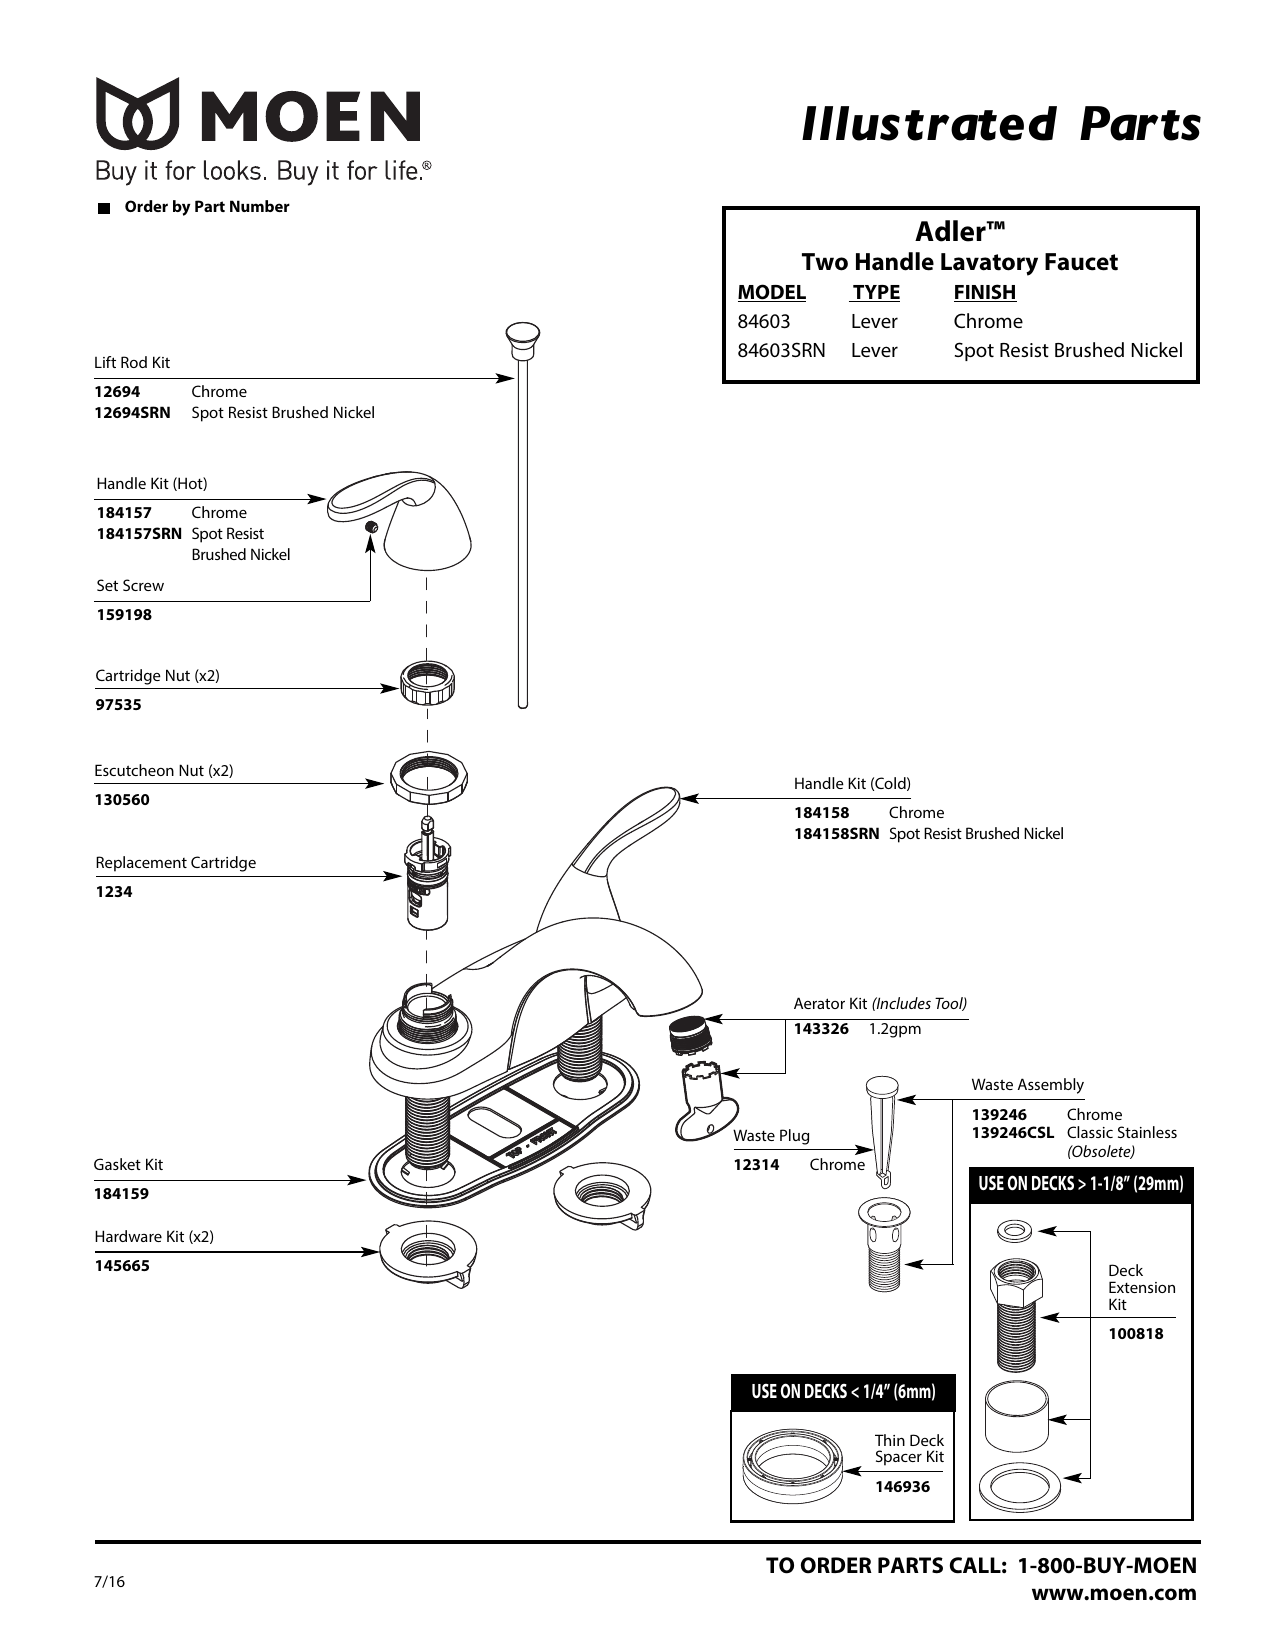
MOEN 84603-4C4PC24 Adler 4 in. Centerset 2-Handle Bathroom Faucet
Related articles:
- Black Finish Bathroom Faucets
- Replace Valve Stem Bathroom Faucet
- 2 Tone Bathroom Faucets
- How To Fix A Leaky Moen Single Handle Bathroom Faucet
- Black Waterfall Bathroom Faucet
- Delta Mandara Bathroom Faucet
- Antique Brass Bathroom Faucets Single Handle
- Bathroom Faucet Installation Guide
- Crane Bathroom Faucet Parts
- Jado Bathroom Faucet Replacement Parts
Installing a Moen Banbury Bathroom Faucet for Your Home
Are you tired of your old and outdated bathroom faucet? Do you want to upgrade your bathroom in an affordable way? Installing the Moen Banbury bathroom faucet is an excellent choice. This product is easy to install, attractive and has a reasonable price tag – so it’s perfect for those who don’t have a big budget but still want to make a change in their bathroom. Here are detailed instructions on how to install the Moen Banbury bathroom faucet.
What You Need for Installation
Before you get started with the installation process, it’s important to make sure that you have all the necessary tools and supplies. The most essential items that you need are adjustable pliers, a basin wrench, a pair of gloves and Teflon tape. Additionally, you may want to have some extra parts on hand in case something goes wrong during the installation process. These parts include washers, nuts, gaskets and mounting screws.
Step-by-Step Installation Guide
Once you have all of the necessary tools and supplies ready, you can begin the installation process. Here are the steps that you should follow:
1. Turn off the water supply. Before doing anything else, make sure that you turn off the water supply to your bathroom. This will ensure that no water is flowing while you’re working on installing your new faucet.
2. Disconnect existing pipes. You will need to disconnect any existing pipes that are connected to your old faucet in order to remove it from the sink. Use adjustable pliers for this step if necessary.
3. Remove old faucet. Once all the pipes have been disconnected from your old faucet, use a basin wrench to carefully remove it from the sink basin. Make sure that you’re careful not to damage any of the surrounding areas while doing so.
4. Install new Moen Banbury faucet. Start by unscrewing all of the parts from your new Moen Banbury faucet and laying them out on a clean surface before beginning installation. Then attach the mounting screws into each side of the sink basin using a pair of pliers or an adjustable wrench, depending on what type of screw is provided with your model of faucet. Securely tighten each one before proceeding with further steps in order to ensure that everything is properly installed and won’t come loose over time.
5. Attach supply lines and drain lines. Connect both supply lines and drain lines by attaching them securely to their respective locations on both sides of the faucet body with nuts, washers and gaskets as necessary for each connection point (use Teflon tape if necessary).
6. Connect hot and cold handles/knobs. Connect both hot and cold handles/knobs onto their respective locations on either side of your Moen Banbury faucet by tightening them securely with an adjustable wrench or pliers (again, use Teflon tape if necessary).
7. Test out your new faucet! After all connections have been made securely, turn on the water supply valve and test out your new Moen Banbury bathroom faucet! You should now be able to enjoy its convenience and beauty for many years ahead!
What types of tools do I need for installation?
To install a Moen Banbury bathroom faucet correctly, you will need adjustable pliers, a basin wrench, gloves, Teflon tape as well as other parts such as washers, nuts, gaskets and mounting screws depending on what type of model you’ve chosen (these items may also be included in some models).
How long does it take to install?
Generally speaking, it should take about 1-2 hours to install a Moen Banbury bathroom faucet if all goes according To plan. However, it’s always a good idea to allow yourself some extra time just in case something goes wrong or you run into any unexpected issues.
Are there any special instructions that I should follow during installation?
Yes, it’s important to make sure that all connections are securely tightened and that you use Teflon tape on any threads to ensure a water-tight seal. Additionally, you should always wear gloves while working with the faucet and its components in order to protect your hands from any sharp edges or hot surfaces.
How do I install a Moen Banbury bathroom faucet?
1. Turn off the water supply to the sink.
2. Unscrew the decorative nut that holds the existing faucet in place.
3. Remove the existing faucet and discard it (or save it for future use).
4. Place the Moen Banbury faucet in place, and secure it with the washer and decorative nut provided with the faucet.
5. Connect the hot and cold water supply lines to the faucet’s hot and cold water ports, using a wrench or pliers to tighten them.
6. Attach the drain assembly by threading it into place and tightening it with a wrench or pliers.
7. Open up the water supply lines and check for leaks at all of the connections. If there are any, use some plumber’s tape or pipe dope to seal them up before proceeding further.
8. Insert the handle of your choice into the handle hub and secure it with a set screw, provided with your Moen Banbury faucet kit.
9. Turn on the water supply lines and test out your new faucet!